106
4
Place the fabric under the presser foot.
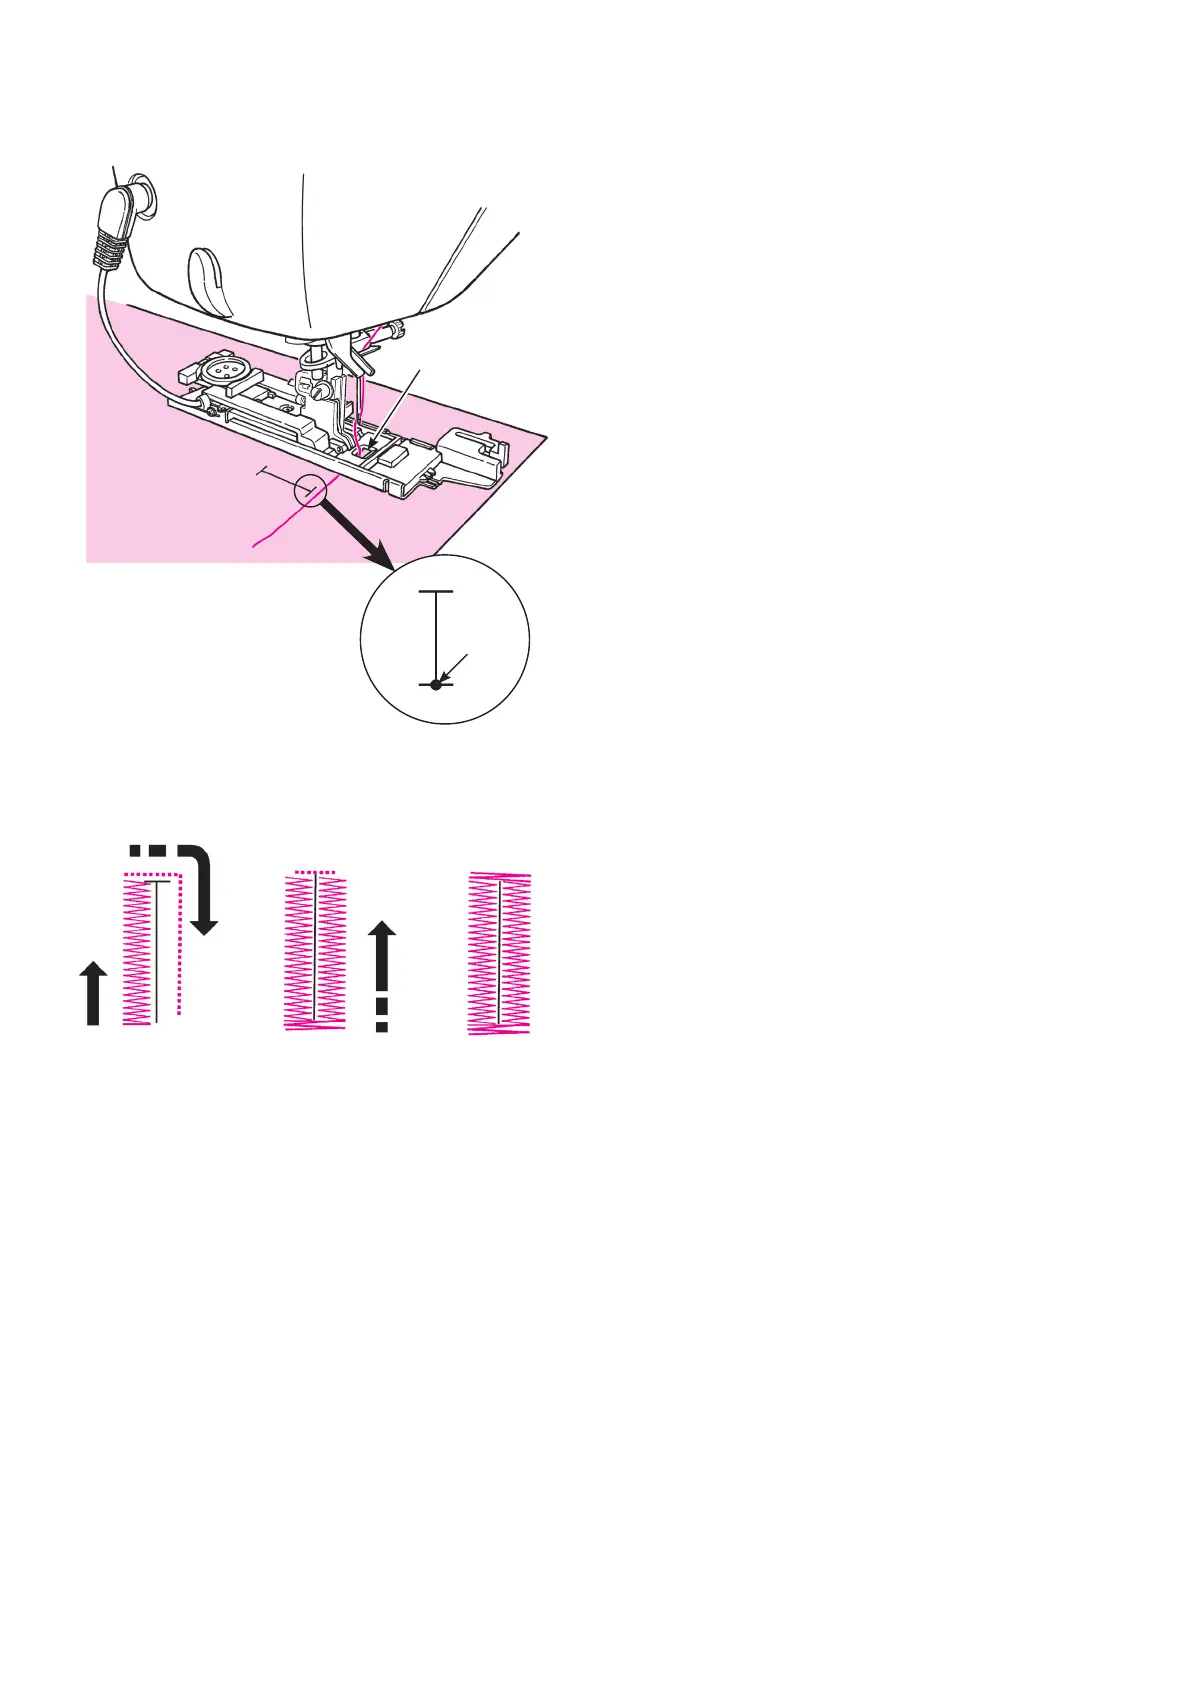
Raise the presser foot, pass the needle thread through
the hole on the presser foot
❺
and pull it out side-
ways.
Place the fabric under the presser foot, align the
marking with the sewing-start point
❻
. Penetrate the
needle into the fabric by turning the hand wheel and
lower the presser foot.
5
Start sewing.
A
The machine will stop automatically after sewing the
buttonhole.
* If a buttonhole of the same size will be sewn
again, push the thread trimming button to
trim the threads and raise the presser foot.
Under this condition move to another point,
lower the presser foot and then start sewing.
* Do not change stitch length and/or zigzag
width during buttonholing. Otherwise this will
cause imbalanced stitches.
* If thread trimming button is pushed while
sewing buttonhole, the machine will stop and
will not complete the buttonhole.
* Depending on material to be sewn and weaving
direction of the material, there might be a slight dif-
ference in zigzag widths between right and left lines
of buttonholes. Test sewing is recommended.
❺
❻
A
 Loading...