(E>
Stepsetting
switch
• Used
to
make a step change in order to set the number
of
stitches, needle
stop
position, presser
foot
lifter
ON/OFF,
thread trimming or
other
sewing conditions
for each step in programnied stitching. .
• The step can be changed from 1 to 15.
(If
there are steps for which the numbers
of
stitches
have
not
been set, only the step
of
the lowest number
will be displayed.)
•
"+"
: Increases
the
step
No.
" : Decreases
the
step
No.
I
Step
display (LED)
Displays a step (1 to 15).
I
Step
stitch
number
setting
switch
Used to set the
number
of
stitches within
the
range
of
0 to 99 for each sewing step.
"+"
:
Increases
the
number
of
stitches.
" :
Decreases
the
number
of
stitches.
When
the
"+"
or
side
of
the
switch
is
held
depressed,
the
number
of
stitches continues to increase
or
decrease.
I
Step
stitch
number
display (LED)
Displays the number
of
stitches for a step within the
range
of 0 to 99.
I Machine
stop
mode
selector
switches
Used to select the following machine stop modes at
the time when a step has been sewn:
o The machine will stop with the needle up.
o The machine will stop with the needle down,
o The machine will stop with the presser foot up.
o The machine willstop with the presser foot down,
o The machine will stop after thread trimming.
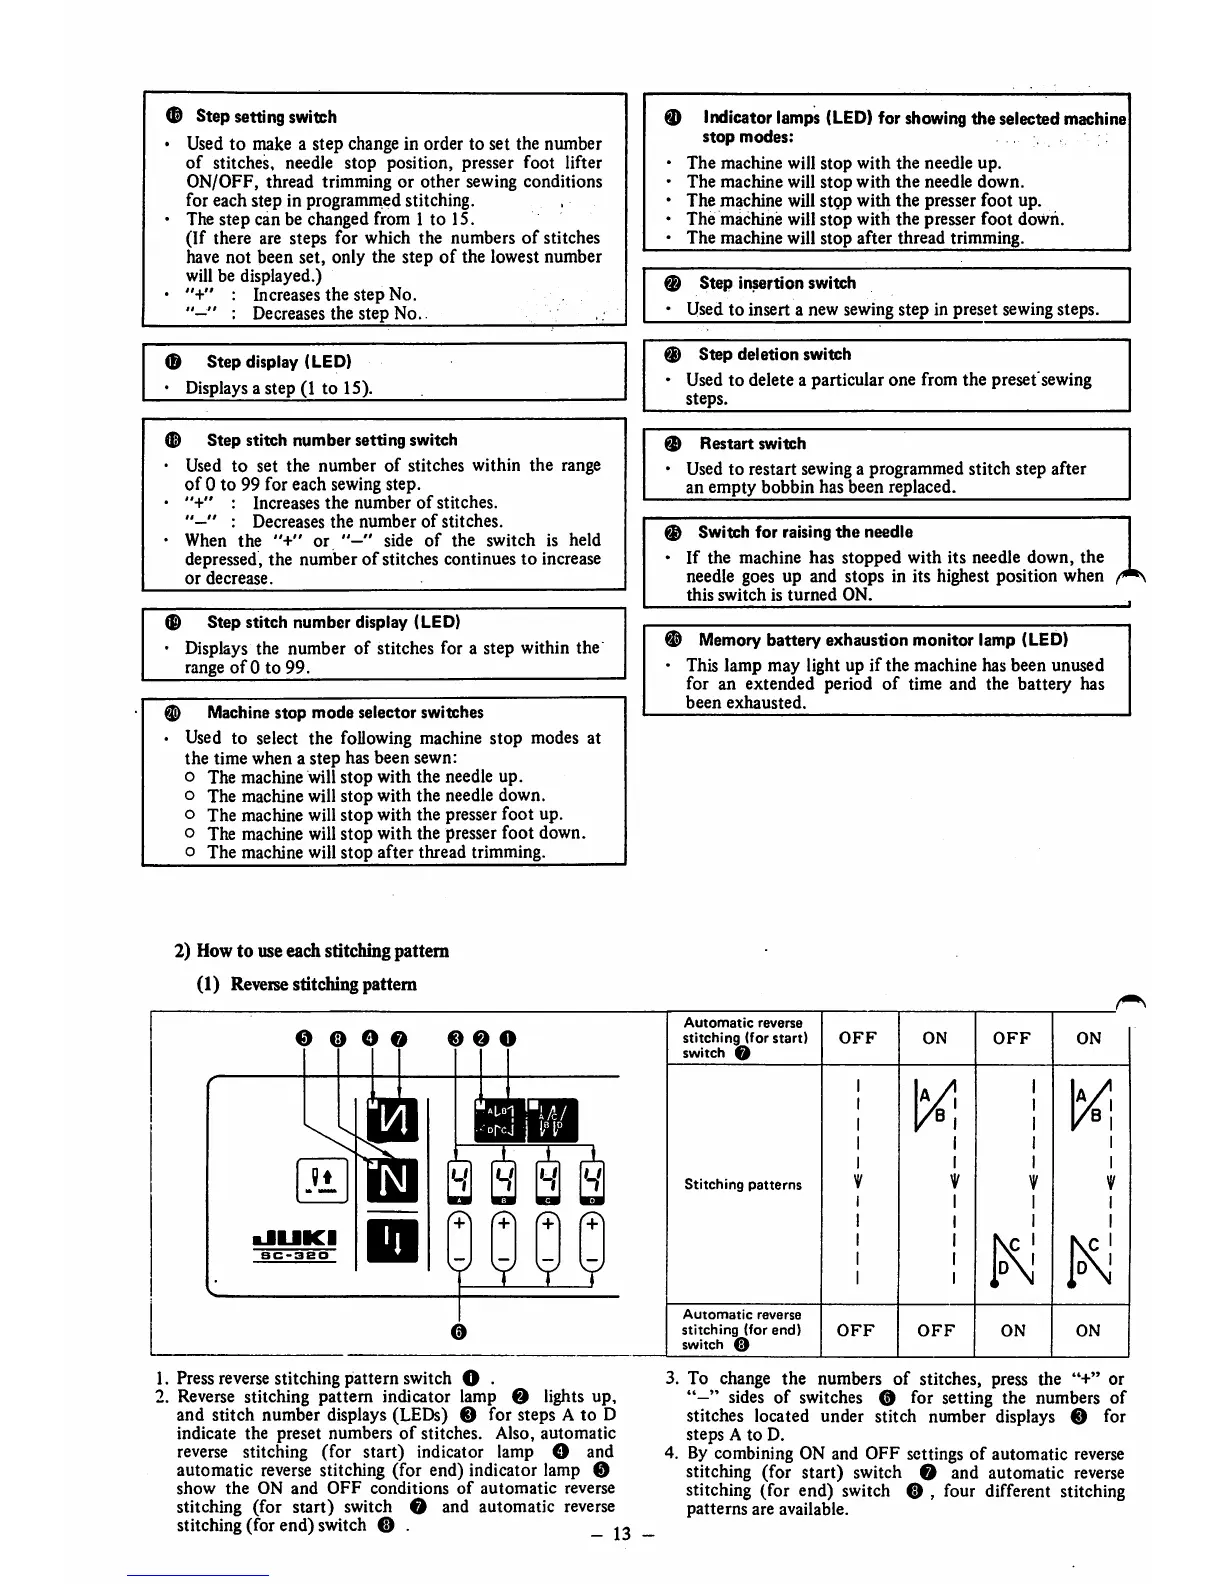
2) Howto useeachstitdimg pattern
(1) Reversestitching pattern
0 O O O 0 0 O
^
Hi
•JUKI
ac-3eo
w
^ ^ ^
Y Y V
0
1. Pressreversestitching pattern switch O •
2. Reverse stitching pattern indicator lamp 0 lights up,
and stitch number displays (LEDs) 0 for steps A to D
indicate the preset numbers
of
stitches. Also, automatic
reverse
stitching (for start) indicator lamp O and
automatic
reverse
stitching (for end) indicator lamp 0
show
the
ON
and
OFF
conditions
of
automatic
reverse
stitching (for start) switch 0 and automatic reverse
stitching (for end) switch 0 .
-
13
Indicator lamps (LED) for showing
the
selected machine
stop
modes:
The
machine will
stop
with
the
needle up.
The machine will stop with
the
needle down.
The machine will stQp with the presser foot up.
The machine will stop with the presser foot down.
The machine will stop after thread trimming.
Step
insertion
switch
Used
to
insert a new sewing step in preset sewing steps.
Step
deletion
switch
Used to delete a particular one from the preset'sewing
steps.
®
Restart
switch
• Used to restart sewing a programmed stitch step after
an empty bobbin has been replaced.
Switch
for
raising
the
needle
If the machine has stopped with its needle down, the
needle goes up and stops in its highest position when
this
switch
is
turned
ON.
' Memory
battery
exhaustion
monitor
lamp (LED)
This lamp may light up if the machine has been unused
for an extended period
of
time and the battery has
been
exhausted.
Automatic
reverse
stitching
(for
start)
switch O
Stitching
patterns
Automatic
reverse
stitching
(for
end)
switch O
OFF
OFF
ON
OFF
ON
OFF
ON
ON
3. To change the numbers
of
stitches, press the
"+"
or
" sides of switches 0 for setting the numbers of
stitches located under stitch number displays 0 for
steps
A to D.
4. By combining ON and OFF settings
of
automatic reverse
stitching (for start) switch 0 and automatic reverse
stitching (for end) switch 0 , four different stitching
patterns
are
available.