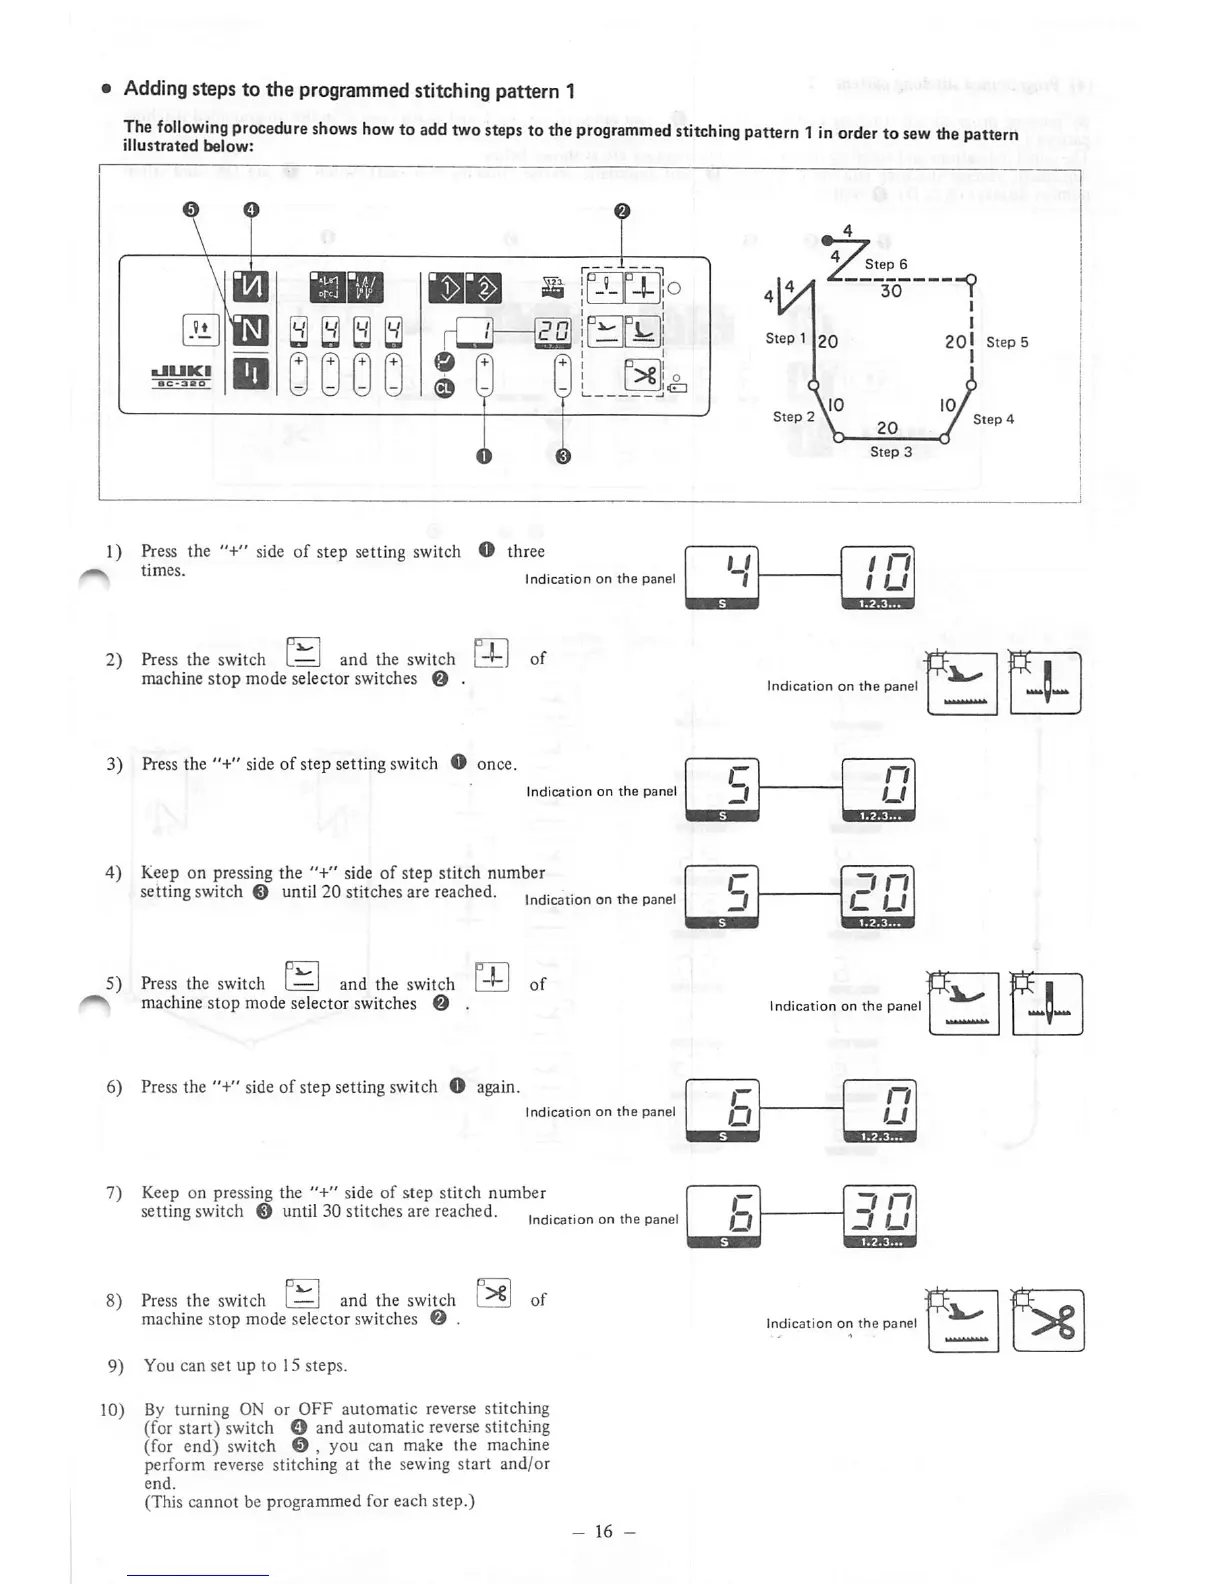
Adding
steps to the programmedstitching pattern 1
The
following
procedure
shows
how
to
add
two
steps
tothe
programmed
stitching
pattern
1in
order
to
sew
the
pattern
Illustrated
below:
rrartlo
•JUKI
s a a a
iSBi
®Fl
Fl!
ra.
1)
Press
the "+"
side
of step setting
switch
O three
k
times.
Indication
on
the
panel
2)
Press
the
switch
I—I and the
switch
I
-r-|
of
machine stop mode selector switches O •
3)
Press
the
"+"
side
of
step
setting
switch
O
once.
Indication on the panel |
4)
Keep
on
pressing
the
"+"
side
of
step
stitch
number
j ^
setting
switch
@
until
20
stitches
are
reached.
indication
on
the
panel
J
5)
Press
the
switch
i—I
and
the
switch
S machine stop mode selector switches O .
6)
Press
the "+"
side
of step settingswitch O
again.
Indication
on
the
panel
7)
Keep on pressing the
"+"
side
of
step
stitch
number
setting
switch
0
until
30
stitches
are
reached.
mdication
on
the
panel
8)
Press
the
switch
f—i
and
the
switch
f^l
of
machine
stop modeselector
switches
© .
9)
You can set up to 15 steps.
10) By turning ON or OFF automatic
reverse
stitching
(for start) switch O and automatic
reverse
stitching
(for end) switch © , you can
make
the machine
perform reverse stitching at the sewing start and/or
end.
(This cannot be programmedfor each step.)
^
Step
6
Step1120
Indication
on
the
panel
jn
u
Indication
on
the
panel
D n
u
Indication
on
the
panel
20l
Steps
I