9)
SC-320
panel
circuit
board
assembly
(1)
Remove
the
back
panel
from
the
front
panel
by
the
same
procedure
that
was
used
in
8)
SC-120,
220
panel
circuitboard
assembly
replacement steps(1) and(2).
J114
I I J113
Q
J112
SC-320
J112
Jill
Hook a
fingernail
under the stepsshownat O
to pull the connectors out.
J112
Jill
thumb
index
finger
-
62
-
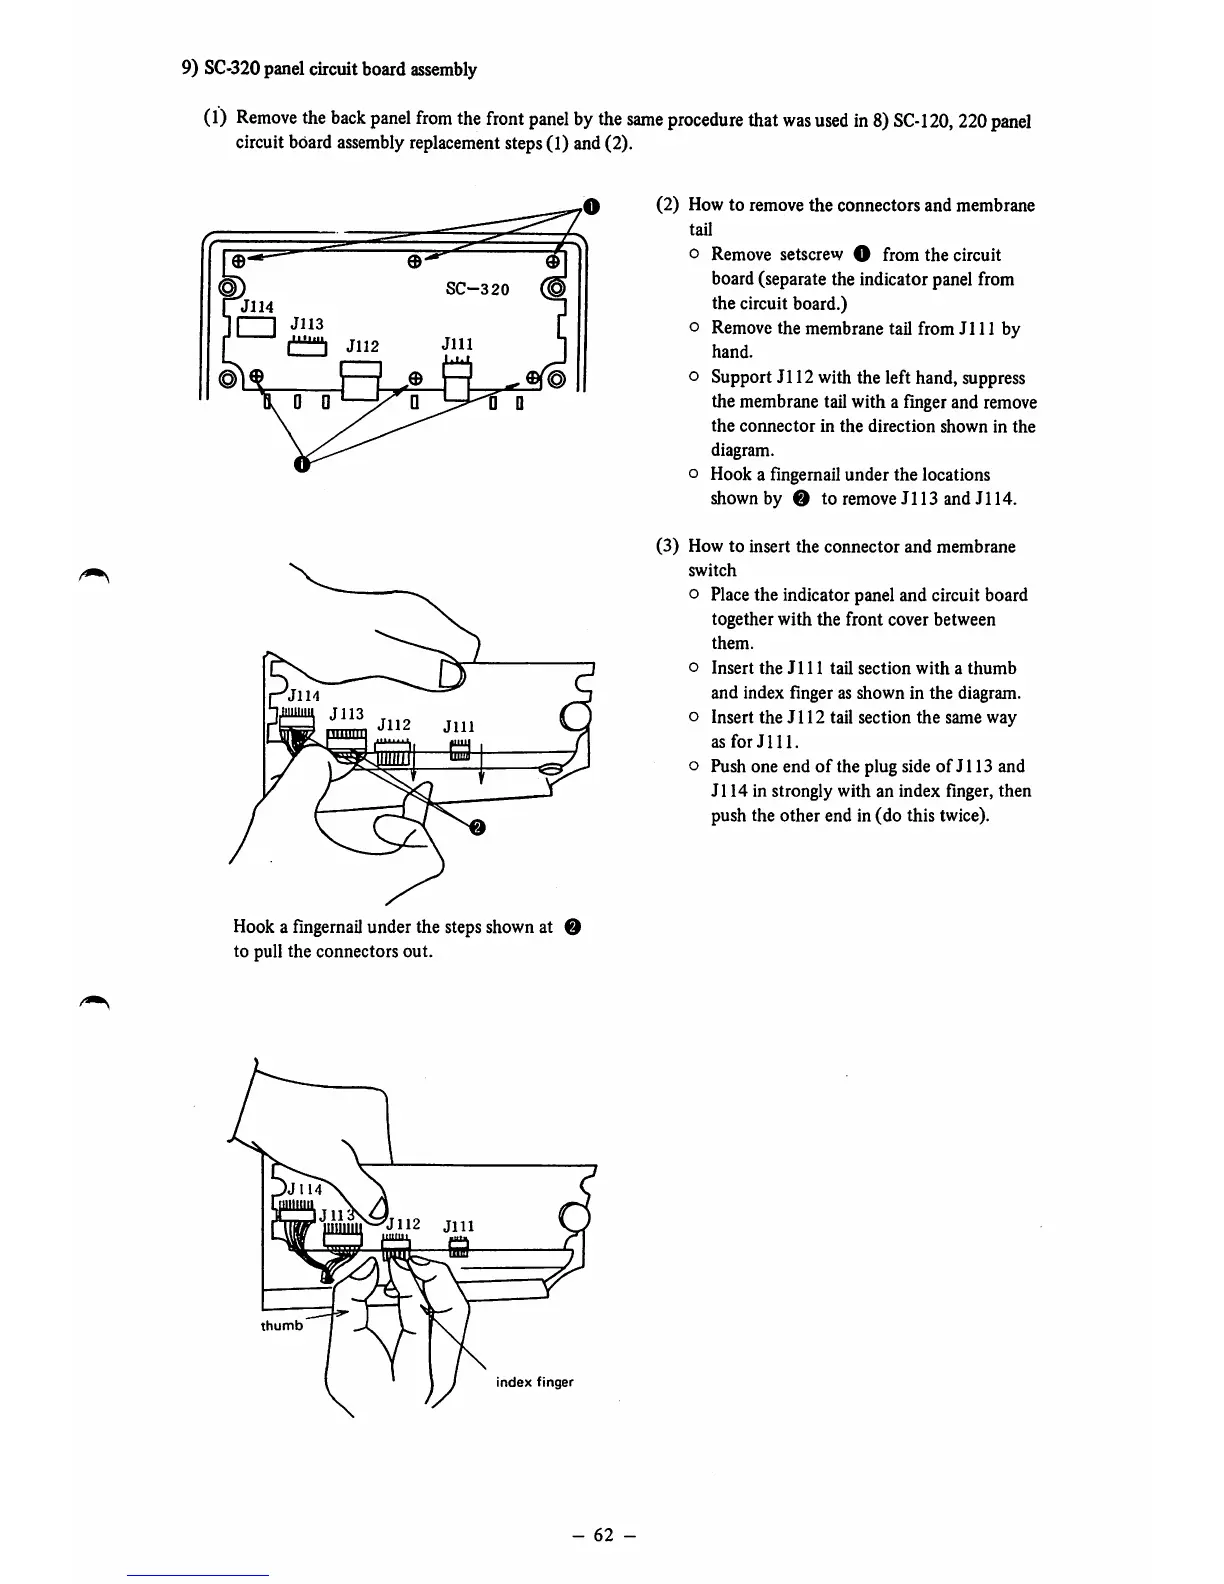
(2) How to remove the connectors and membrane
tail
o Remove setscrew O
from
the
circuit
board(separate the indicator panel from
the circuit board.)
o Remove the membrane tail from
Jill
by
hand.
o Support J112 with the left hand, suppress
the membrane tail with a finger and remove
the
connector
in
the
direction
shown
in
the
diagram.
o Hook a fingernailunder the locations
shown by O to remove J113 and J114.
(3) How to insert the connector and membrane
switch
o Place the indicator panel and circuit board
together with the front cover between
them.
o
Insert
the
J111
tail
section
with
a
thumb
and index finger as shown in the diagram,
o Insert the
J112
tail section
the
same way
as
for
J111.
o Push one end
of
the plug side of J113 and
J114
in strongly with an index finger, then
push the other end in (do this twice).
 Loading...


