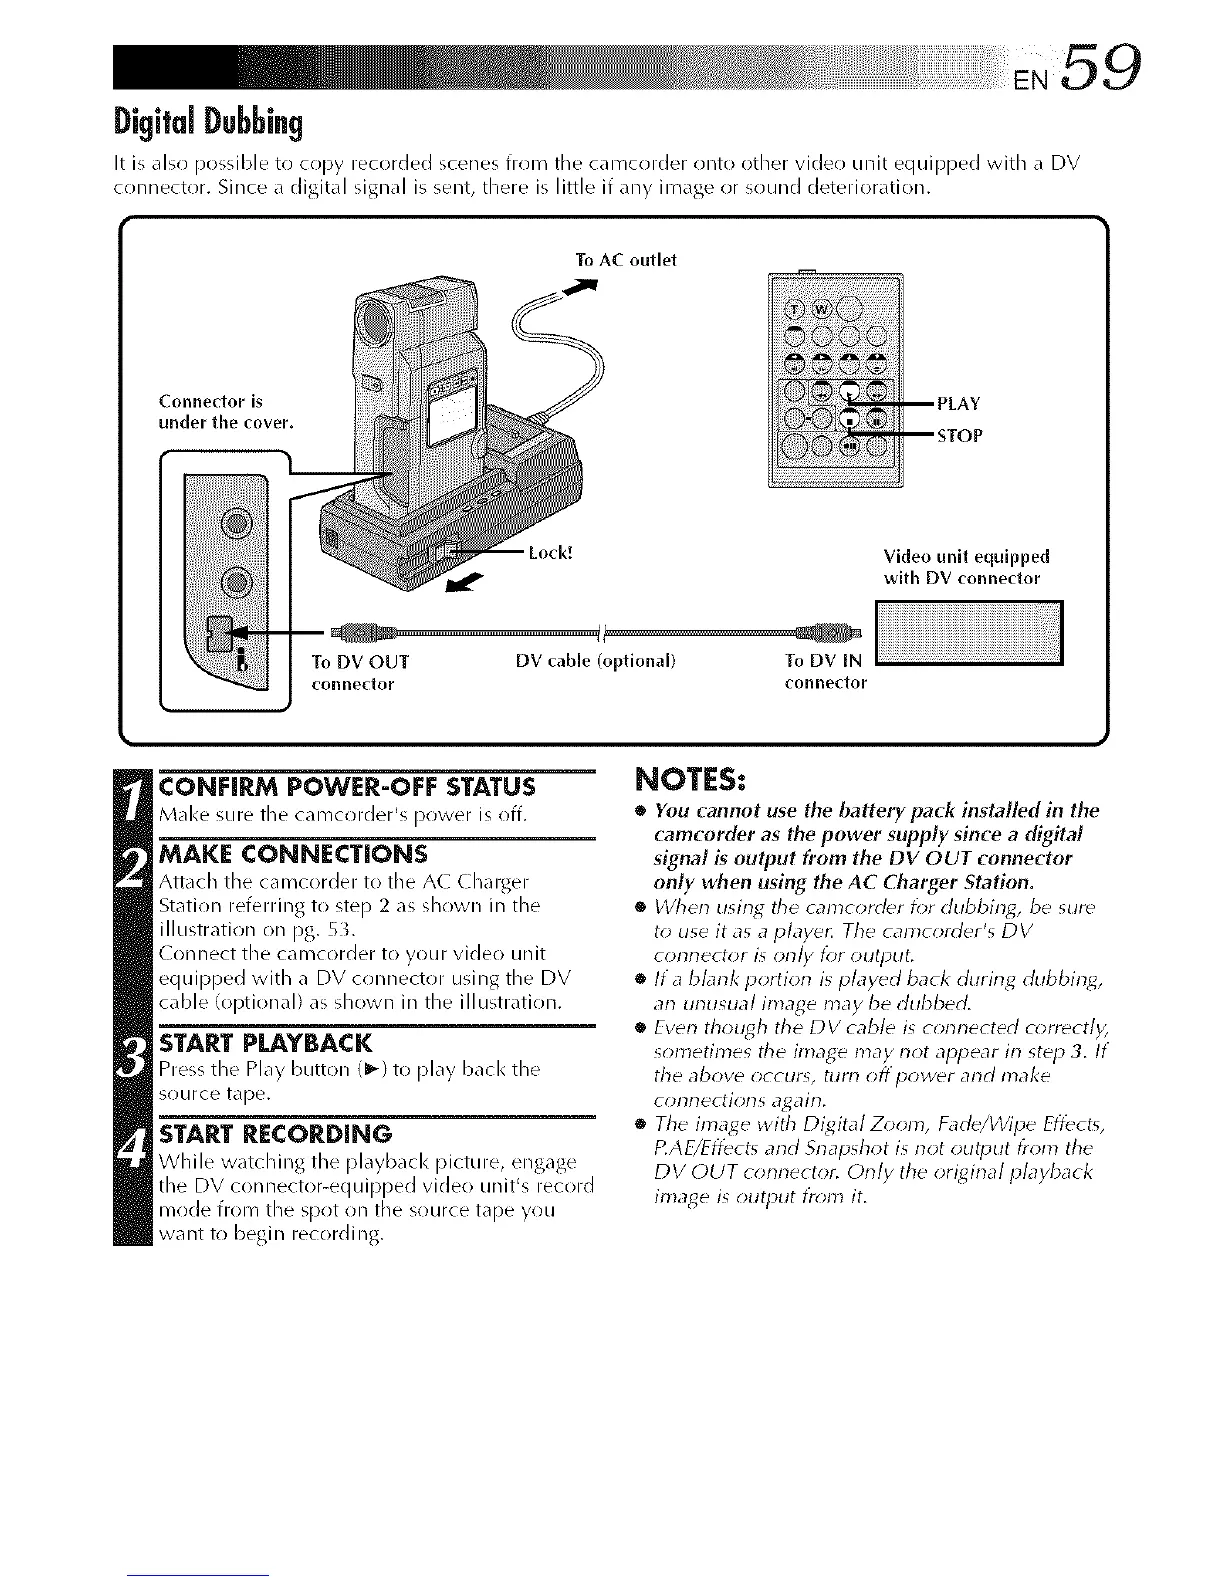
Digi|alDubbing
It is also possible to copy recorded scenes from tile camcorder onto other video unit equipped with a DV
connector. Since a digital signal is sent, there is little if any image or sound deterioration.
ToAC outlet
Connector is
under the cover.
To DV OUT DV cable (optional) To DV IN
conne(tor conneftor
Video unlt equlpped
with DV connector
CONHRM POWER-OFE STATUS
Make surethe camcorder's power isoff.
MAKE CONNECTIONS
Attach the camcorder to tile A( Charger
Station referring to step 2 as shown in the
illustration on pg. 5L
( onnect tile can/corder to your video unit
equipped with a DV connector using the DV
cable (optional) as shown in the illustration.
STARTPLAYBACK
Press the Play button (1_) to play bacl< the
source tape.
START RECORDING
While watching the playback picture, engage
the DV connector-equipped video unit% record
mode from the spot on the source tape you
want to begin recording.
NOTES:
• You cannot use the battery pack installed in the
camcorder as the power supply since a digital
signal is output from the DV OUT connector
only when using the AC Charger Station.
• When using tile camcorder for dubbing, be sure
to use it as a playe_ Tile camcorder's DV
connector is only for output.
• If a bbnk portion is played back during dubbint6
an unusual image may be dubbed.
• Even though the DV cable is connected correctly,
sometimes the image may not appear in step 3. If
the above occur% turn off power and make
connections again,
• The image with Digital Zoom, Fade/Wipe Effects,
P.AE/Effects and Snapshot is not output from the
DV OUT connector. Only the original playback
image is output tr_;m it.