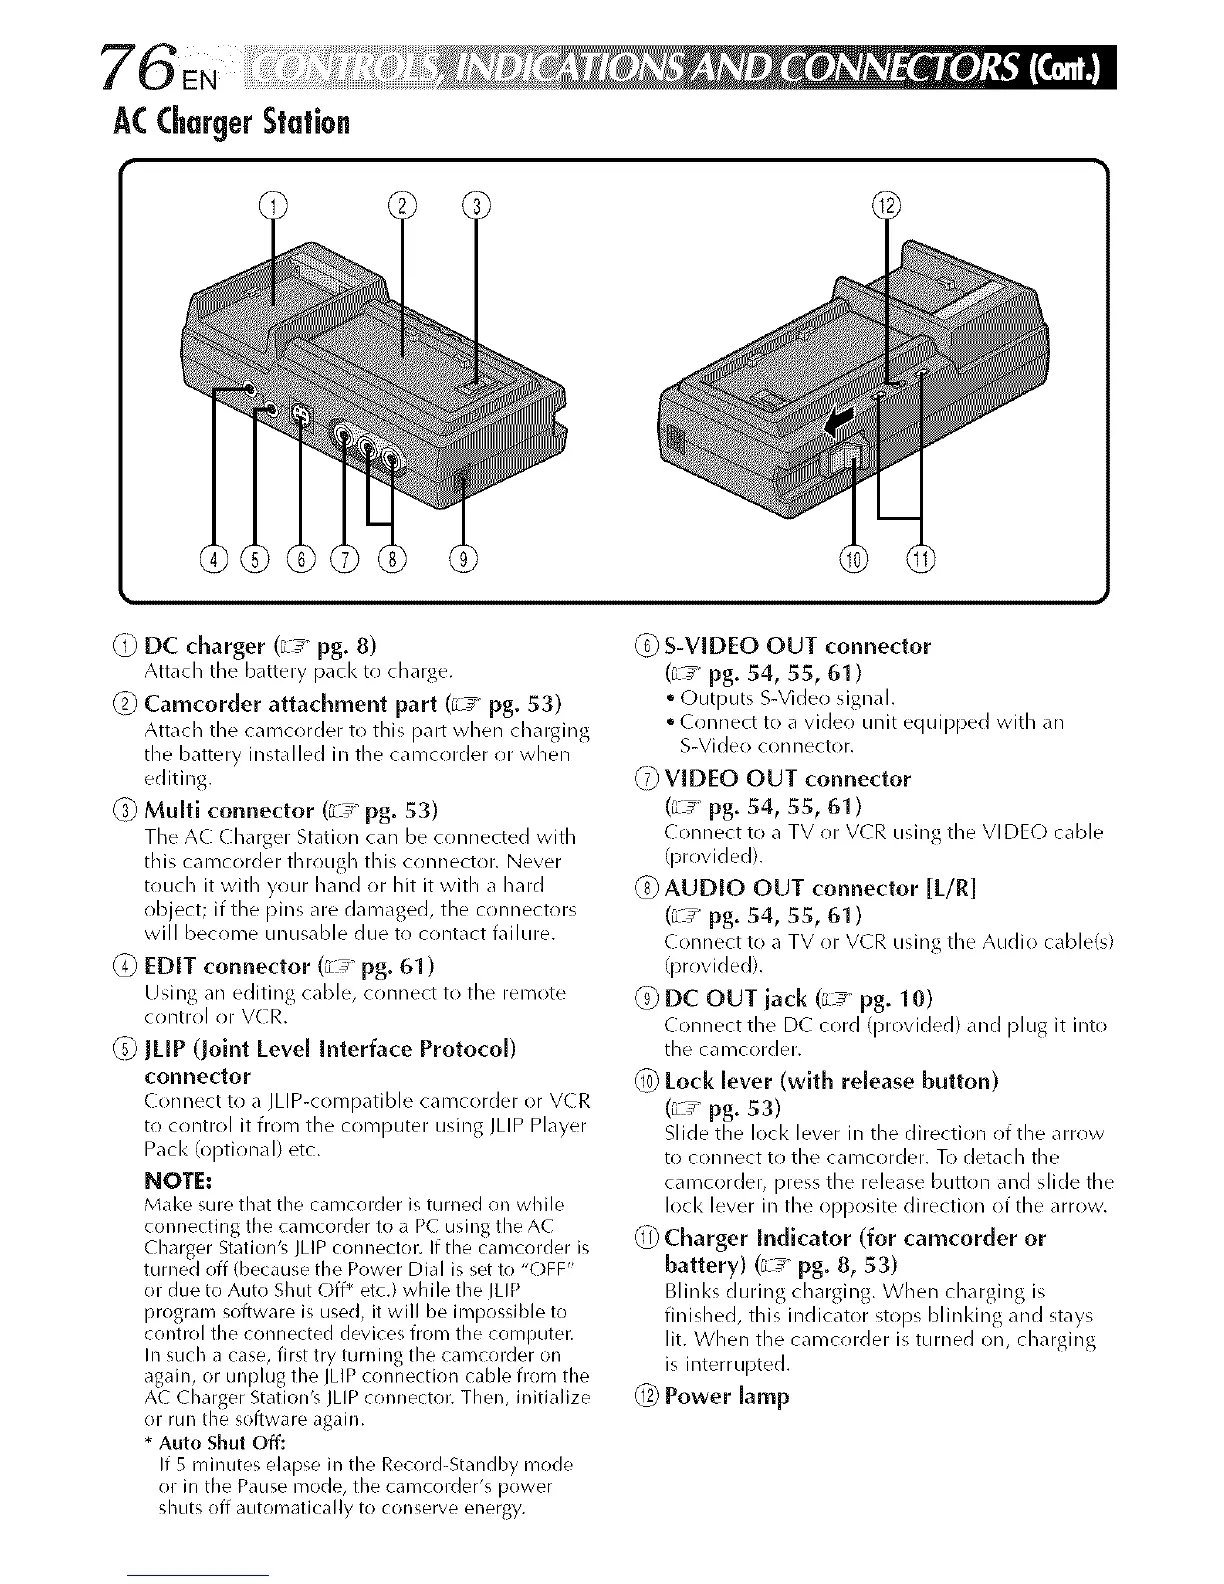
ACChargerStation
@ DC charger (_Le pg. 8)
Attach the battery pacl< to charge.
(Z) Camcorder attachment part (_L7' pg. 53)
Attach tile camcorder to this part when charging
tile battery installed in tile camcrlrder or when
editiug.
_) Multi connector (c__ pg. 53)
Tile AC Charger Station can be connected with
this camcorder through this connector. Never
touch it with your hand or hit it with a hard
object; if tile pins are dan)aged, tile connectors
will beco me u nn sa b le due to co ntact fail ure.
@ EDIT connector (_L_ pg. 61)
Using an editing cable, connect to tile remote
control or V(R.
@ JLIP (Joint Level Interface Protocol)
connector
Connect to a JLIP-compatible camcorder or VCR
to control it fiom tile computer using JLIP Player
Pack (optional) etc.
NOTE:
Mal<e sure that the camcorder is turned on while
connecting the camcorder to a PC using the AC
Charger Station's JLIP connector. If the camcorder is
turned off (because the Power Dial is set to "OFF"
or due to Auto Shut Off _ etc.) while the ILIP
program software is used, it will be impossible to
control the connected devices from the computer.
In such a case, first try turning the camcorder on
again, or unplug the IMP connection cable from the
AC Charger Station's JLIP connector. Then, initialize
or run the software agairl,
* Auto Shu? Off:
If 5 minutes elapse in the Record-Standby mode
or in the Pause mode, the camcorder's power
shuts off automatically to conserve energy.
@ S-VIDEO OUT connector
(_L_' pg. 54, 55, 61 )
• Outputs S-Video signal.
• ( onnect to a video unit equipped with an
S-Video con hector.
_) VIDEO OUT connector
(_Le pg. 54, 55, 61)
Connect to a TV or V(R using the VIDEO cable
(provided).
AUDIO OUT connector [L/R]
(_L_' pg. 54, 55, 61 )
Connect to a TV or V(R using the Audio cable(s)
(provided).
@DC OUTiack (L_ pg. 10)
Connect the DC cord (provided) and plug it into
the camcorder.
@ Lock lever (with release button)
(_L_ pg. 53)
Slide the loci< lever in the direction of the arrow
to connect to the camcorder. To detach the
camcorder, press the release button and slide the
loci< lever in the opposite direction of the arrow.
Charger Indicator (for camcorder or
battery) (_L_ pg. 8, 53)
Blinl<s during charging. When charging is
fin ished, this indicator stops b linIdng a nd stays
lit. When the camcorder isturned on, charging
is interrupted.
Power lamp