The life of the oil separator cartridge is influenced by:
■ contamination in the air drawn into the compressor,
■ adherence to the changing intervals for:
─ cooling oil
─ oil filter
─ air filter
Material Replacement part
Cleaning rag
Precondition The power supply disconnecting device is switched off
The disconnecting device is locked in the off position
A check has been made no voltage is present
The machine is fully vented, the pressure gauge reads 0 psig.
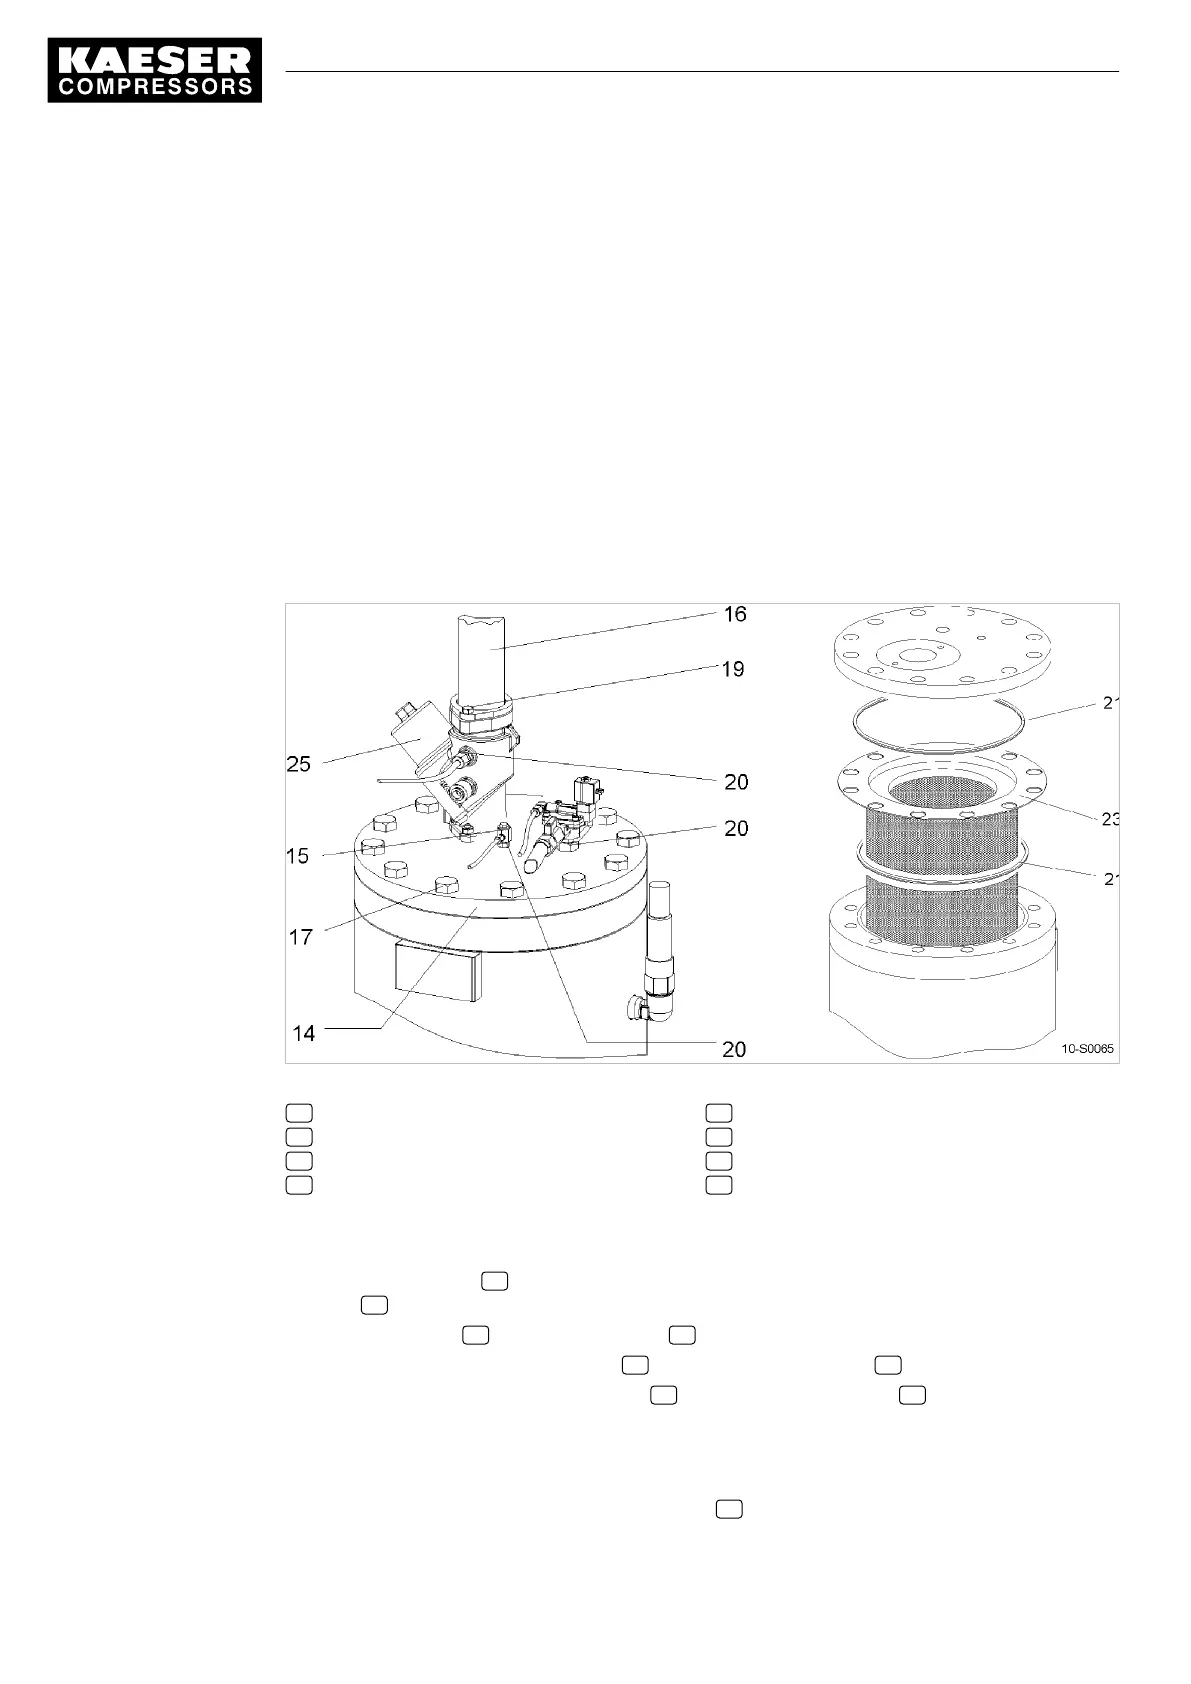
Fig. 37 Changing the Oil Separator Cartridge
14 Cover
15 Dirt trap
16 Air pipe
17 Retaining screw
19 Nut (self locking)
20 Fitting
21 Gasket
23 Oil separator cartridge
Changing the Oil Separator Cartridge
1. Unscrew the fitting 20 and carefully put the parts to one side, then pull out the copper pipe at
item 15 .
2. Unscrew the nut 19 and turn the air pipe 16 to one side.
3. Remove the cover retaining screws 17 and carefully lift the cover 14 .
4. Take out the old oil separator cartridge 23 together with the gaskets 21 and dispose of these
according to environmental protection regulations.
5. Clean all sealing faces.
6. Insert the new oil separator cartridge with gaskets and screw down the cover.
7. Install a new O-ring and strainer in the dirt trap 15 .
10 Maintenance
10.17 Changing the Oil Separator Cartridge
80
Service Manual Screw Compressor
ASD T Tri-Voltage 9_5721 06 USE
 Loading...