2-18 Calibration Model 2701 Service Manual
AC current calibration
Follow these steps for AC current calibration:
1. Connect the calibrator to the AMPS and INPUT LO terminals of the Model 2701 as
shown in Figure 2-3.
2. Perform the calibration steps summarized in Table 2-12. For each step:
• Set the calibrator to the indicated current and frequency, make sure the unit is in
operate. (You must use the stated current and frequency.)
• Send the indicated programming command.
•Wait until the Model 2701 completes each step before continuing.
Programming calibration dates
Program the present calibration date and calibration due date by sending the following
commands:
:CAL:PROT:DATE <year>, <month>, <day>
:CAL:PROT:NDUE <year>, <month>, <day>
For example, the following commands assume calibration dates of 12/15/1999 and
12/15/2000 respectively:
:CAL:PROT:DATE 1999, 12, 15
:CAL:PROT:NDUE 2000, 12, 15
Saving calibration constants
After completing the calibration procedure, send the following command to save the new
calibration constants:
:CAL:PROT:SAVE
NOTE Calibration constants will not be saved unless the :CAL:PROT:SAVE command is
sent.
Locking out calibration
After saving calibration, send the following command to lock out calibration:
:CAL:PROT:LOCK
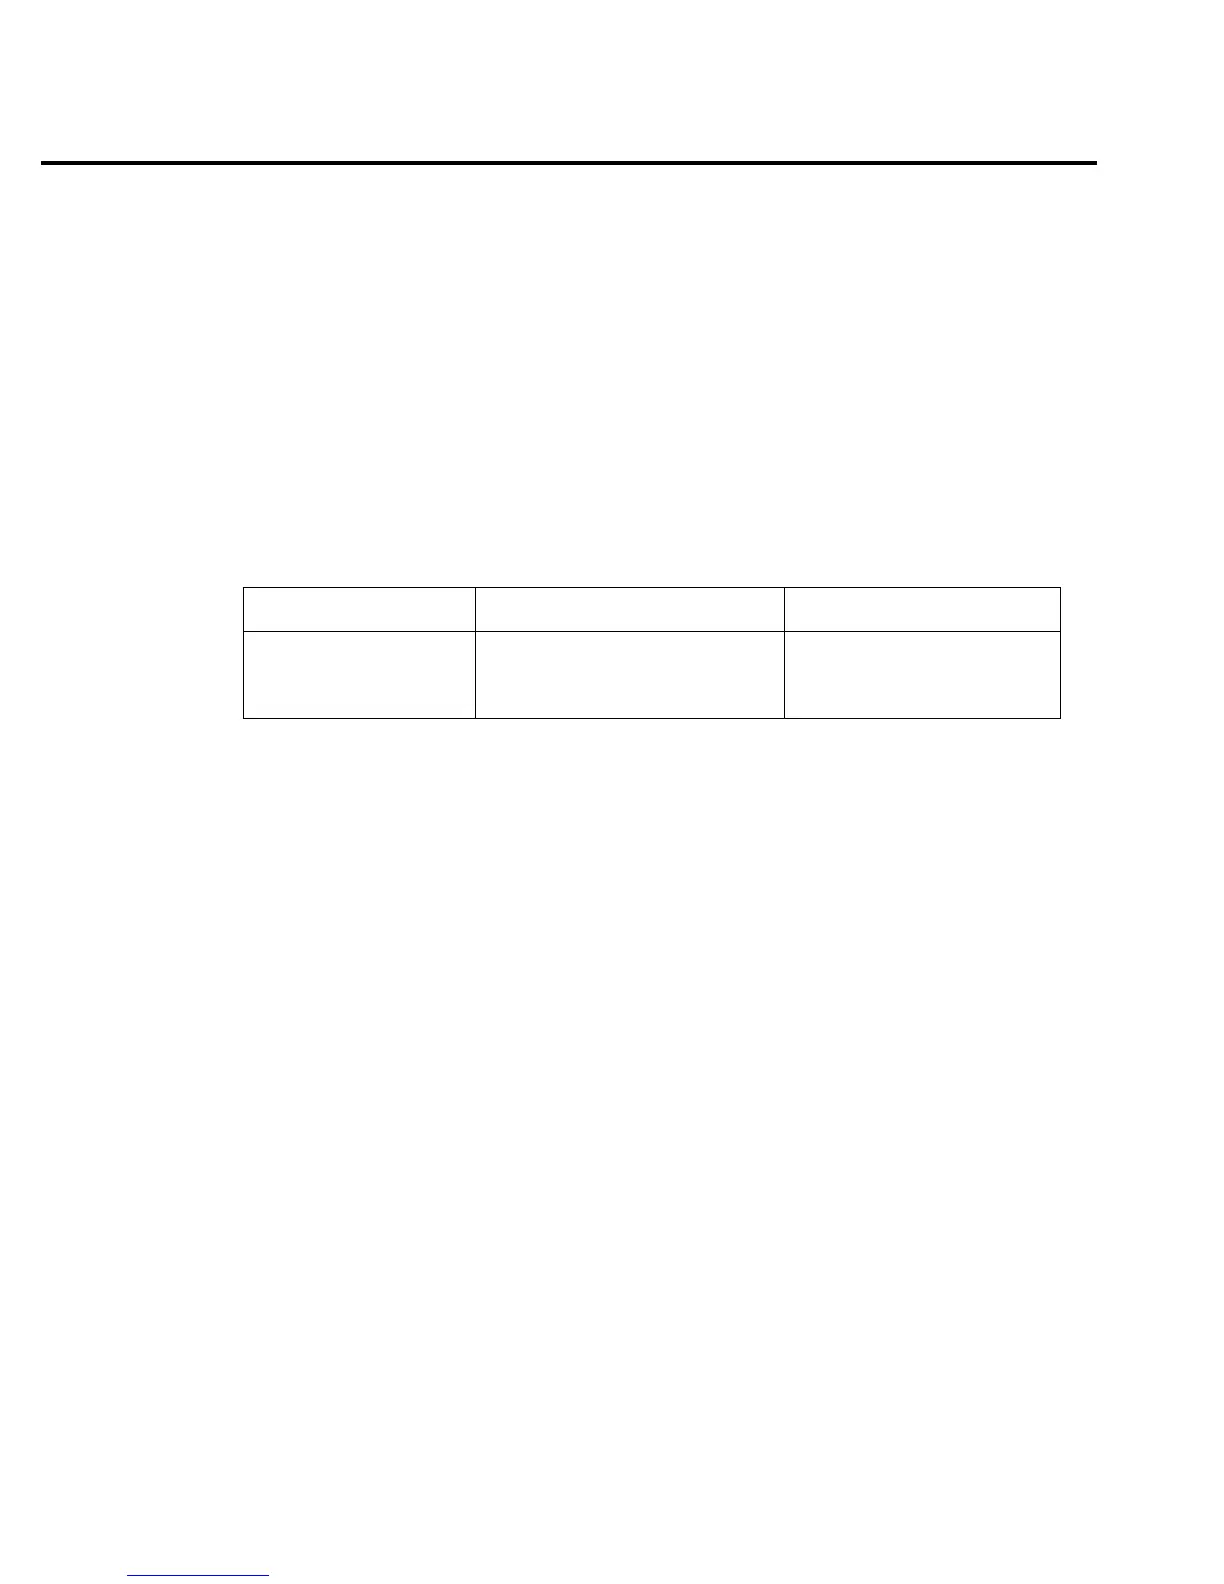
Table 2-12
AC current calibration programming steps
Calibration step Calibrator current, frequency Calibration command
100mA at 1kHz
1A at 1kHz
2A at 1kHz
100.0000mA, 1kHz
1.000000A, 1kHz
2.000000A, 1kHz
:CAL:PROT:AC:STEP11
:CAL:PROT:AC:STEP12
:CAL:PROT:AC:STEP13

 Loading...