Reference • Song Edit mode
134
2. Move the cursor to the “First measure” field, and
indicate the measure where you wish the insert to
take place. Move the cursor to the “Number of
measures” field, and indicate the number of meas-
ures to be inserted. Move the cursor to the “Time
signature” field, and choose the time signature for
the measures you wish to insert.
3. Press ENTER/YES twice to confirm insertion.
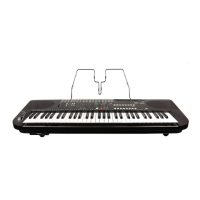
Inserting measures with a different time
signature
The change of time signature during playback will
take place if the tempo is =AUT. If measures are
inserted with a different time signature in a track, all
the tracks will have the new time signature. The data
will remain intact however, and the tracks will play
exactly as they did before.
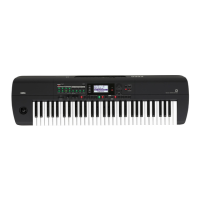
Inserting two measures of time signature = 7/8
If you assign the value **/** to the “Time signature”
parameter, the new measures will have the same time
signature as the measures that are in the same position
on the other tracks. If the other tracks are still empty,
the time signature of the measure that precedes the
measures to be inserted, will be selected.
Time signature = **/**
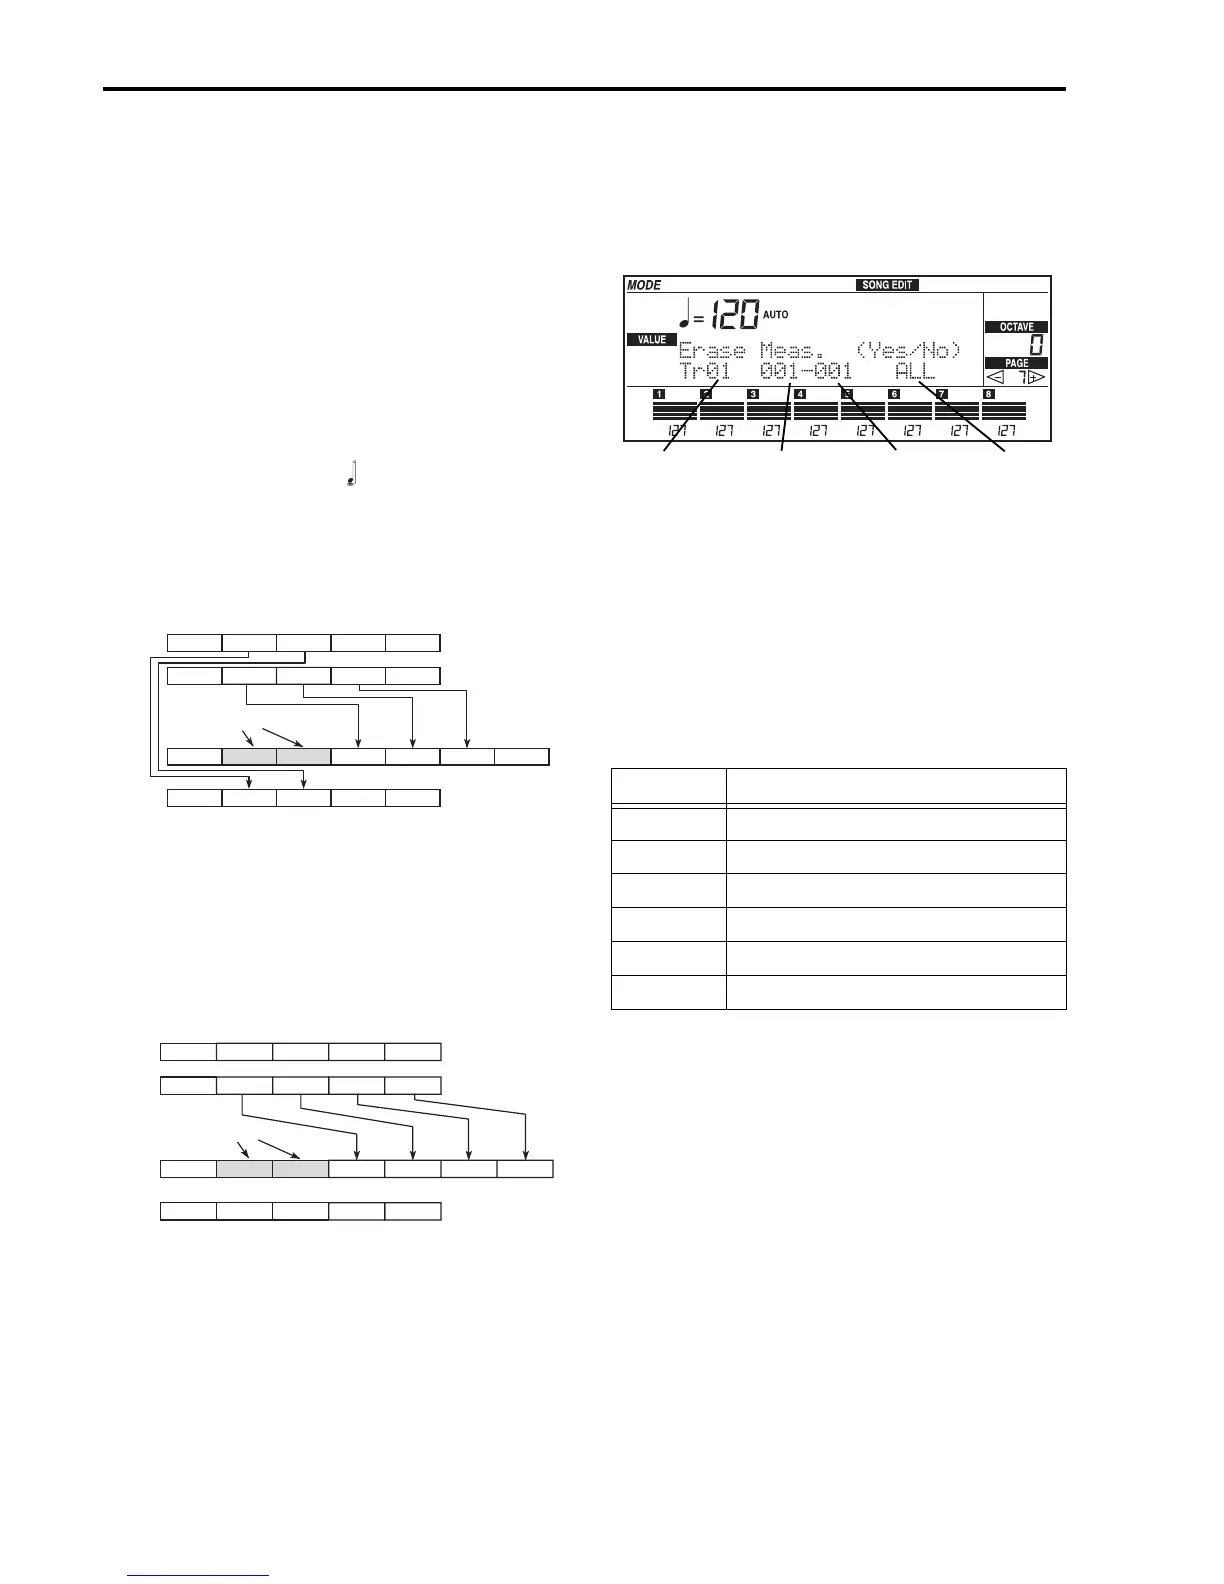
Erase measures
This function erases all or part of the data contained in
the specified measure(s). The measures themselves
will not be erased.
1. Move the cursor to the “Track” field using the
CURSOR buttons, and choose the track with the
TEMPO/VALUE buttons (or the DIAL). Choose
ALL to erase data from all the tracks at the same
time.
2. Move the cursor the “First measure” field, and
choose the first of the measures you wish to erase.
Move the cursor to the “Last measure” field, and
choose the last of the measures you wish to erase. If
you only want to erase data from one measure,
assign the same measure to both the fields.
3. Press ENTER/YES twice to confirm erasure of data.
Erasing control change messages
The continuous controls (control change, CTRL) can be
made up of an activating and a deactivating part. If
you erase the deactivating part, the control can get
“stuck”. For example, if you erase the deactivating
message of the damper, the pedal will stay open; if you
erase the pitch bend reset message, the track could be
out of tune. Manually erase the activating messages or
insert new deactivating events with the functions of
“Page 4. Event edit”.
1 (4/4) 2 (2/4) 3 (2/4) 4 (4/4) 5 (3/4)
1 (4/4) 2 (2/4) 3 (2/4) 4 (4/4) 5 (3/4)
1 (4/4)
1 (4/4) 2 (7/8) 3 (7/8) 4 (4/4) 5 (3/4)
2 (7/8) 3 (7/8) 4 (4/4) 5 (3/4) 6 (3/4) 7 (3/4)
Insert
Tr01
Tr02
Tr02
Tr01
1 (4/4) 2 (2/4) 3 (2/4) 4 (4/4) 5 (3/4)
1 (4/4) 2 (2/4) 3 (2/4) 4 (4/4) 5 (3/4)
1 (4/4)
1 (4/4) 2 (2/4) 3 (2/4) 4 (4/4) 5 (3/4)
2 (2/4) 3 (2/4) 4 (4/4) 5 (3/4) 6 (3/4) 7 (3/4)
Insert
Tr01
Tr02
Tr02
Tr01
Type of data Erased data
ALL All data
NOTE All note messages
CTRL All control change messages
AFTT Channel/polyphonic aftertouch messages
BEND All pitch bend messages
PROG All program change messages
Track
First measure
Data type
Last measure