13 BRAKE SYSTEM 76
C00724-12
–
Add brake fluid to level
.
Guideline
Level
(brake fluid level below con-
tainer rim)
5 mm (0.2 in)
Brake fluid DOT 4 / DOT 5.1 ( p. 118)
– Position the cover with the membrane. Mount and tighten the screws.
Info
Clean up overflowed or spilled brake fluid immediately with water.
Finishing work
– Install the KTM PowerPack. ( p. 94)
– Lock the seat. ( p. 63)
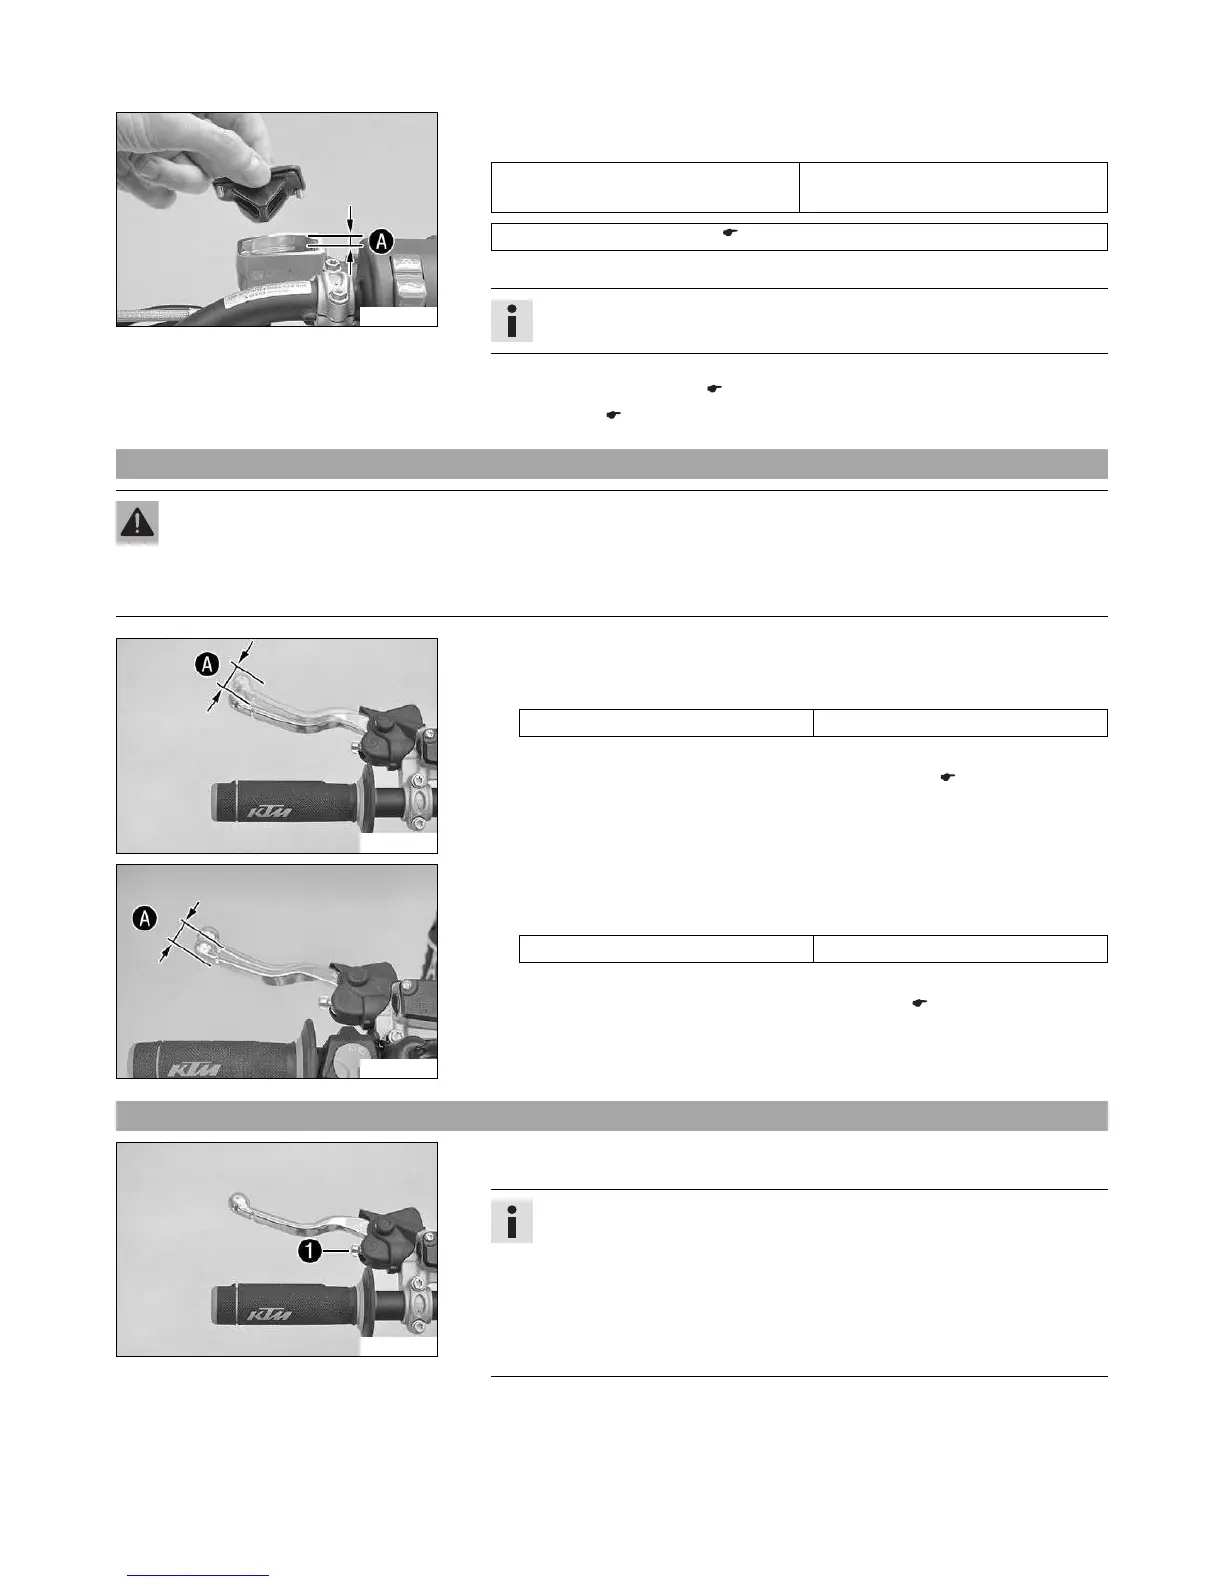
13.9 Checking the free travel of the rear brake lever
Warning
Danger of accidents The brake system fails in the event of overheating.
If there is no free travel on the rear brake lever, pressure builds up on the rear brake circuit.
– Set the free travel on the rear brake lever in accordance with the specification.
C00727-10
(Freeride E‑SX)
–
Push the rear brake lever forward and check free travel
.
Guideline
Free travel on the rear brake lever ≥ 3 mm (≥ 0.12 in)
» If the free travel does not match the specification:
– Adjust the basic position of the rear brake lever. ( p. 76)
C00809-12
(Freeride E‑XC)
–
Push the rear brake lever to the handlebar and check free travel
.
Guideline
Free travel on the rear brake lever ≥ 3 mm (≥ 0.12 in)
» If the free travel does not match the specification:
– Adjust the free travel of the rear brake lever. ( p. 77)
13.10 Adjusting the basic position of the rear brake lever (Freeride E‑SX)
C00727-11
– Adjust the basic position of the rear brake lever to your hand size by using adjust-
ing screw
.
Info
Turn the adjusting screw clockwise to increase the distance between the
rear brake lever and the handlebar.
Turn the adjusting screw counterclockwise to decrease the distance between
the rear brake lever and the handlebar.
The range of adjustment is limited.
Only turn the adjusting screw by hand, and do not use force.
Do not make any adjustments while riding.