400726-10
– Position the vehicle upright on a horizontal surface in front of a light wall and make
a mark at the height of the center of the low beam headlight.
–
Make another mark at a distance
under the first mark.
Guideline
Distance
5 cm (2 in)
–
Position the vehicle vertically a distance
away from the wall.
Guideline
Distance
5 m (16 ft)
– The rider now sits down on the motorcycle with a full set of protective clothing.
– Turn the key in the ignition lock to the position .
– Push the main switch into the position .
– Switch on the low beam.
– Check the headlight setting.
The boundary between light and dark must be exactly on the lower mark for a
motorcycle with a rider.
» If the light-dark border does not meet specifications:
– Adjust the headlight range. ( p. 92)
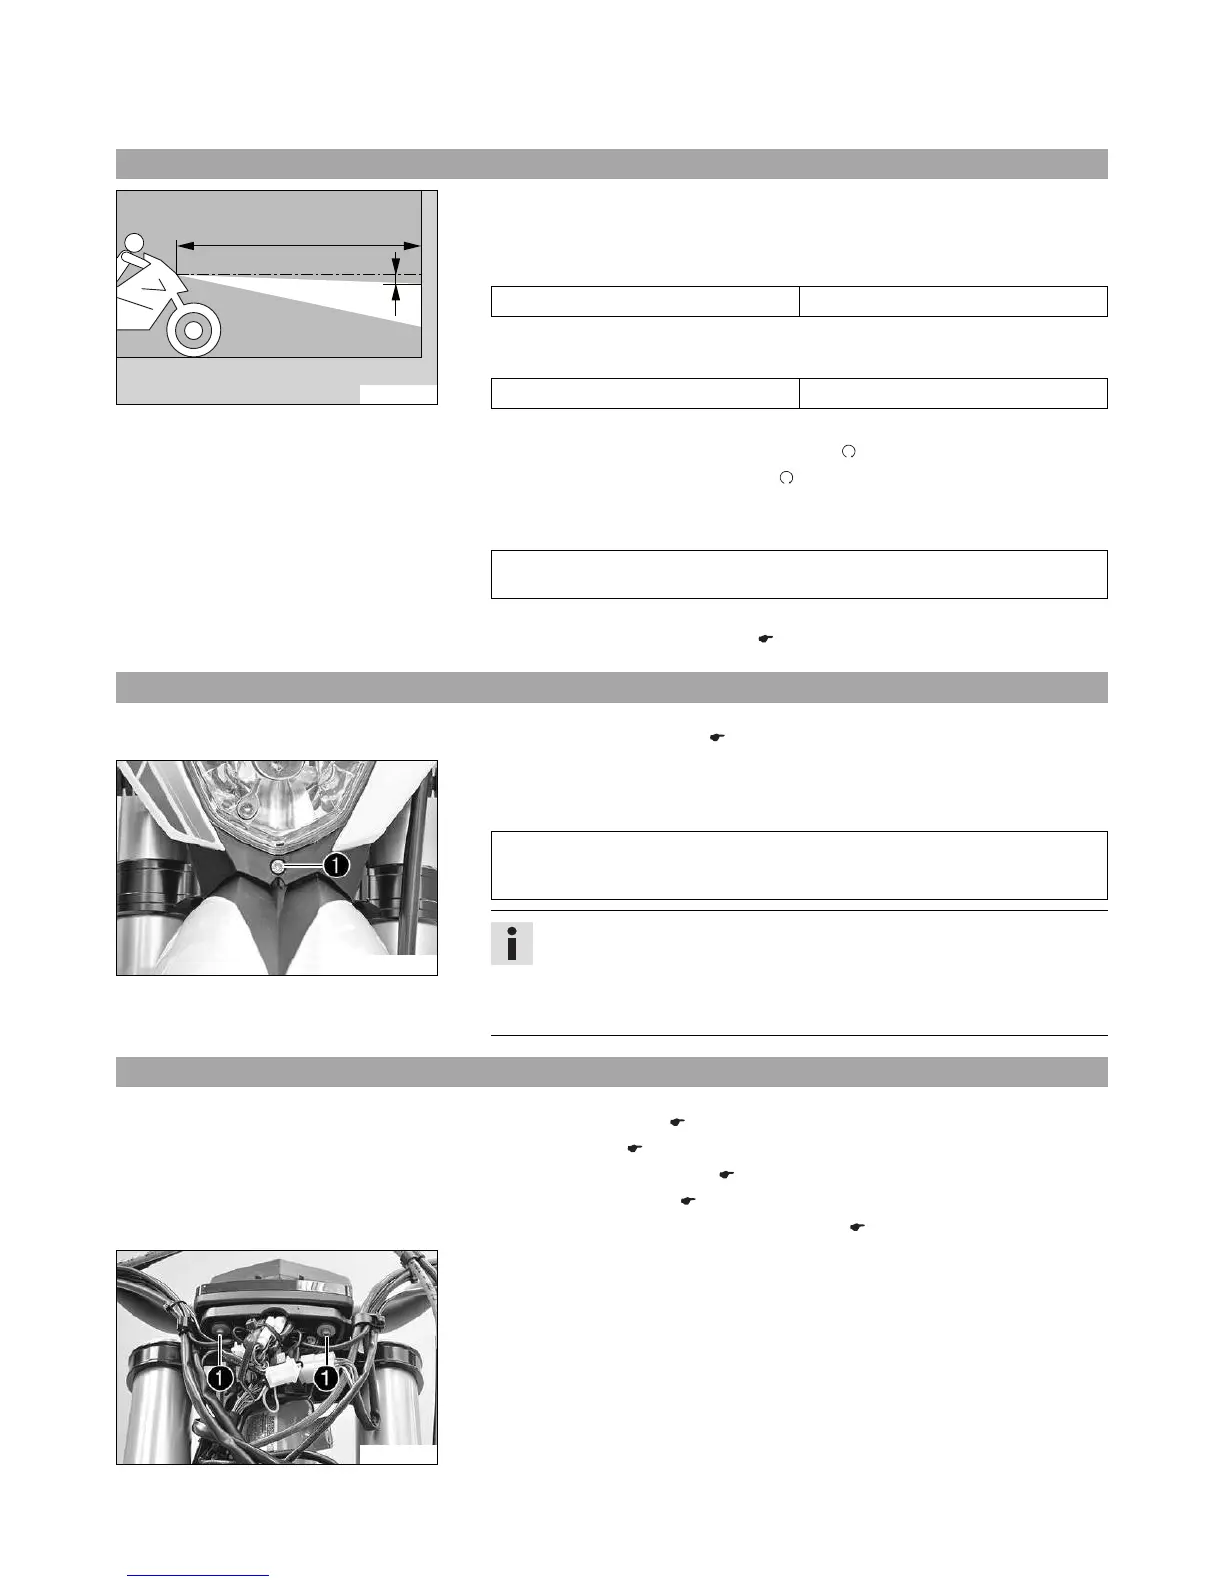
15.10 Adjusting the headlight range (Freeride E‑XC)
Preparatory work
– Check the headlight setting. ( p. 92)
C00818-10
Main work
–
Adjust the beam distance of the headlight by turning screw
.
Guideline
The boundary between light and dark must be exactly on the lower mark for a
motorcycle with a rider (instructions on how to apply the mark: Checking the
headlight setting).
Info
Turn clockwise to increase the headlight range, turn counterclockwise to
reduce the headlight range.
A change in weight on the vehicle may require a correction of the headlight
range.
15.11 Changing the speedometer battery (Freeride E‑XC)
Preparatory work
– Deactivate the vehicle. ( p. 37)
– Fold the seat up. ( p. 63)
– Remove the KTM PowerPack. ( p. 94)
– Mount the covering cap. ( p. 64)
– Remove the headlight mask with the headlight. ( p. 89)
C00819-10
Main work
–
Remove screws
.
– Pull the speedometer upward out of the holder.