Do you have a question about the Kuka KR C1 and is the answer not in the manual?
General maintenance procedures for the control cabinet, including cleaning.
Description of the control cabinet's physical and functional structure, including processor and power units.
Details on the processor unit, its components, and functions.
Description of the power unit, its components, and functions.
Explanation of the heat exchanger cooling system within the control cabinet.
Information on the optional air conditioner for cooling the control cabinet.
General overview of peripheral interfaces for the control cabinet.
Details on the interfaces of the power unit.
Information on the equipment and components within the power unit.
Procedures for safely removing and installing basic and power modules.
Detailed description and incorporation of the PM0-600 basic module.
Features of 1-axis and 2-axis power modules PM 1-600 and PM 2-600/25-16.
Front view diagram and details of the PM0-600 power supply module.
Front view diagram and details of the PM2-600/25/16 power module.
Front view diagram and details of the PM1-600/25 power module.
Front view diagram and details of the PM1-600/16 power module.
Connection diagram for PM0 and PM2 modules (without PM6-600).
Instructions for jumpering motor connectors based on robot type and current.
Procedure for programming the current regulator using the EEPot ($G_COE_CUR).
Overview of functions implemented by the FE201 module.
Configuration of DIP-FIX switches for EMERGENCY STOP delay and external axes.
Detailed view and labeling of the FE201 version A circuit board.
Detailed view and labeling of the FE201 version B circuit board.
Wiring diagram for the EMERGENCY STOP and safety circuit.
Wiring diagram for the Drives ON/OFF circuit.
Diagram illustrating operating mode switchover logic.
Block diagram illustrating the individual axis switch-off functionality.
Describes a fault related to individual axis switch-off and its remedial action.
Wiring diagram for individual axis switch-off for external axes.
Circuit diagram for external axis switch-off connections.
Diagram showing outputs related to external axis switch-off.
Diagram showing inputs related to external axis switch-off.
Diagram illustrating cross connections for external axes.
Diagram showing the layout of the connector panel.
Explanation of symbols used in interface diagrams.
Detailed table of interface signals for connector X11.
Examples of linking the robot's Emergency Stop circuit to other systems.
Diagrams and details for power supply and service socket connections.
Pin assignment and description for motor connector X20.
Pin assignment and description for optional motor connectors X7.1, X7.2, X7.3.
Detailed pin assignment and description for peripheral connector X11.
Pin assignment and description for optional peripheral connector X12.
Pin assignment for the CAN bus Sub-D connector X801.
Pin assignment for the Ethernet Sub-D connector X802.
Pin assignment and description for data cable connector X21.
Pin assignment and description for optional data cable connector X8.
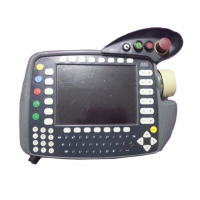
Pin assignment and description for the KCP connector X19.
Diagram showing jumper settings for stand-alone operation via connector X11.
Introduction to the DSEAT module and its advantages in controller architecture.
Schematic diagram illustrating the controller's software and hardware architecture.
Block diagram detailing the DSEAT's internal components and interfaces.
Explanation of DSEAT functions: position sensing, control, speed, and commutation.
Diagram showing DSEAT card configuration and connector details.
Step-by-step instructions for safely replacing the DSEAT card.
Procedures for visual inspection and functional testing of the DSEAT card.
Description of the RDC card, its functions, and advantages.
Block diagram illustrating the RDC's internal components and data flow.
Explanation of the RDC's power supply, processor, and resolver evaluation.
Table detailing serial connection pin assignments between DSEAT and RDC.
Diagram showing RDC card configuration, jumpers, and connectors.
List of RDC interfaces, their axis assignments, and connector types.
Pin assignments and resistance for RDC resolver cable connectors X1 to X8.
Instructions for safely removing and installing the RDC card.
Procedures for testing the RDC via dial gauge mastering and diagnostic tools.
| Compatibility | KUKA robots |
|---|---|
| Frequency | 50/60 Hz |
| Protection Class | IP54 |
| Programming Language | KUKA Robot Language (KRL) |
| Communication Interfaces | Ethernet, PROFIBUS, Interbus |