2FD/2FF/2FG
1-3-65
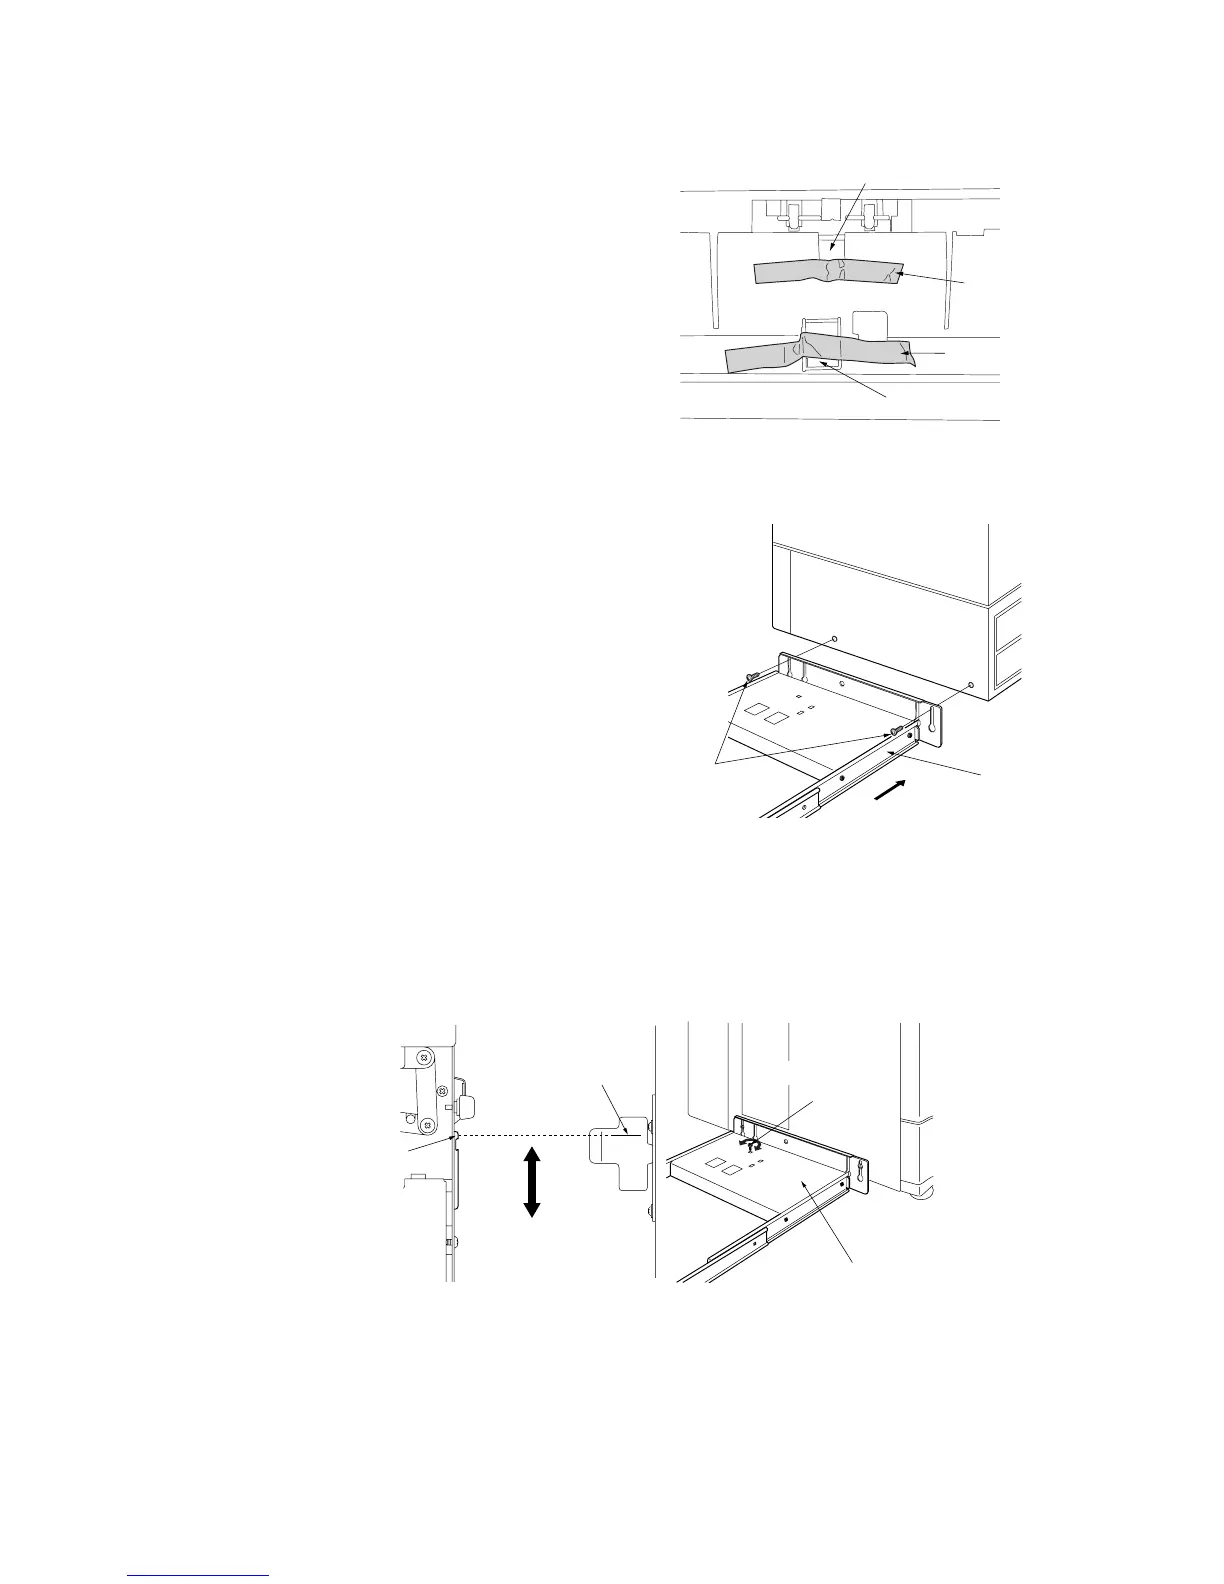
4. Remove the tape securing the solenoid, and
the tape securing the shifting guide.
5. Set the waste punch box back into the
finisher, and fasten it into place with the two
fastening pins.
6. Pull the rail unit out of the finisher.
7. Loosely fasten the rail unit to the copier’s
finisher-attachment area with the two M4 × 10
TP-A bronze screws.
8. Move the finisher next to the copier, and open the finisher’s front cover. Adjust the height-adjustment screw in the rail
unit until the guideline marked on the retainer is aligned with the center of the height-adjustment plate.
Solenoid
Tape
Tape
Shifting guide
Rail unit
M4 × 10
TP-A bronze screws
Height-adjustment
plate
Guideline
Rail unit
Height-adjustment
screw
Figure 1-3-156
Figure 1-3-157
Figure 1-3-158

 Loading...