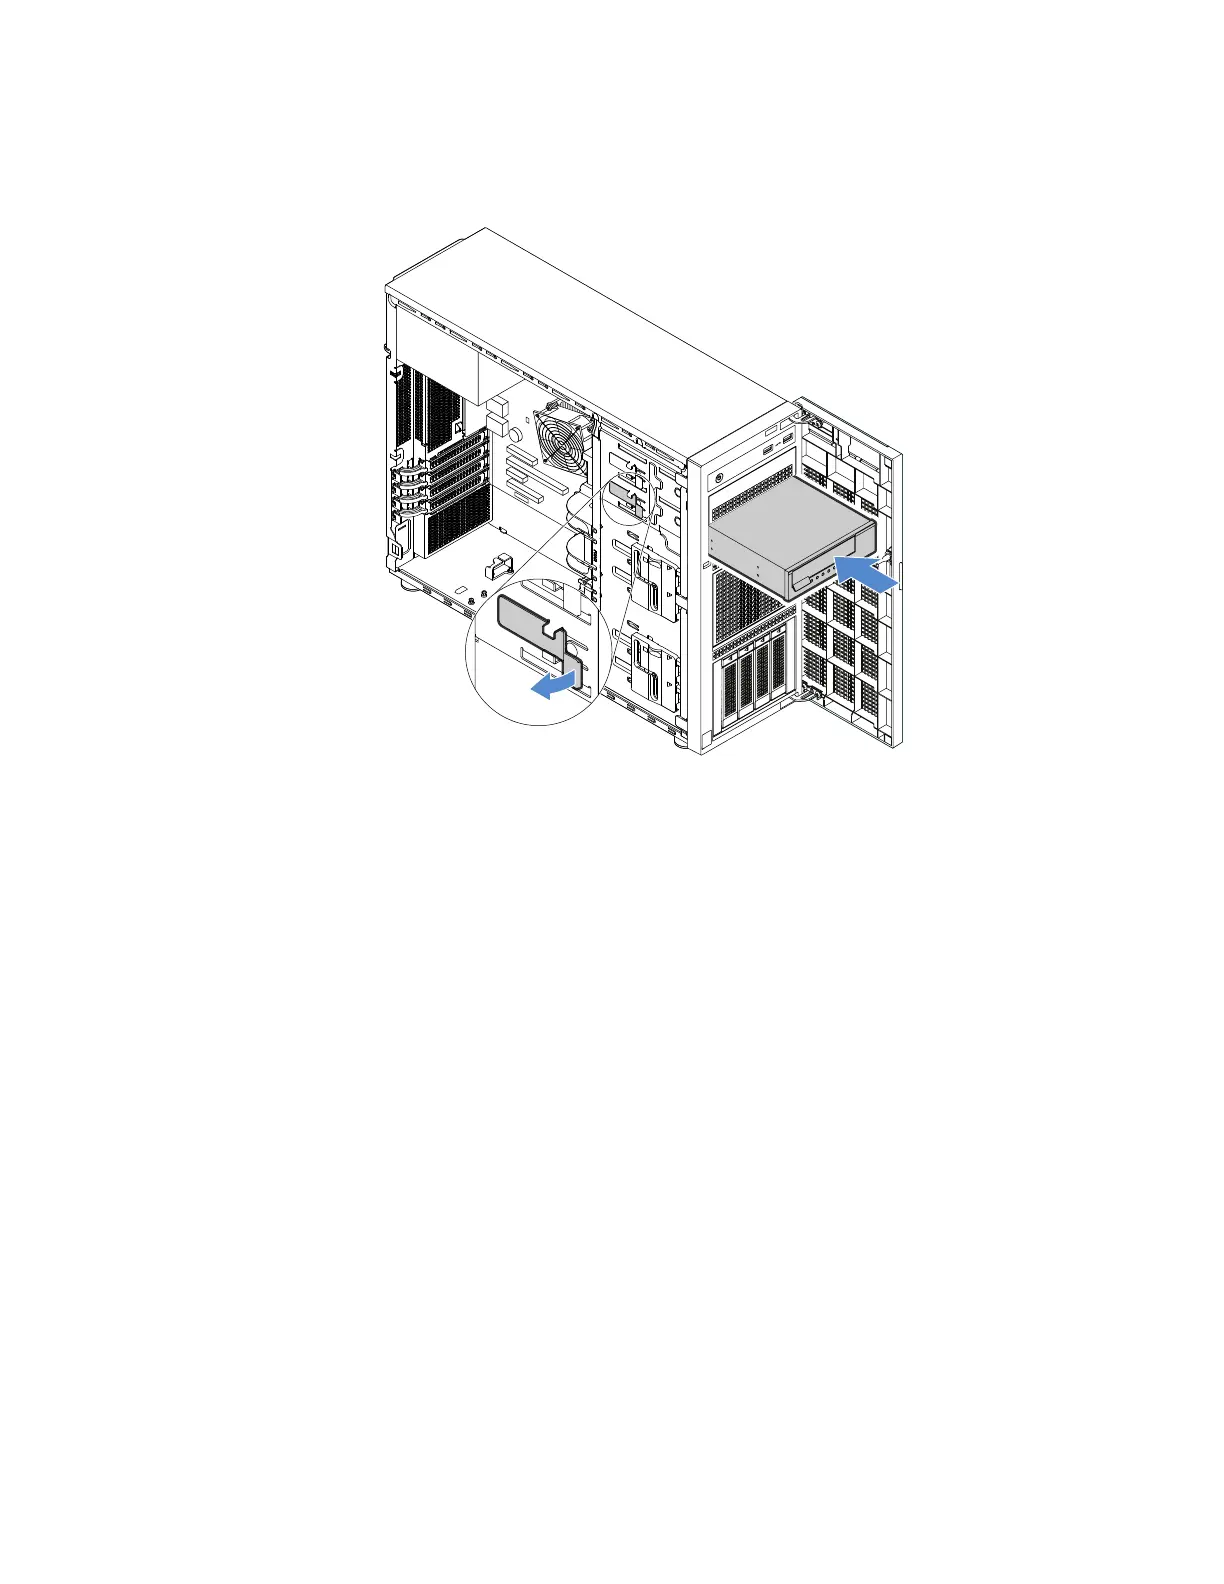
5.Insertthetapedriveintothelowerdrivebayandslideitinuntilitisobstructed.Gentlypullthemetaltab
onthesideofthechassis,andthencontinuetoslidethetapedriveinuntilitsnapsintoposition.
Figure39.Installingthetapedrive
6.Connectthepowerandsignalcablestotherearofthetapedrive.See“Connectingcablesforthe
tapedrive”onpage115.
Note:FortheLTOtapedrive,connectoneendofthesignalcabletotheLTOtapedrive.Then,connect
theotherendofthesignalcabletotheRAIDcard.
7.SavetheremovedEMI-protectiveshieldfromthechassisandtheplasticshieldfromthefrontbezelin
caseyoulaterremovethedriveandneedtheshieldstocoverthedrivebay.
Solid-statedrive(2.5-inch)
Youcaninstallorremoveahot-swapSSDwithoutturningofftheserver,whichhelpsyouavoidsignificant
interruptiontotheoperationofthesystem.
•“Removinga2.5-inchSSDfroma3.5-inchHDDbay”onpage74
•“Installinga2.5-inchSSDintoa3.5-inchHDDbay”onpage75
TheEMIintegrityandcoolingoftheserverareprotectedbyhavingalldrivebayscoveredoroccupied.The
numberoftheinstalledHDDsorSSDsinyourservervariesdependingontheservermodel.Thevacant
baysareoccupiedbydummytrays.Whenyouinstallahot-swapHDDorSSD,savetheremoveddummy
trayfromthedrivebayincaseyoulaterremovethehot-swapHDDorSSDandneedthedummytrayto
covertheplace.
Attention:AnunoccupieddrivebaywithoutanyotherprotectionmightimpacttheEMIintegrityandcooling
oftheserver,whichmightresultinoverheatingorcomponentdamage.TomaintaintheEMIintegrity
andcoolingoftheserver,installanewhot-swapHDDorSSDassoonasyouremovethefailingoneor
thedummytray.
Chapter5.Replacinghardware73