Repair information 4-7
4513-200, -220, -230
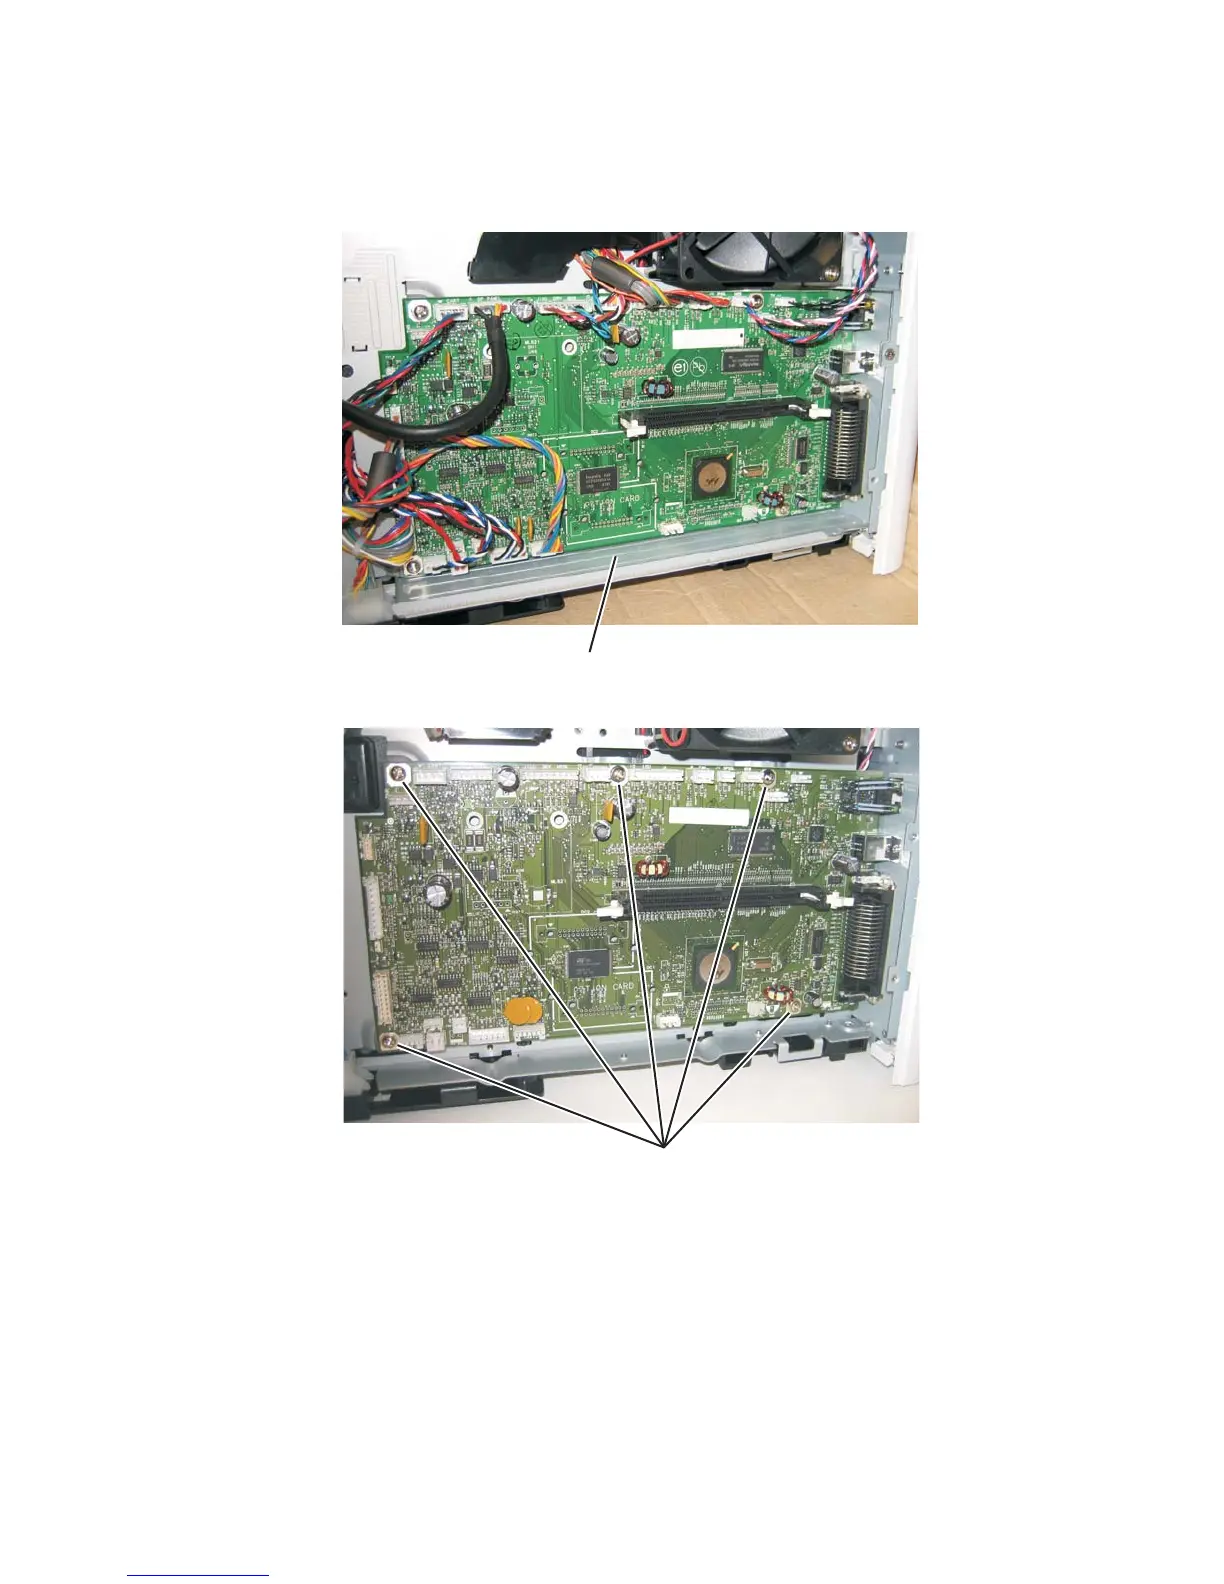
3. Disconnect all of the cables from the controller board.
Note: A drip guard (B) has been added below the controller board. The drip guard may need to be removed to
access to the controller board.
4. Remove the five screws (C) from the controller board.
5. Lift the controller board, and remove.
Note: When installing the controller board, place the USB port and parallel port screws first, and then place the
other controller board screws.
 Loading...


