Trackit Mk3 User Manual
86
Appendix 6: Trackit quick setup and operation guide
Caut ion: D o n ot rem ove Tra ck it ’s CF ca r d w hile t h e acce ss LED is on .
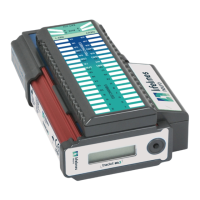
1 For the Mk3 Trackit , connect t he special USB cable t o t he Trackit and t o t he PC USB port .
2 Open the back of t he Trackit unit wit h t he special t ool provided. Make sure a bat t ery and flash
card are insert ed.
5 St art t he Trackit set up soft ware on the PC. Switch on t he Trackit recorder.
6 Act ivate t he Trackit Cont rol Panel dialog box via the handshake sym bol on the Trackit t oolbar.
Click on t he Connect but t on. The Trackit St at us shows t hat the Trackit is online.
7 Go to the View Menu and select Ot her Opt ions. I f you want t he nam e of the recorded file t o de-
fault t o t he pat ient ’s nam e, put a checkm ark by Recording File Nam e. Decide also whet her to
use a pat ient dat abase or a sim ple file nam e and recording I D for entering pat ient info.
8 Choose Patient Details from the File Menu or the left m ost button on t he toolbar (Pat ient icon).
Ent er t he pat ient ’s nam e, I D and recording I D. Click t he Edit but t on if in t he dat abase or sim ply
ent er the inform ation if t his opt ion is not used. The pat ient ’s nam e and ID will then be seen on
t he St atus Bar.
9 Choose Recording from t he Setup Menu, or click on t he spanner icon on the t oolbar, to create
or select t he recording m ontage. Under t he Recording Channels t ab, select t he size of t he card
in use t o see t he available recording tim e wit h t he m ontage select ed.
Once select ed, the m ontage appears on t he left of t he trace window.
10 I n the Trackit control panel dialog select the Set Recording but t on and click on Send Setup.
This downloads the recording set up t o the Trackit recorder in preparation for a recording.
11 View t he EEG prior to recording by select ing t he Ongoings On icon from t he Trackit t oolbar. You
can only view as m any t races as can be t ransferred across t he serial link at any one tim e – 12
or 16 channels depending on t he sam pling rate used for t he Mk1 and up to 40 for the Mk2.
To look at t he traces t hat are not displayed, click t he up and down arrow keys on the right
hand side of the t oolbar.
12 Perform an im pedance check. I f this is done aft er a recording has start ed,
an im pedance check event will be recorded. After viewing the im pedance values, cancel t he im -
pedance check.
13 Go back t o the Set Recording dialog t hat should still be open ( act ivat ed from the Trackit Control
Panel), and click on the St art but t on. The Trackit is now recording data to card.
14 Disconnect the RJ45 cable t o t he Trackit . Put t he recorder in the pouch wit h shoulder st rap pro-
vided.
At the end of the ambulat ory recording
15 Connect t he Trackit once again to t he RJ45 cable, and for Mk2 Tr ackit m ake sur e t hat t he
RJ45/ D9 Convert er is powered and connect ed t o t he PC.
16 Rest art the Trackit soft ware. Open the Trackit Cont rol Panel as previously described. Select t he
Set Recording but ton again.
17 Click on t he Record Off but t on. The recording now stops.
18 Det ach the Trackit. Open the rear door wit h the tool provided. Rem ove t he flash card.
19 I nsert t he flash card into t he PC card r eader at t ached t o t he PC. Com m ence review using an
EEG br owser.
N ot e : t here are two files on t he card; an EDF dat a file and an event file wit h the extension
* .tev. If the EEG browser does not support the reading of Trackit events, install Event it .exe
from the Trackit soft ware CD. This program allows the event log t o be reviewed separat ely
from the EEG review application.