24
Using the Main Menu
SYSTEM
Use the System menu to update system
firmware and set an automatic system reset
schedule.
To enable auto-reset:
1. Under AUTO RESET, select ON. The
Settings opti
on appears.
2. Under SETTINGS, select EVERY DAY,
EVERY WEEK
, or EVERY MONTH. The date
drop-down menu appears.
3. Select the date for auto-reset from the
drop-do
wn menu.
4. Enter the time for auto-reset using the
Virtual Ke
yboard (mouse only).
5. Click APPLY. Click CLOSE in the
c
onfirmation window
To restore factory settings:
1. Click FACTORY DEFAULT. This will r
estore
the system to the original factory settings.
2. Click SURE in the
prompt.
NOTE: Recorded video on the HDD will not be
erased.
To restart the machine (soft-reset):
1. Click RESTART.
2.
Click SURE in the prompt. The sys
tem will
perform a soft-reset and load to a live
split-screen view.
Upgrading Firmware
Your system will periodically need firmware
updates to ensure optimal performance. Visit
www.lorexcctv.com to check if upgrades are
available for your system.
To upgrade firmware:
1. Download the latest firmware update for
your system from www.lorexcctv.com
2. Copy the firmware file to an empty USB
flash driv
e. The firmware file should not be
in a folder.
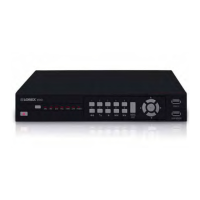
3. Connect the USB flash drive to the top USB
port on the fr
ont panel of your system.
4. Open the System Menu (Main
Menu
>Advance>System).
5. Click FIRMWARE UPDATE. Th
e system
will scan the USB flash drive and begin
updating the firmware. Do not remove the
USB flash drive while the upgrade is
taking place.
6. Click CLOSE in th
e confirmation window.
In the system prompt, click SURE. The
system will restart.
Figure 19.1 Firmware upgrade progress

 Loading...