LUMIPro 2017
20
e Sit Ball
LUMIPro instituted the Sit Ball back in version 3.1, and it was a revolution for in-world photographers and models. No longer tied to the tyranny of the pose ball, LUMIPro users could
place their models anywhere, and position them freely. With the addition of the Sit Ball controller in LUMIPro 2016, photographers can now control the Sit Ball right from the HUD! No
more losing the shot because you had to cam out to nd and adjust the Sit Ball. Here’s how to control it from the HUD:
When selected from the REZ menu, a Sit Ball appears 2.5 meters in front of you, and adjusted to the height of the currently selected model. You can then use either Edit
mode or use the touch method to move the sit ball into position. To adjust the position of the Sit Ball, do the following:
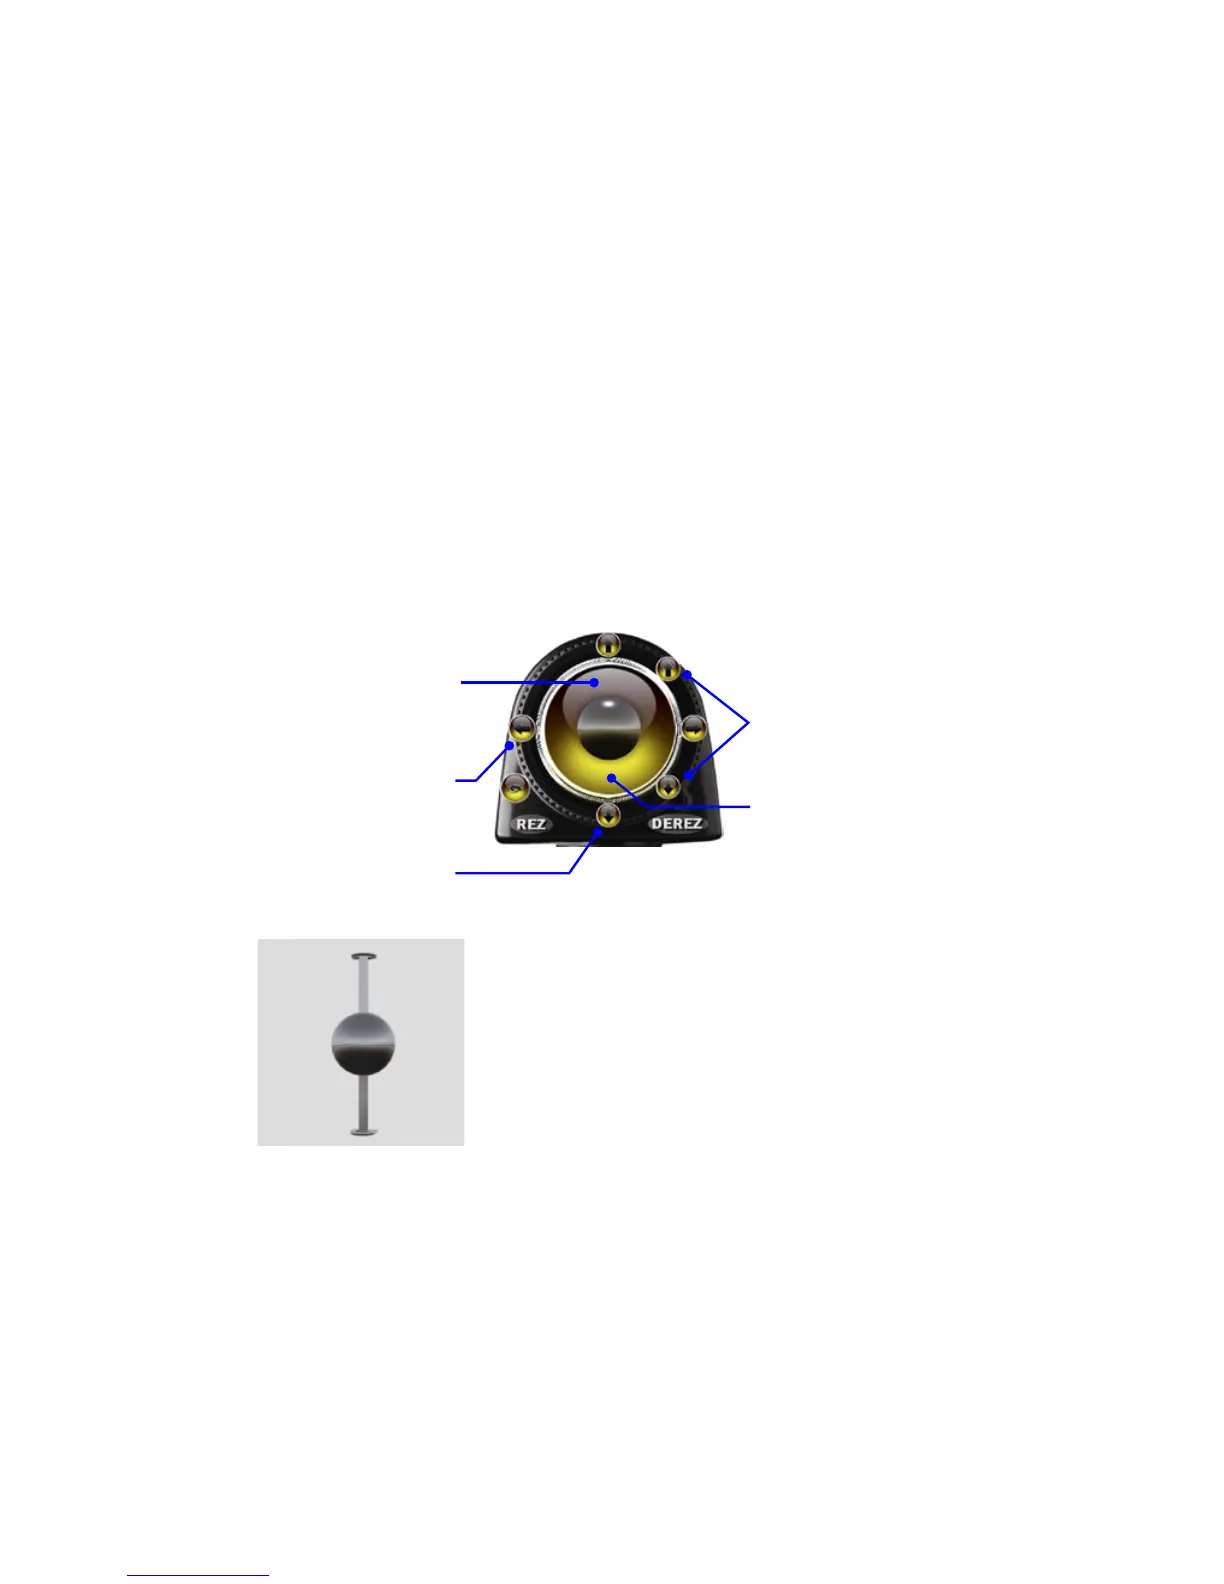
Use the arrow buttons at 3:00 and 9:00 to
rotate the Sit Ball around the Z axis, spinning
them in a circle right where they’re sitting.
Clicking anywhere from the center of the
Joystick area up towards the arrow button
at 12:00 position will move the Sit Ball in
an arc up and over the photographer’s head.
Clicking from the center down will move
the Sit Ball in an arc downwards.
Use the Side Arrows to move the Sit Ball
towards or away from you. Note that the
direction the Sit Ball will move is relative to
the Sit Ball itself, not the photographer. In
practical terms, this means that sometimes
a Side Arrow will move the Sit Ball towards
the photographer, and sometimes it will
move away from the photographer.
Clicking anywhere inside the Joystick area will move the sitball that direc-
tion—up/le, up/right, bottom/le, or bottom/right. Also, the closer to
the center you click, the ner the adjustments in position you’ll make.
Use the arrow buttons at 12:00 and 6:00 to
move the Sit Ball vertically, up and down
along the Z axis
Clicking from the center out towards the 3:00
or 9:00 arrow buttons will rotate the Sit Ball
in a outward spiral around the photographer.
e Sit Ball