LUMIPro 2017
27
Scene Presets—Restoring
NEW!
Restoring Presets
Once you’ve stored one or more presets, they’re available for recall at any time. You do this by following
the same 1-2-3 steps you took when saving your preset:
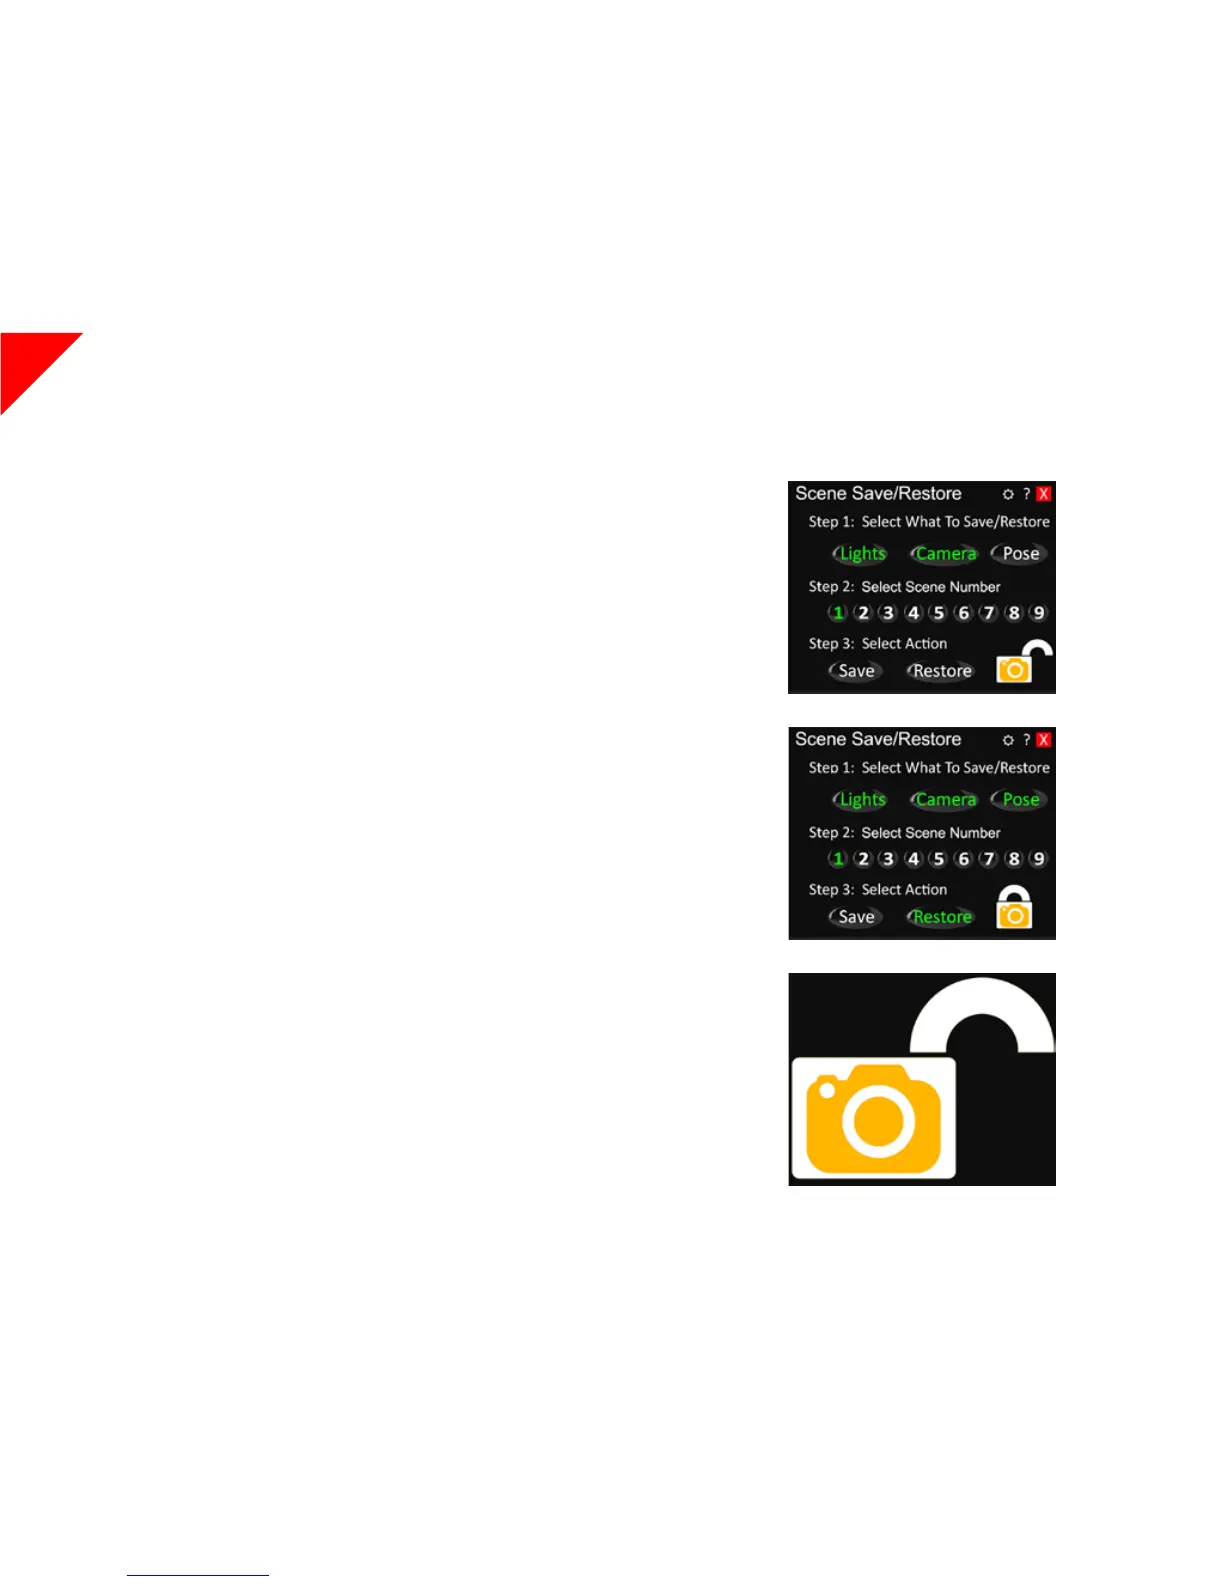
Step 1: Select What To Save/Restore
Because LUMIPro 2017 stores each component of a scene separately, you can choose to restore any or
all functions. If you loved the lights and camera from Scene 1 and the pose from Scene 2, you can re-
store just those components from Scene 1, then add just the pose from Scene 2. TIP: you might want to
then save that combination to an open scene, or overwrite an existing scene. In the example to the right,
the Lights and Camera functions from Scene 1 have been selected.
Step 2: Select Scene Number
If the currently selected scene is not the one you wish to restore, click the desired Scene Number. Re-
member, a scene with a green label has information stored, and a red label is empty.
e Lock Button
When you restore a camera setting, LUMIPro 2017 restores the position of your camera, and locks it
into place. You can still move your camera around freely, but when you press the Escape key—which
normally restores your camera to the default position behind your avatar—it restores to the stored cam-
era position; in essence, it replaces your default camera position, for as long as the Lock button remains
in the locked position. It might seem odd the rst time you do it, but try it out before your next shoot,
and you nd it intuitive enough, and very useful.
ere are a couple things to be aware of when restoring camera positions, the rst being that there’s a
limit to how far you can move from your original position before LUMIPro needs to make some adjust-
ments. If you’re within 2 meters of your position when you initially saved the camera, it will use the sim
coordinates to position itself. At 2 meters, the camera position will be relative to the currently selected
model instead (which may require some minor adjustments) At 20m from the original saved position,
the camera will not restore. at may seem like a lot to remember (and measure), but despair not, we’ve
got your back, with the Scene Options menu!
Step 3: Select Action
Click the Restore button, and the parts of the scene you’ve selected in Step 1 will be recalled. Once
you’ve done that, you will notice a couple changes: the rst is basic: the Restore button label will turn
green, letting you know the restore was successful. However, if you’ve restored the Camera setting,
you’ll notice the Lock icon has slid to the Locked position.
Ready to Restore Preset 1
Preset 1 Restored
Click to unlock the Camera and restore
freedom of movement!