LUMIPro 2017
1
Quick Start Tutorial—Part I
is Quick Start Tutorial will have you up and running with LUMIPro 2017 as quick as can be! We’ll cover it in 4 basic steps: selecting and preparing a model, posing and lighting them,
preparing and taking a photo, and nally, storing your session. Even if you’ve used LUMIPro before, you might nd this useful for learning some of the new layouts and features as well.
You can learn this by yourself, but to get the most out of this tutorial, invite a friend over. You will learn how to manage models, and have fun in the process! Note: this tutorial is designed
to get you started with using LUMIPro to take photos. ere’s much more under the hood, and the manual covers it all—and then some. Do yourself a favor and check it out! Before you
get started with LUMIPro, try this: take a reference photo of your model without using LUMIPro. Take the picture from the torso up, and the model looking over your le shoulder. We’ll
be duplicating that shot further into the tutorial, so save it for now, and we’ll compare later. You’ll be amazed at the dramatic dierence LUMIPro will make to your photography.
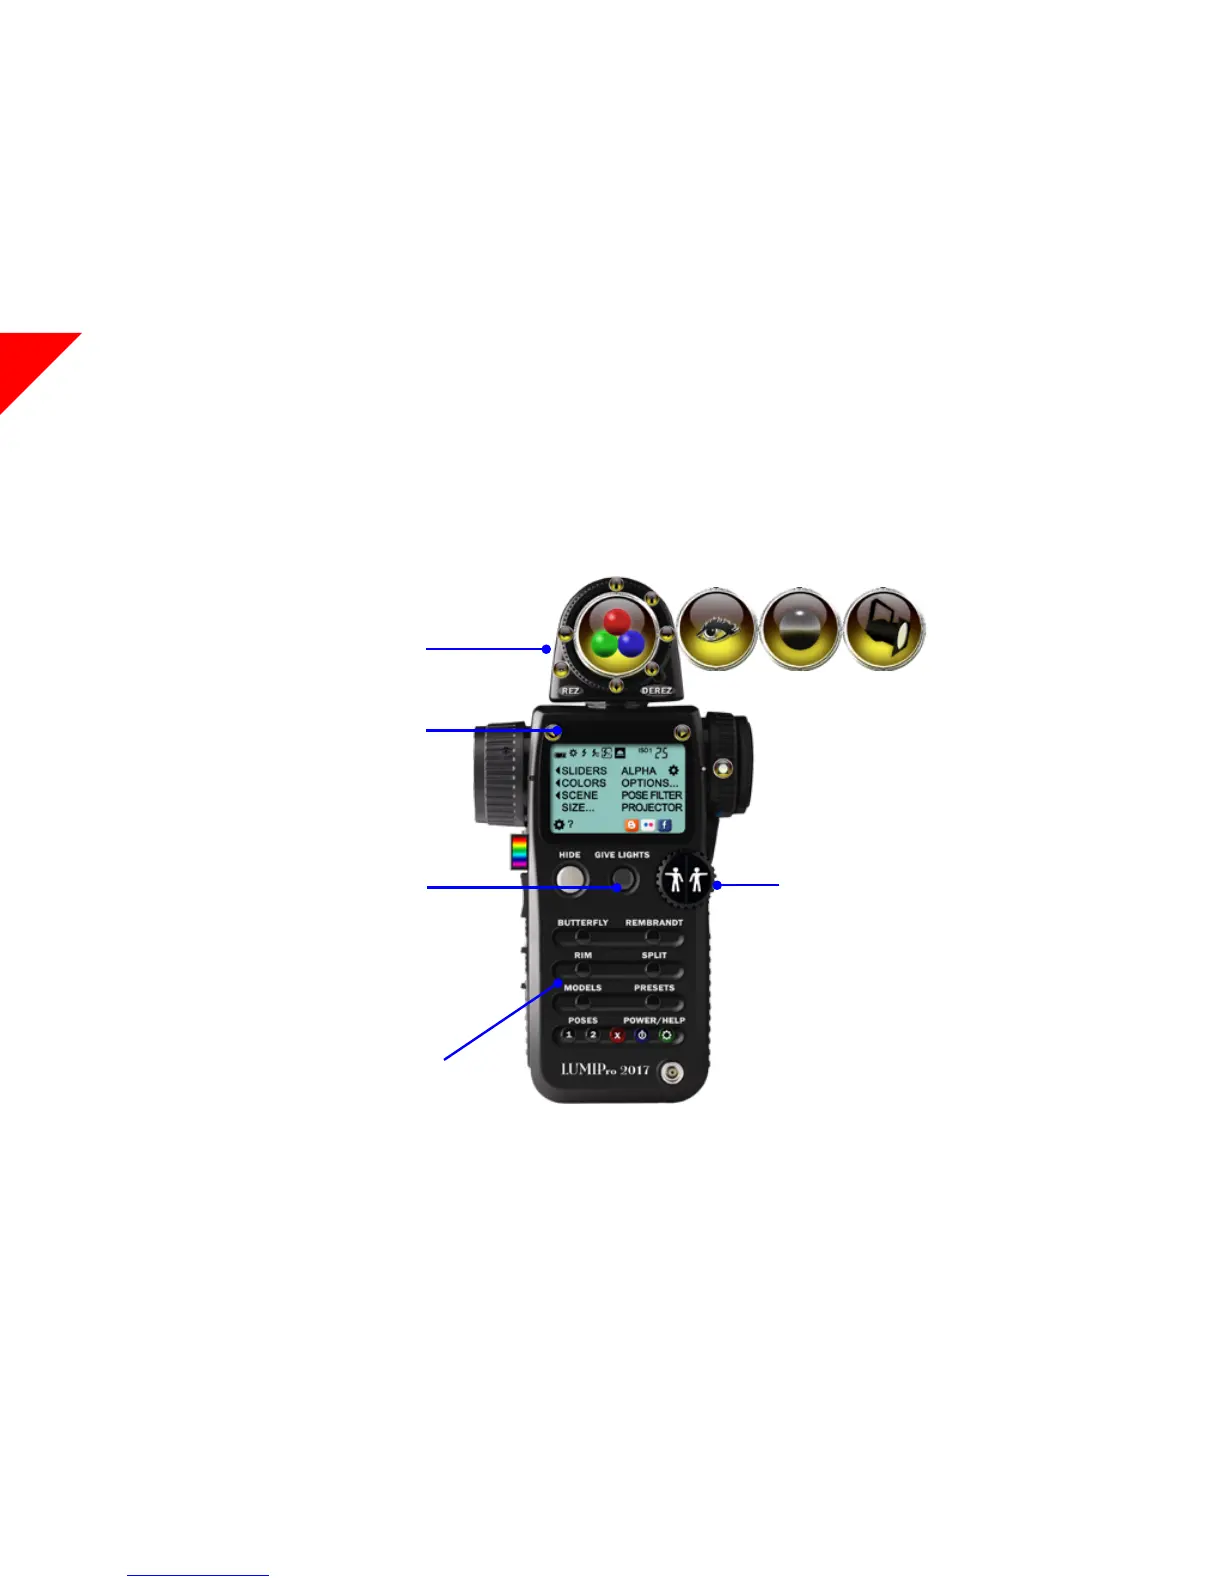
Step 1. At top of the HUD sits the Toolbox. Click on the
Flipper button to toggle between Toolbox modes. Shown is
the Light Controll, Eye Gazer, Sit Ball, then the Projector.
When you’re ready, make sure the Sit Ball is showing in the
Joystick area
Step 2. Assign a model. In yellow, you’ll see your name be-
tween two arrows. is is the model the HUD will control.
Click on your name, and select your friend from the menu.
Step 3. Give them lights. Click the GIVE LIGHTS button,
and LUMIPro 2017 will deliver a set of wearable lights and
a projector directly to the chosen model. It will be at the
top level of their Inventory folder, named “LUMIPro Talent:
Right-click ADD this folder.” Have them wear just the lights,
and then tell them to approve the control requests they’ll get.
Step 4. Light them up! Select a sky preset that’s not too
bright. You’ll get a better idea of what the lights are doing if
you’re not competing with the sun! Now that your model is
adorned in colorful light balls, click on the button labeled
“BUTTERFLY.” is is a nice, basic preset that will light
your model evenly, and add a little dimension as well. Try all
four of the presets—BUTTERFLY, REMBRANDT, RIM, and
SPLIT, and see the dierences among them. When you’re
done experimenting, return to the BUTTERFLY preset.
Step 5. Pose your model. Straight out of the box, LUMIPro
2017 comes with a set of professionally-craed poses from
some great SL posemakers. When you click on the Wheelies,
you step through each of them in turn. Click Right Wheelie
to move the next pose, and Le Wheelie to move to the last
pose. Try them out, and nd a pose that you like. Try not to
embarrass your model too much, as tempting as it might be.
Congratulations, you’re on your way to learning LUMIPro!
Now you know how to select your model, give them lights,
turn them on (the lights, that is), and how to pose your
model. Next, you’ll learn how to use the Sit Ball and the
HUD to position your model. Let’s continue.
Your Name Here
NEW!