LUMIPro 2017
25
Sliders and Colors
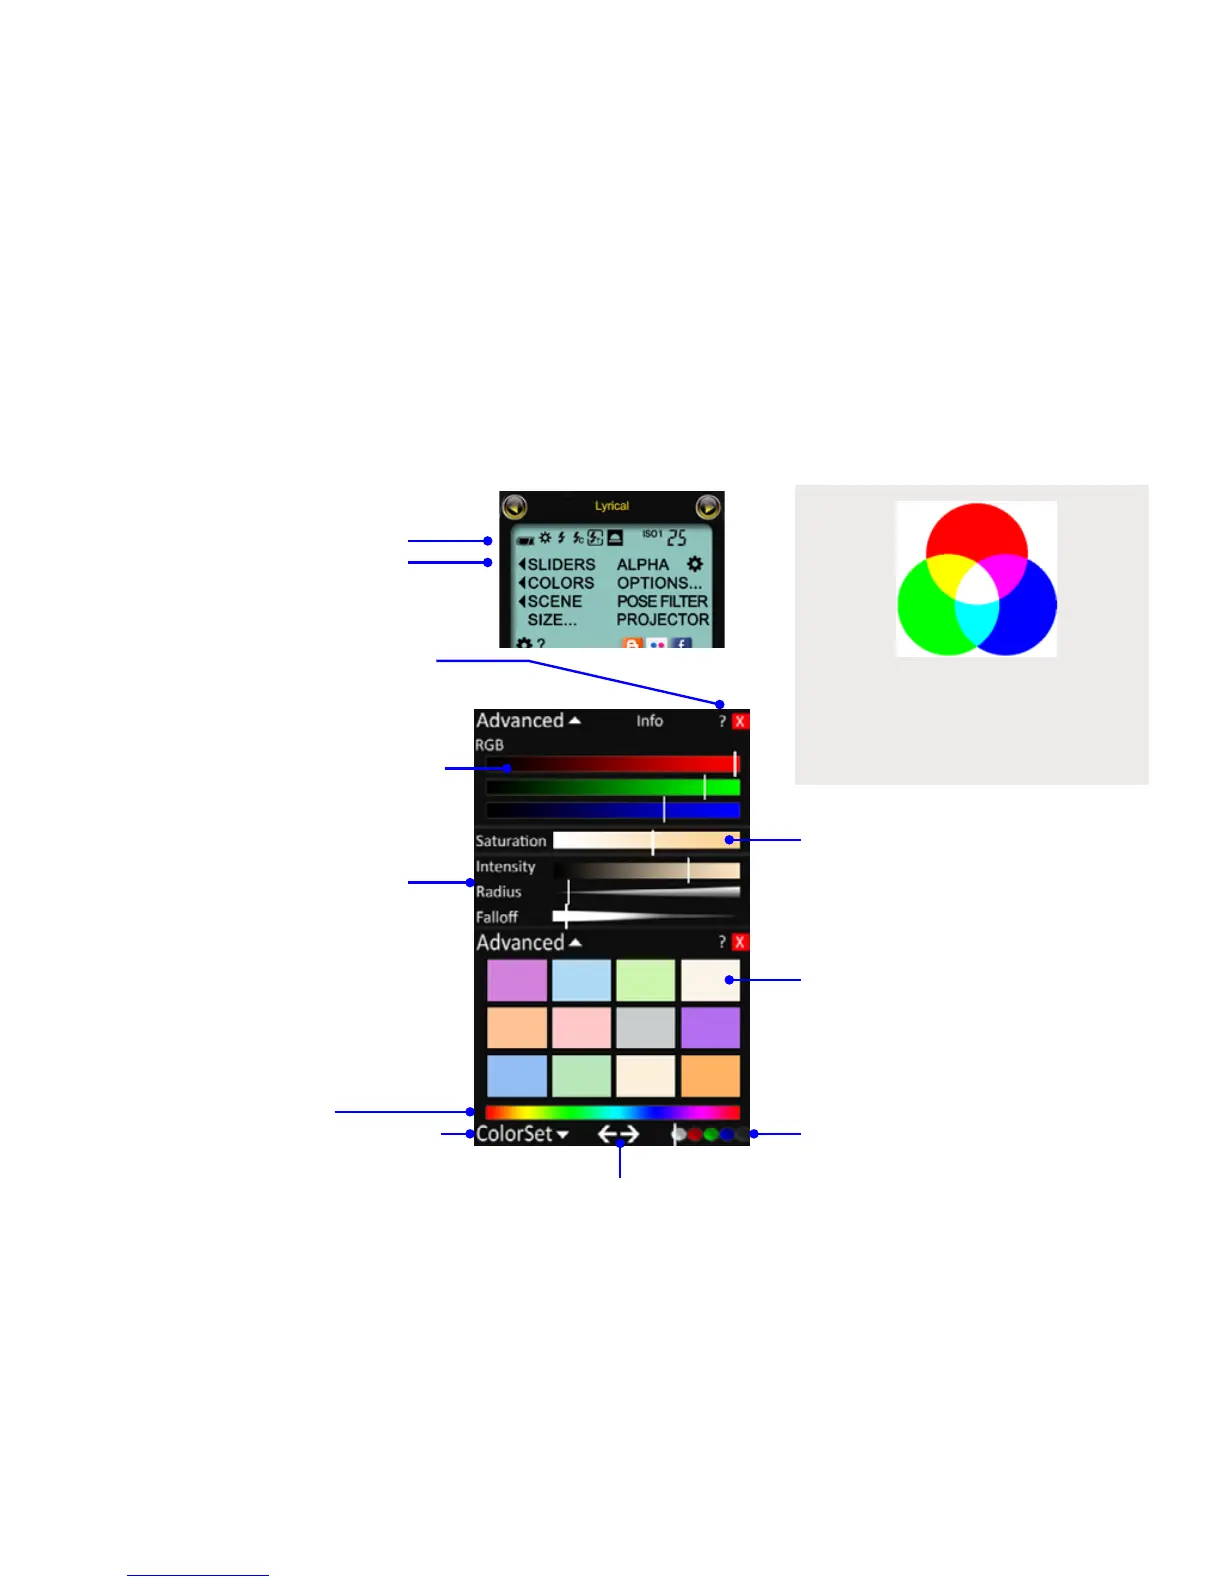
In the original versions of LUMIPro, light levels, saturation, and other variables were set using buttons and menus (see Page 15, Panel 2 for details). Starting with LUMIPro 3.4, slider pan-
els were added that lets you use intuitive slide controls to set the levels for Color, Intensity, Radius, Fallo, and Alpha (transparency) of your lights rezzables. We also feature a full selec-
tion of color palettes based on the Lee catalog (click here to see them all).
To access the Sliders panel, click on < Sliders in the Panel 1 of the
LCD control panel of the HUD. e panel below—including the
Slider panel and the Color panel—will pop out to the le
of the LUMIPro 2017 HUD. Clicking on <Colors will
pop out just the Color panel.
e Saturation strip will show you the color you’ve mixed
with the RGB sliders. Full saturation is the pure color
you’ve mixed. As you lower the saturation, that color is
diluted with white until there’s no color le. For example,
if you mix a rich blue, then lower the saturation, it may
give you something very much like moonlight.
e white, red, green, blue, and black buttons at the bot-
tom indicate which light you’re modifying; the white bar
shows you the active light: the white button is all lights;
the red, green, and blue buttons are the red, green, and
blue balls, respectively, and the black button is all un-
locked projectors. Use this control in conjuction with the
Joystick to determine which light will be controlled from
the HUD.
e Color Palette gives you a full range of color swatches
that have been designed with professional lighting in mind.
e initial card is a useful set of basic colors but more are
accessible a couple dierent ways:
Arrow Buttons move back and forth between swatches.
e ColorSet menu lets you pick from various sets for each of
the basic colors: Blues, Reds, Yellows, Oranges, Violets, Greens,
Neutrals (gray) and legacy colors from before LUMIPro 3.4.
e Rainbow Strip lets you grab a fully-saturated color with just
a click on the color of your desire. You can then use the various
sliders above to ne-tune your light output.
e Intensity, Radius, and Fallo sliders show you visually these
settings. Click here to see more details on these settings.
In many places on the LUMIPro HUD you will see a “?” sym-
bol; click that to nd context-sensitive help delivered right to
your inventory.
When the panel opens the RGB sliders will be set to the exist-
ing light’s color, as marked by the vertical white marks. Click
each color strip to raise or lower the level of that color. Refer to
the example to the right for mixing light colors. All three colors
together make white when mixed equally at full strength, black
when set to 0, and shades of gray for everything in between.
When you add one light to another, the resulting light is
always brighter. Mixing red light and green light create a
yellow light. Green + blue makes cyan, while blue + red
make magenta. Add all the lights together at full intensity,
and you get white light.
Mixing Light