LUMIPro 2017
26
Scene Presets—Saving
e Scene Save/Restore system lets you save up to 9 scenes including your lighting positions, the pose used, eye positions, and the position of the camera too. No other HUD does all this,
and looks so good doing it. ere are a lot of features here, so pay special attention to this section: it’s got lots of great information that will make these new capabilities indispensable!
NEW!
ere are three factors that all shoots have in common—from the old Daguerreotypes to today’s high-speed
digital lm—and there’s an iconic phrase to dene it: “Lights, camera, action!” LUMIPro 2017 gets in on
that action with the new Preset Save/Restore panel. Here’s how to use it:
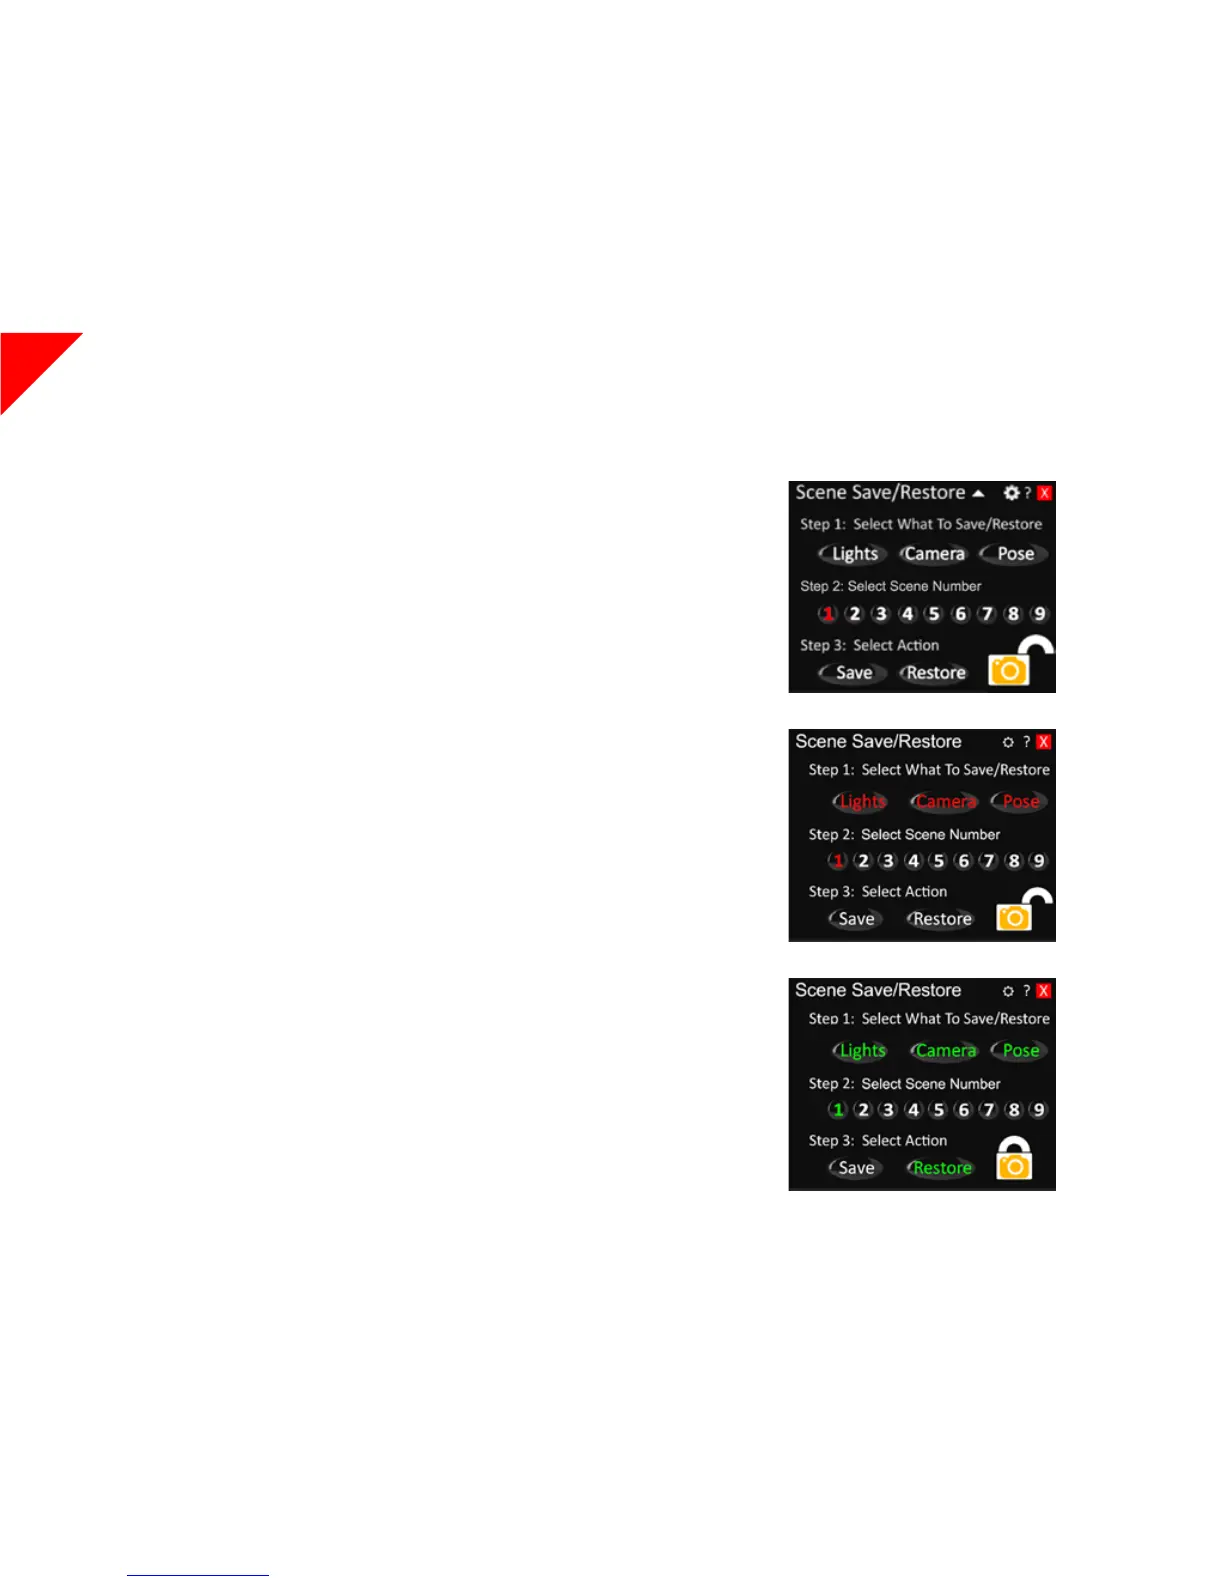
Step 1: Select What To Save/Restore
You have three options: Lights, Camera, and/or Pose. Each button enables saving that part of the scene.
Storing Scenes
Step 2: Select Scene Number
By default, Preset Number 1 is selected. Once you’ve selected a Preset Number, that number will be
selected when you open the Scenes Panel next time. If the button label is red, that preset is empty and
ready to be used. If the button label is green, something is stored in that preset. You can still write over
it, but you may want to verify that it’s not a preset you care about losing.
When you rst open the Scenes panel, these buttons are white, indicating that nothing has been se-
lected for saving. You can select any combination of functions to save, giving you lots of exibility. For
example, you could click on just the Lights button, or you could opt to store only the Camera, if you’re
doing a product shot, and have 2 or 3 dierent camera angles—front view, back view, closeup, for exam-
ple—but don’t want to change either the lighting or the pose. Similarly, you might want to store dier-
ent camera and pose combinations while keeping complete control of the lighting. As you select each
function you want to save, the label will turn red. Buttons with white labels will not be stored.
Lights will store the light positions for all three light balls in addition to all the slider values: col-
or, intensity, saturation, radius, and fallo.
Camera will save the position of the camera with relation to the model. Note that due to SL lim-
itations, when using this in conjunction with Depth of Field settings you may need to do some minor
adjustments to re-focus the camera.
Pose, as the name suggests, will save the pose the model currently has loaded as well as the eye
position you may have set.
Step 1: Lights, Camera, & Pose Ready for selection
Step 2: Lights, Camera, Action, & Preset 1 Selected
Step 3: Select Action
Once you’re selected what to save and where to save it, there’s only one thing le to do: Save! When you
click the Save button, the activated text labels will turn green, indicating a successful save. When you
back up your HUD to the server all your preset information will be saved as well, so whether you wear
the HUD again tomorrow, next week, or even next year, all your scenes are ready to go!
Step 3: Preset 1 Saved