LUMIPro 2017
31
Managing Poses - Adding Poses
Starting From Scratch
When you receive LUMIPro 2017, it comes stued with over 180 poses from some of Second Life’s most talented pose makers. It’s an incredible value, and if you’re starting from scratch,
it’s a great way to begin. However, most seasoned photographers will have hundreds, if not thousands of poses they’ve bought, been given, or have made, and up until now, accessing them
has been cumbersome at best. With LUMIPro 2017, the number of poses you can add to a HUD is technically unlimited, so the photographer’s life just got a whole lot simpler. In the next
couple pages, we’ll show you how to load, manage, save, and restore all your poses eciently.
e very rst thing you want to do when getting LUMIPro 2017 is make a backup copy. If you haven’t already done so, take a moment and do that now. We’ll wait. Done? Great! e
next thing we want to do is create an empty HUD. In your inventory, double-click the HUD you copied. is will attach the HUD to the right side of your screen, in the optimal posi-
tion. With the HUD attached, follow these next steps:
When you want to load a new HUD with animations, follow the same procedure outlined above, only now you simply need to move a copy of
the empty HUD you created in steps 1 to 3 onto the ground. Next, we’ll cover how to catalog the poses you’ve loaded into LUMIPro 2017.
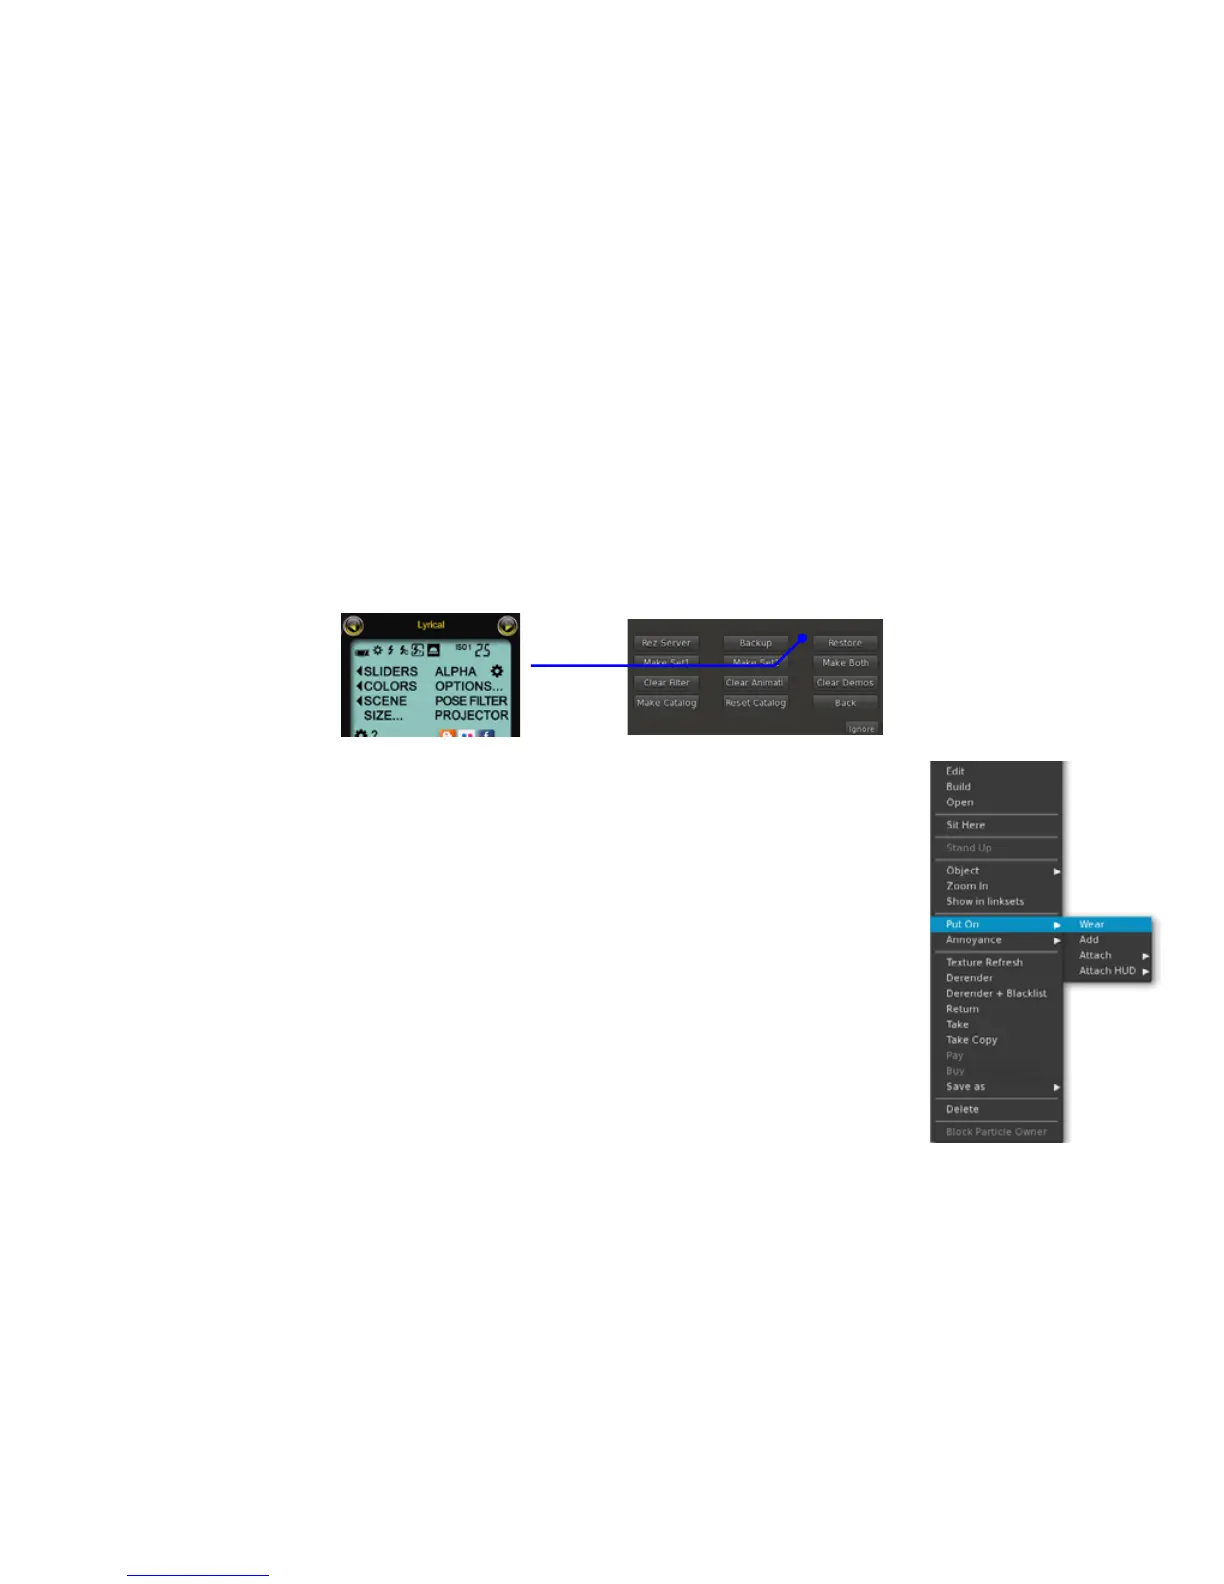
1. Click on Options... in the LCD Control Panel, then click on Clear Demos
2. Right-click on the LUMIPro 2017 HUD, and select Drop from the menu. is will place it on the ground in front of you.
3. Right-click on the dropped HUD, and select Take Copy from the menu. is will take a pristine, empty version into inventory for later
use.
4. With the HUD that’s still on the ground, right click on it and select Open from the menu
5. From your inventory, open the folder that contains your poses (usually the Animations folder), and select the poses you want to move
into the HUD. Some ideas and notes:
• Creator-based: move all poses from one maker into one HUD; a Purple Poses HUD, a Del May HUD, etc.
• Position-based: move all poses of one type into its own HUD: a Standing HUD; a Laying HUD, Dances, etc.
• Gender-based: all male poses in one HUD, and all female poses in other HUDs.
• You cannot add poseballs into the HUD, only individual animation les.
• While not a xed limit, you can add a massive number of poses to any one HUD. We’ve successfully tested over 1000 poses!
6. Copy the animations into the HUD. It’s best to purchase (or make) only animations that have copy perms; when you back up to a server,
no-copy poses are moved out of the HUD and into the backup server. Note: because of a quirk with LL, there can be issues with moving
large numbers of poses into the HUD at once: some poses may be skipped. We recommend moving no more than 10-20 poses at a time.
7. When you’re done loading poses, click on the Object tab, name your HUD.
8. Right-click on the HUD, and from the menu, select Put On > Wear. is will return your HUD to its default position on your screen,
ready for the next step in managing your poses.