LUMIPro 2017
33
Backing Up and Restoring
Restoring
Backing Up Presets
Backing Up Your HUD
Once you’ve got your HUD loaded and ready, the very next thing you should do is create a backup! is will not only save your bacon if SL eats your HUD, it will also help you keep your
inventory under control—your backup will store all your poses in one place, so they won’t need to rattle around in folders. Don’t delete the original boxes the poses came in...they’re still
useful in case of emergency, but the individual animations are all stored in your HUD now. Backing up is fast, easy, and like oatmeal, “it’s the right thing to do.” Here’s how:
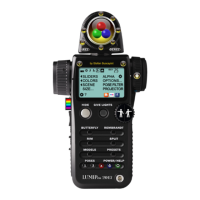
1. Click on Options... in the LCD Control Panel, then in the Options menu, click on Rez Server. is will rez a new, empty backup server about 3 meters in front of you. You
can also do this by clicking on the REZ button by the Joystick.
2. Right-click on the newly-rezzed server, choose Edit from the menu, and in the General tab change the name to something descriptive. Close the Edit window.
3. In the Options menu, click on Backup, and the backup process will begin. Status text will appear above the server and monitor the progress. When nished, take the server
back into your inventory.
Restoring the full HUD is just as easy. Locate the desired backup server in your inventory, and double-click on it. e camera will be attached to your right hand, ready to
go. Note that you can also rez it on the ground, or attach it to any other body part. Once attached, you have a couple ways to initiate the Restore cycle. e rst is to click
Options..., then click on Restore button in the Options menu shown above. e second way is to click on the Camera/server directly, then select Restore from the menu that
appears. e server will replace the contents of your HUD with the contents of the server, so make sure you’re restoring the right server into the right HUD
Note: do not rez or wear more than one server at a time. If you back up, it will back up to all servers at once!
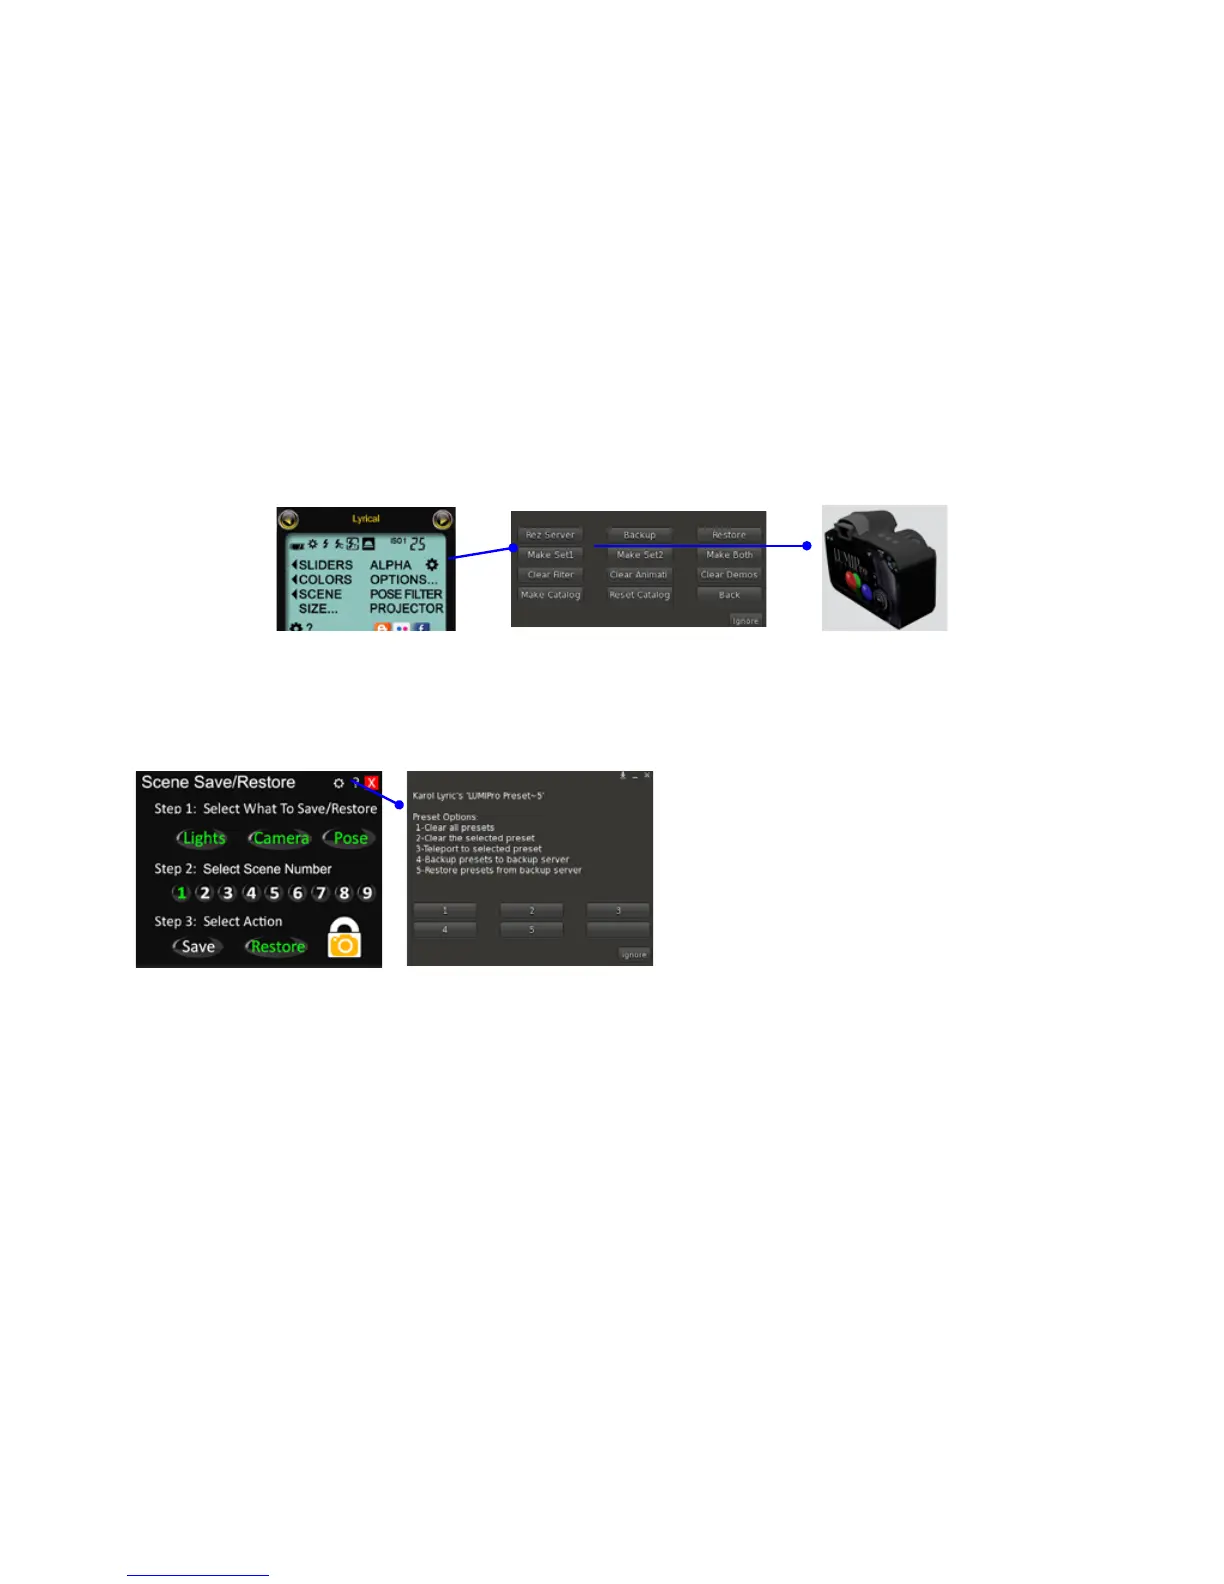
When you back up your HUD, you backup everything: lights, poses,
presets, the works. You can also backup just the 9 Preset Save/Restore
scenes. Rez a server as described above, and then click on < Presets in
the LCD Control Panel to open the Preset Save/Restore panel.
Click the gear icon to open the Preset Menu at le. Click on Button 4 to
initiate the backup of each scene including light information and posi-
tion, camera position, and the pose used for that preset.
To restore the presets, double-click to wear the server, then from the
Preset Options Menu click Button 5.
Backup Server