MAINTENANCE/SERVICE
RECOMMENDED
LUBRICANTS
GREASE
Use an SAE Multi·Purpose High Temperature Grease with Extreme Pressure (EP) Petfonnance and
containing at least
1.5% molybdenum disulphide.
Also
acceptable is
an
SAE
Multi-Purpose lithium
Base
Grease.
WOBBlE
BOX
LUBRICANT
In
siclde
drive wobble
box,
use
SAE
85W·140
gear lubricant
(API
Service Classification
GL-S)
CAPAanES:
Wobble
Box·
000
mL
(1.0
U.S.
quart)
STORING
AND
HANDUNG
LUBRICANTS
Your machine can operate
at
top efficiency only
if
clean
lubricants
are
used.
Contaminant in lubricants
is the most likely cause
of
bearing and hydraulic system failure. Use clean containers
to
handle all
lubricants.
Store
lubricants
In
an
area
protected
from
dust,
moisture
and
other
contaminants.
Keep
hydraulic couplers and connectors clean.
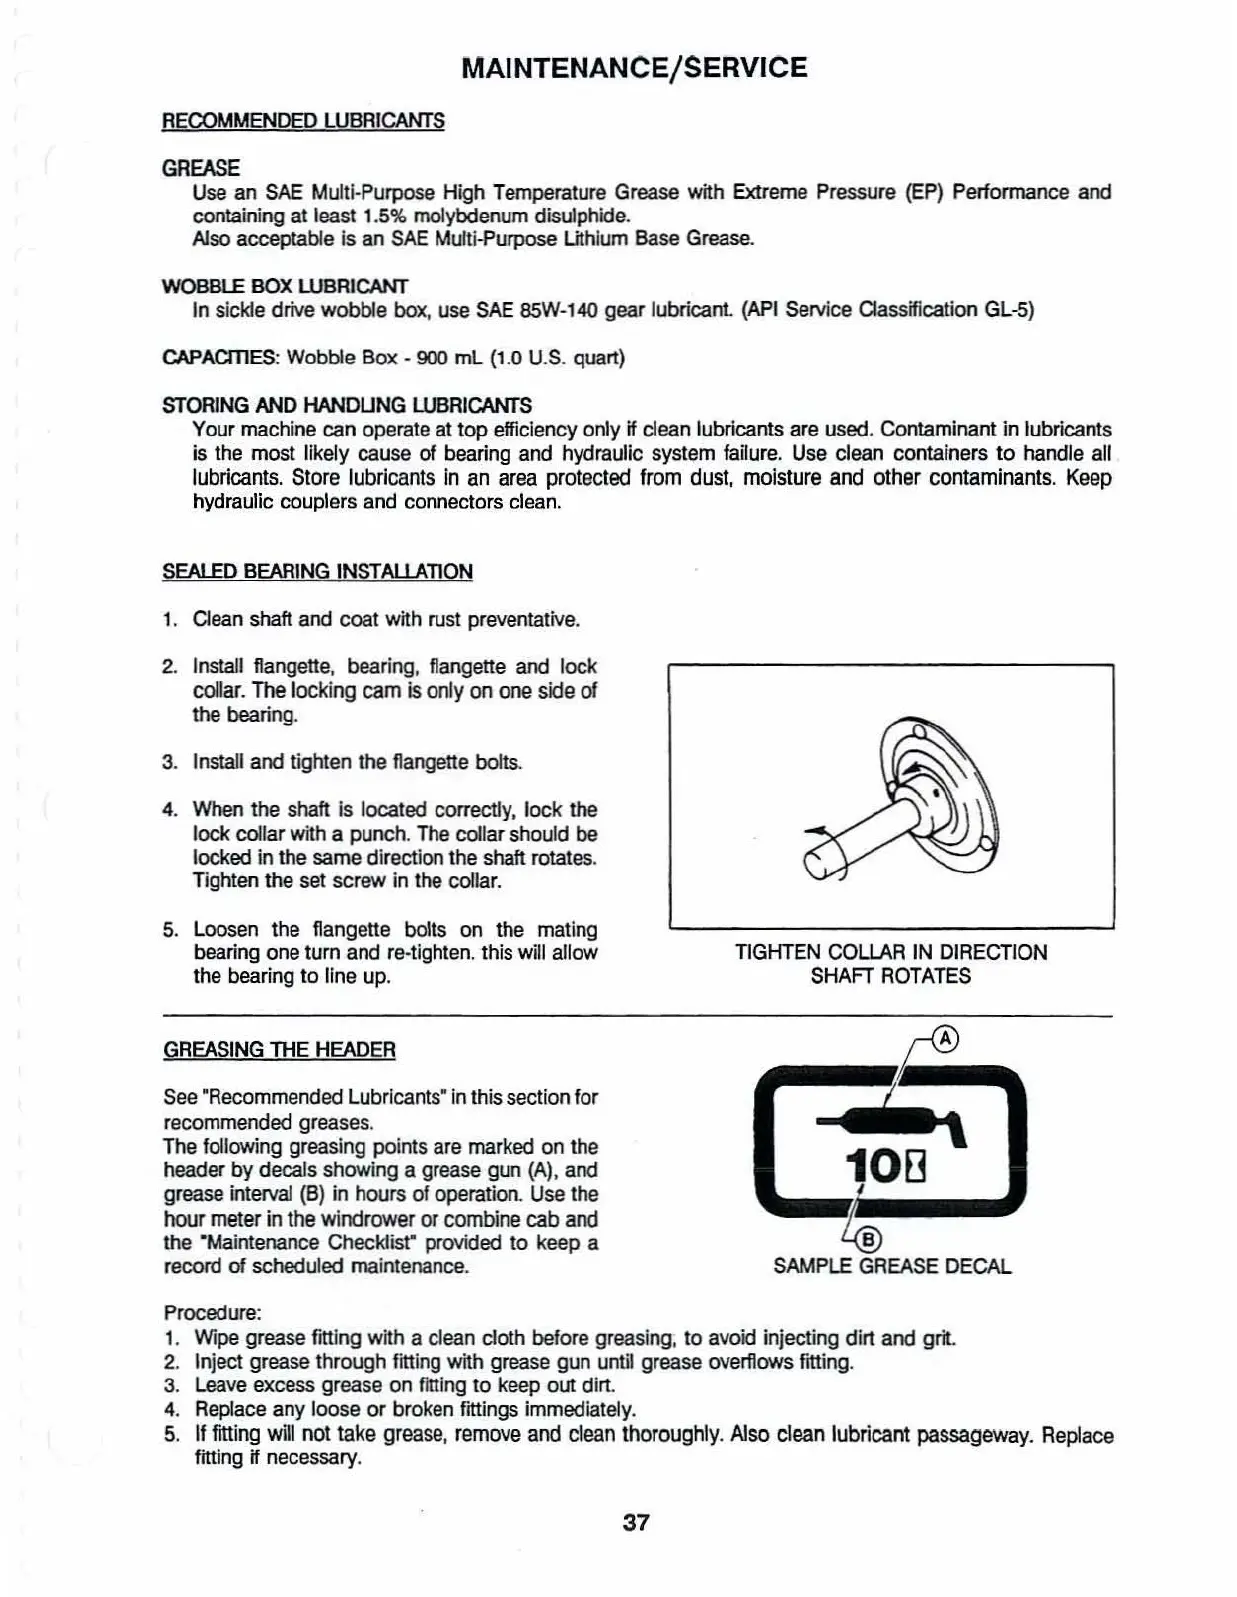
SEALED
BEARING
INSTALLATION
1.
Clean shaft and
coat
with
rust preventative.
2.
Install
f1angette.
bearing, flangette and lock
collar.
The
locking
cam
is
only
on
one
side
of
the
bearing.
3.
Install and tighten the flangene bolts.
4.
When
the shaft
Is
located correctly, lock the
lock collar with a punch. The
cotlar should be
locked in the same direction the shaft rotates.
Tighten
the set screw in the collar.
5.
Loosen the flangene bolts on the mating
bearing one turn and re-tighten. this will allow
the bearing to line up.
GREASING
THE
HEADER
See
"Recommended LubrIcants"
In
this section for
recommended greases.
The following greasing points are marked on the
header by decals showing a grease gun (A), and
grease interval
(B)
in hours of operation. Use the
hour meter in the
wioorower or combine cab and
the "Maintenance Checklist" provided
to
keep a
record
of
scheduled maintenance.
TIGKTEN
COLLAR
IN
DIRECTION
SHAFT
ROTATES
B
SAMPLE
GREASE
DECAL
Procedure:
1.
Wipe grease rmlng with a clean cloth before greasing,
to
avoid injecting dirt and
grit
2.
Inject grease through rmlng with grease gun
unt~
grease overflows fming.
3.
Leave excess grease on fitting
to
keep out dirt.
4.
Replace any loose
or
broken rmings immediately.
5.
If fining
wm
not take grease, remove and clean thoroughly. Also clean lubricant passageway. Replace
fitting
if
necessary.
37