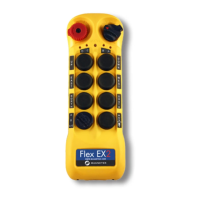
Page 19
6.6 Program Transmitter Inactivity Timer (TX)
1) Make sure the I-Chip is connected to the programmer.
2) Press “→” button to enter Transmitting Timer setting.
3) Press “↑” and “↓” button to select between “__M__S” and “ON”. “__M__S”
represents Minutes and Seconds and “ON” represents constant ON.
4) When “__M__S” is selected, press “→” button to go to the 1
st
digit on the
far left and press “↑” and “↓” button to change numeric value (number
0~6). Then press “→” button to go to the next digit and press “↑” and “↓”
button to change numeric value (number 0~9). The first 2 digits are the
Minutes value (M). Repeat the same process for the Seconds value (S).
5) Press “→” button to select START button or ANY button activation after
transmitter timeout or after transmitter inactivity.
6) Press “↑” and “↓” button to select.
7) Press BACK button to go back to step 3 or 4.
8) Exit Program Transmitter Timer by pressing the “BACK” button until the
cursor is shown next to “TX TIMER”.
9) Press “↑” and “↓” button to scroll through other Flex 2JX settings.
Transmitter inactivity timer is for setting receiver main relays cutoff time when the transmitter
is not in operation for a certain period of time. When set to 5 minutes (05M00S), the receiver
main relays are deactivated at 5.0 minutes after last transmitter operation.
Select “ON” means the receiver main relays are activated at all time unless the e-stop button
is pressed down, receiver power turned off, or when the transmitter power is switched off
(inactivity time disabled).
Select “+START” means after 5 minutes of transmitter inactivity you must press the green
START button to continue operation. Select “+ANY” means after 5 minutes of transmitter
inactivity operate the joysticks or buttons (not switches) to continue operation.
6.7 Program Transmitter RF Power (TX)
1) Make sure the I-Chip is connected to the programmer.
2) Press “→” button to enter RF Power setting.
3) Press “↑” and “↓” button to change RF power (0.1mW ~ 10mW).
4) Exit Program RF Power by pressing the “BACK” button until the cursor is
shown next to “RFpower”.
5) Press “↑” and “↓” button to scroll through other Flex 2JX settings.
6.8 Program Infrared (IR) Modes (TX)
1) Make sure the I-Chip is connected to the programmer.
2) Press “→” button to enter Infrared Mode setting.
3) Press “↑” and “↓” button to scroll and select.
Select “OFF” to disable infrared function.
Select “IRS” to enable infrared START function.
Select “IRL” to enable infrared range limiting function.
4) Exit Program IR Mode by pressing the “BACK” button until the cursor is
shown next to “IR Mode”.
5) Press “↑” and “↓” button to scroll through other Flex 2JX settings.