Page 55
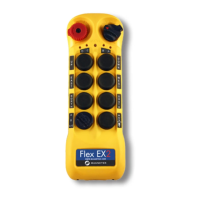
9.14 Program Function Relay 2 / K22 Relay (RX)
1) Make sure the I-Chip is connected to the programmer.
2) Press “→” button to enter Function Relay 1 setting.
3) Press “↑” and “↓” button to scroll and select.
4) Exit Program Function Relay 1 by pressing the “BACK” button until the
cursor is shown next to “FUNC RLY1”.
5) Press “↑” and “↓” button to scroll through other Flex EP-H settings.
LV : Function relay closes when receiver voltage is low.
ID : Function relay works simultaneously with all motion commands.
NORMAL : START function + AUX with normal momentary output.
TOGGLE : START function + AUX with toggled/latching output.
TOG&E : START function + AUX with toggled/latching output. The relay opens when
STOP button is pressed down and transmitter power off.
EXT : FUNCTION relay works simultaneously with the receiver MAIN relays.
S/P : FUNCTION relay closes when Start command is initiated and opens only when
transmitter power is turned off.
HORN : FUNCTION relay closes for up to 3 seconds when Start command is initiated at
transmitter power on and then becomes normal momentary outputs thereafter.
G SENSOR : FUNCTION relay closes when Zero-G sensor is triggered (receiver MAIN
relays deactivated) and opens when receiver MAIN relays are reactivated.
9.15 Program ID1 Outputs (RX)
Set ID1 output type when Function Relay 1 is set to “ID”.
1) Make sure the I-Chip is connected to the programmer.
2) Press “→” button to enter ID1 Output setting.
3) Press “→” button again then “↑” and “↓” button to scroll and select “Digital”,
“Current”, Voltage or “PWM”.
4) Press “BACK” button and then “↑” and “↓” button to select values for “Current”,
“Voltage”, and “PWM” settings.
5) Press “→” button to enter setting and “↑” and “↓” button to select numeric
value for the digit to the far left. Press “→” button to go to the next digit and
press “↑” and “↓” button to select.
6) Press “BACK” button to go back to step 5.
7) Exit Program ID1 Output by pressing the “BACK” button until the cursor is
shown next to “ID1 OUT”.
8) Press “↑” and “↓” button to scroll through other Flex EP-H settings.