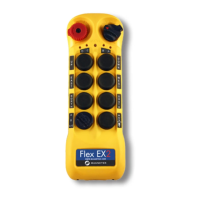
Page 56
9.16 Program ID2 Outputs (RX)
Set ID2 output type when Function Relay 2 is set to “ID”.
1) Make sure the I-Chip is connected to the programmer.
2) Press “→” button to enter ID2 Output setting.
3) Press “→” button again then “↑” and “↓” button to scroll and select “Digital”,
“Current”, Voltage or “PWM”.
4) Press “BACK” button and then “↑” and “↓” button to select values for “Current”,
“Voltage”, and “PWM” settings.
5) Press “→” button to enter setting and “↑” and “↓” button to select numeric
value for the digit to the far left. Press “→” button to go to the next digit and
press “↑” and “↓” button to select.
6) Press “BACK” button to go back to step 5.
7) Exit Program ID2 Output by pressing the “BACK” button until the cursor is
shown next to “ID2 OUT”.
8) Press “↑” and “↓” button to scroll through other Flex EP-H settings.
9.17 Program ID1 Ramp (RX)
1) Make sure the I-Chip is connected to the programmer.
2) Press “→” button to enter ID1 Ramp setting.
3) Press “↑” and “↓” button to scroll and select “ACC” for acceleration and
“DEC” for deceleration and press “→” button to enter.
4) Press “↑” and “↓” button to change value.
5) Press “BACK” button to go back to step 3.
6) Exit Program ID1 Ramp by pressing the “BACK” button until the cursor is
shown next to “ID1 RAMP”.
7) Press “↑” and “↓” button to scroll through other Flex EP-H settings.
9.18 Program ID2 Ramp (RX)
1) Make sure the I-Chip is connected to the programmer.
2) Press “→” button to enter ID2 Ramp setting.
3) Press “↑” and “↓” button to scroll and select “ACC” for acceleration and
“DEC” for deceleration and press “→” button to enter.
4) Press “↑” and “↓” button to change value.
5) Press “BACK” button to go back to step 3.
6) Exit Program ID2 Ramp by pressing the “BACK” button until the cursor is
shown next to “ID2 RAMP”.
7) Press “↑” and “↓” button to scroll through other Flex EP-H settings.