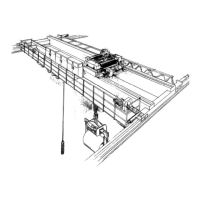
Page 7
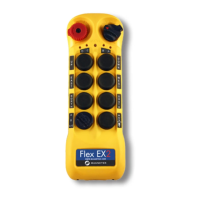
4.10 Program Function Relay / K26 Relay (RX)
1) Make sure the I-Chip is connected to the programmer.
2) Press “→” button to enter Function Relay setting.
3) Press “↑” and “↓” button to scroll and select.
4) Exit Program Function Relay by pressing the “BACK” button until
the cursor is shown next to “FUNC RLY”.
5) Press “↑” and “↓” button to scroll through other Flex EX settings.
--- : START function only.
NORMAL : START function + AUX with normal momentary output.
TOGGLE : START function + AUX with toggled/latching output.
TOG&E : START function + AUX with toggled/latching output. The relay opens when
STOP button is pressed down and transmitter power off.
EXT : FUNCTION relay works simultaneously with the receiver MAIN relays.
TDM A+B : FUNCTION relay closes when selector switch is rotated to the A+B position
and opens when rotate to A or B positions (tandem monitoring output).
S/P : FUNCTION relay closes when START command is executed and opens only when
transmitter power is turned off.
HORN : FUNCTION relay closes for up to 3 seconds when START command is executed
at transmitter power on and then becomes normal momentary outputs thereafter.
When finished, take out the I-Chip and insert it onto the I-Chip programming port located on
the decoder module to transfer the new setting from the I-Chip to the receiver. Make sure
JP6 jumper is inserted when transferring I-Chip information into the receiver.
4.11 Program Brake Functions (RX)
1) Make sure the I-Chip is connected to the programmer.
2) Press “→” button to enter Brake Function setting.
3) Press “↑” and “↓” button to scroll and select.
4) Exit Program Brake Functions by pressing the “BACK” button until
the cursor is shown next to “BRAKE”.
5) Press “↑” and “↓” button to scroll through other Flex EX settings.
DEMAG 1 : When releasing pushbutton from 2
nd
speed up to 1
st
speed, the 1
st
speed
output relay will open for up to 1.0 second and then closes again.
DEMAG 2 : When pushbutton is pressed down to 2
nd
speed directly from 0 speed, the 1
st
speed output relay will maintain closure for up to 0.4 second before 2
nd
speed
output relay closes. When pushbutton is released from 2
nd
speed up to 0
speed, the 1
st
speed output relay will maintain closure for up to 0.5 second
before going to 0 speed.
DEMAG 3 : When releasing pushbutton from 2
nd
speed up to 1
st
speed, both 1
st
and 2
nd
speed output relays are opened. Release pushbutton to 0 speed and then
press down to 1
st
speed to reengage the 1
st
speed output relay.
P&H : When releasing pushbutton from 2
nd
speed up to 0 speed, the 1
st
speed
output relay will maintain closure for up to 0.1 second before going to 0 speed.
When finished, take out the I-Chip and insert it onto the I-Chip programming port located on
the decoder module to transfer the new Brake setting from the I-Chip to the receiver. Make
sure JP6 jumper is inserted when transferring I-Chip information into the receiver.