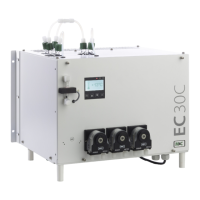
EC-30C | 1.00.02 +49 2102 935 888 www.mc-techgroup.com 61
10.2 Changing the heat exchanger
Removal of the heat exchangers may be necessary to carry out any maintenance or repair
work. The PCU heat exchanger can be disassembled without switching off the cooler.
The DCU 1 and DCU 2 heat exchangers need to be defrosted before disassembly. At oper-
ation temperatures of -30 °C (~-22 °F) the deep-freezer heat exchangers can not be disas-
sembled because of freezing. Only after a defrost period of about one hour, the DCU heat
exchangers can be removed.
We recommend the following procedure to replace the heat exchangers:
Purge the heat exchanger to remove any possible residue of aggressive media.
Release the upper gas connections and lower condensate connections by
turning the green GL-connectors to the left.
Pull the heat exchanger upwards and slightly rotate it out of the cooling block.
Dry and clean the opening of the aluminum cooling block with a cloth.
Apply a thin and equal layer of thermal conductivity paste over the whole
surface of the heat exchanger to ensure good conduction of heat.
Lightly push and slightly rotate the heat exchanger back into the opening of
the cooling block and press it to the upper block.
Remove any surplus thermal conductivity paste.
Reconnect the tubing following the instruction in chapter 8.4 on page 44 or
chapter 8.5 on page 46.
Note
Do not use force to remove frozen DCU heat exchangers! Glass heat
exchangers might break!
Note Do not mix up DCU and PCU heat exchangers!
Note
Do not mix up tubing!
The outlet tube of the DCU 1 has a red mark.
Special instruction for Duran glass heat exchanger assembly:
Check the PTFE/Silicon locking rings for damage. In assembly, the locking rings
must have the PTFE side facing the medium, otherwise the required degree of
sealing cannot be guaranteed!
Fasten the green GL-connection hand-tight by turning them to the right.