DESKTOP PRINTER SERVICE MANUAL
28
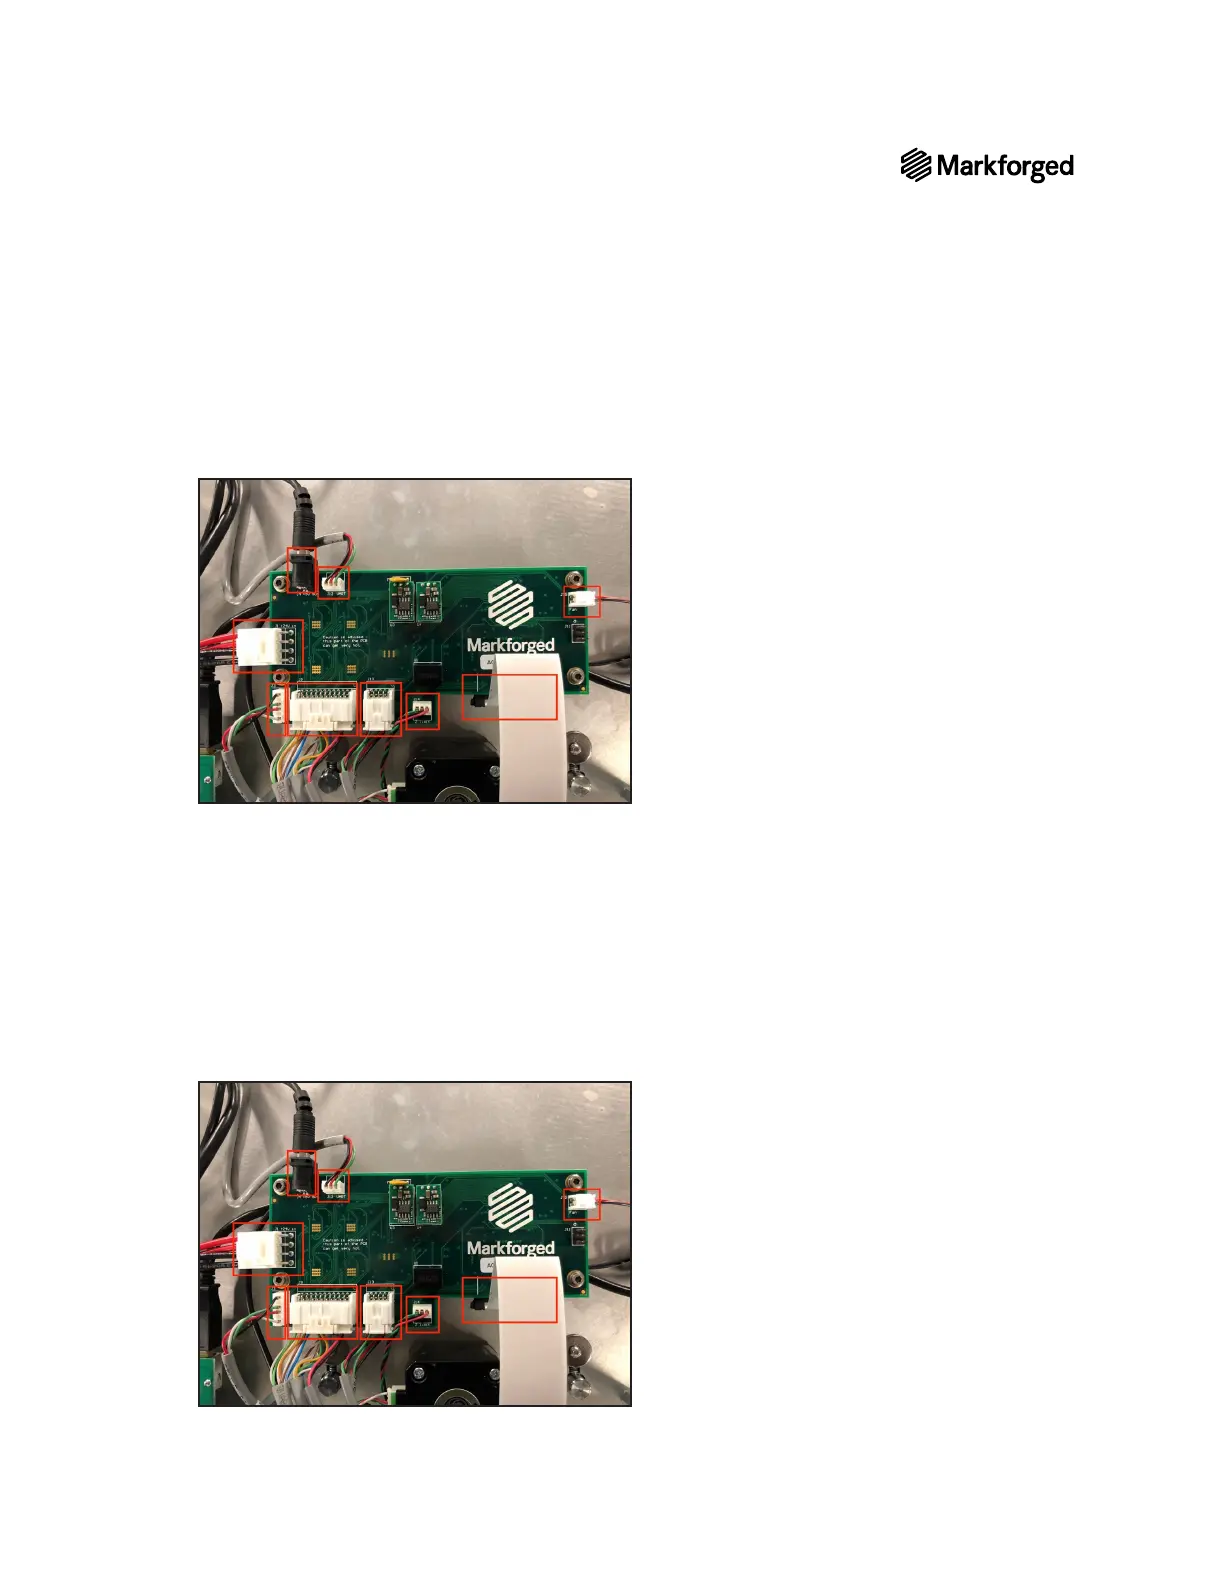
10. Carefully unplug all nine connections from the motherboard.
Note: The ribbon cable (the broad white cable at bottom right in the photo below) connects to a
socket on the underside of the motherboard.
11. Using the 2.5mm hex key, remove the four screws connecting the motherboard to the printer and set
them aside.
12. Remove the motherboard from your printer.
MOTHERBOARD REPLACEMENT
1. Mount the new motherboard in place.
2. Using the 2.5mm hex key, reinstall the four screws that connect the motherboard to the printer.
3.
Note: The ribbon cable (bottom right in the photo below) connects to a socket on
theundersideofthe motherboard.
4. Replace the bottom plate on the printer.