DESKTOP PRINTER SERVICE MANUAL
56
14. Using the 2.5mm hex key, reinstall the four screws in the bottom of the interior of the printer.
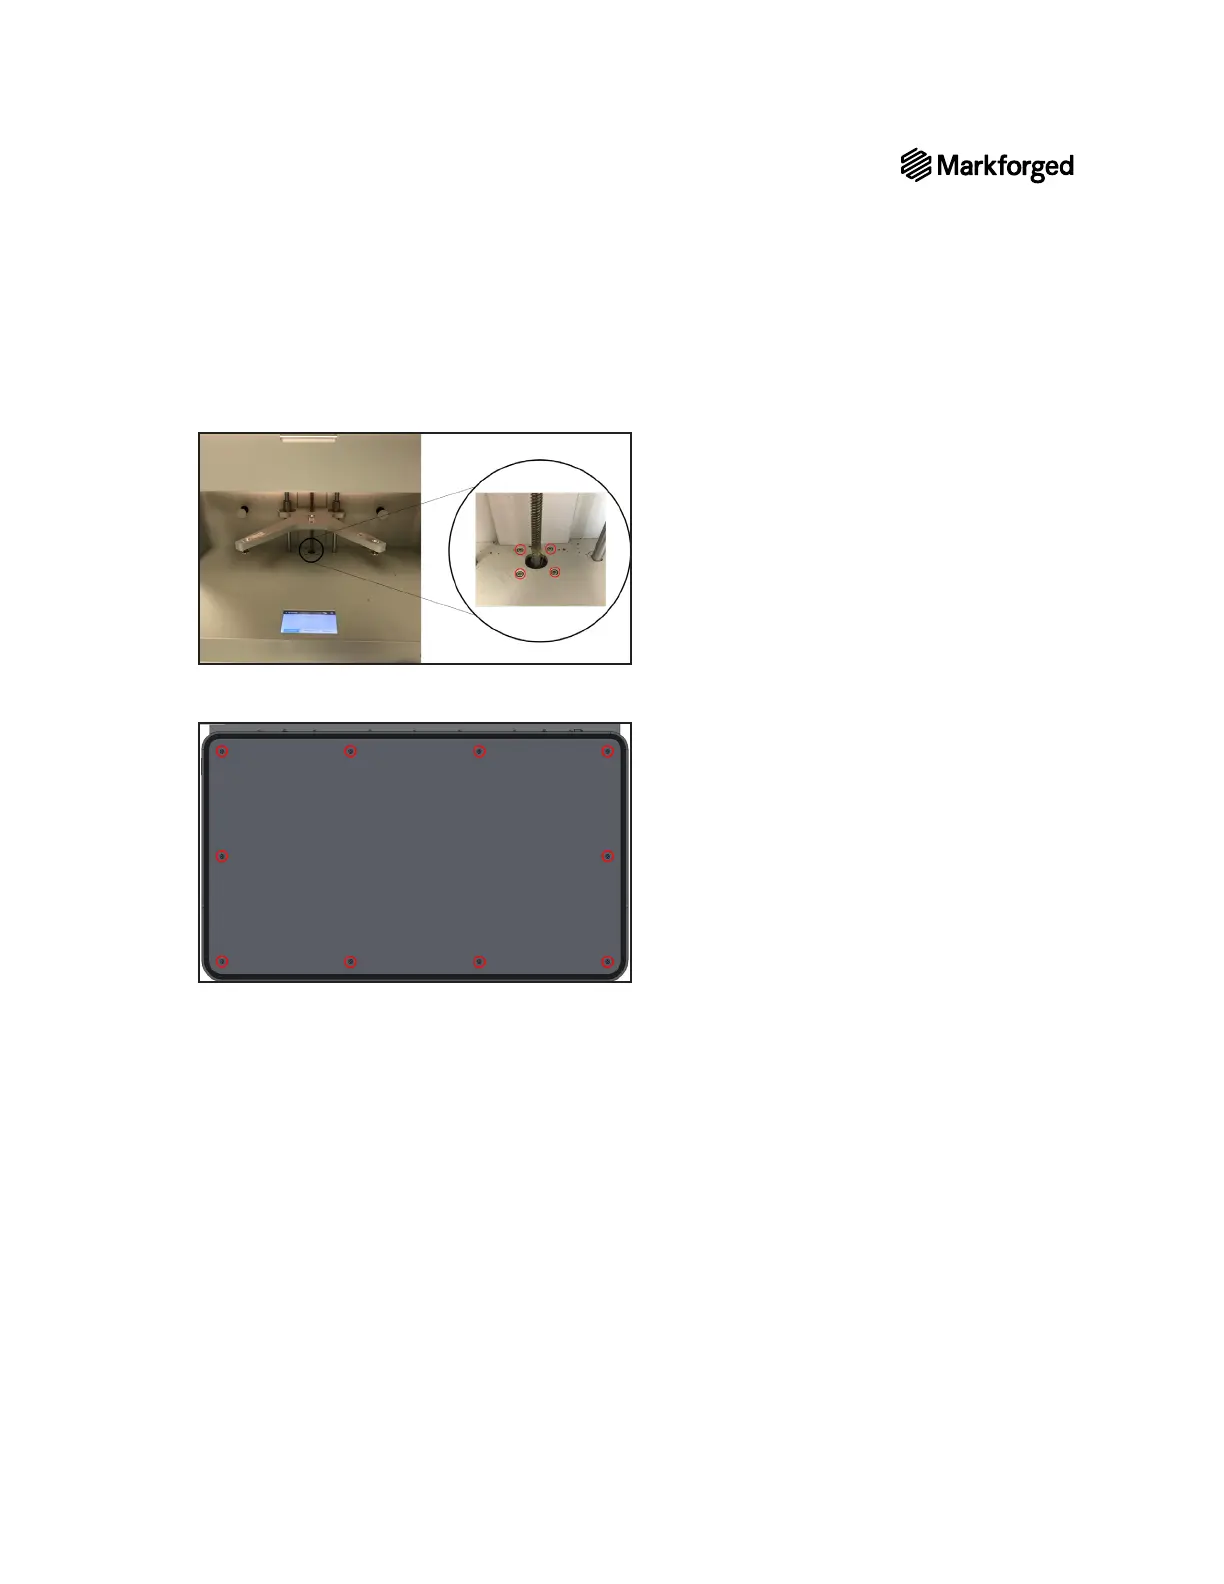
15. Replace the bottom plate of the printer and use the Phillips screwdriver to reinstall the ten screws that
16. Carefully turn the printer upright.
17. Remove and discard the tape holding the lid shut.
18.
19. Plug in and power on your printer.
20. Reload material before attempting to print. To ensure that your printer is ready to print, see Z-Axis
Recalibration below.
1. Spread synthetic grease on the lead screw.
2. Manually move the print stage up and down to disperse the grease. Ensure that the print stage can move
3. Start the Shim Bed Level utility. For more information, see Leveling the Print Bed in the User Guide.
4.
utility(Menu>Bed Level>Adjust Z-Offset).
5. Run the Bed Level Test Print, as described in Bed Level Test Print in the User Guide
the print bed is leveled correctly.