86
Chapter 6, Using Matrox VS4 with StudioCoast vMix
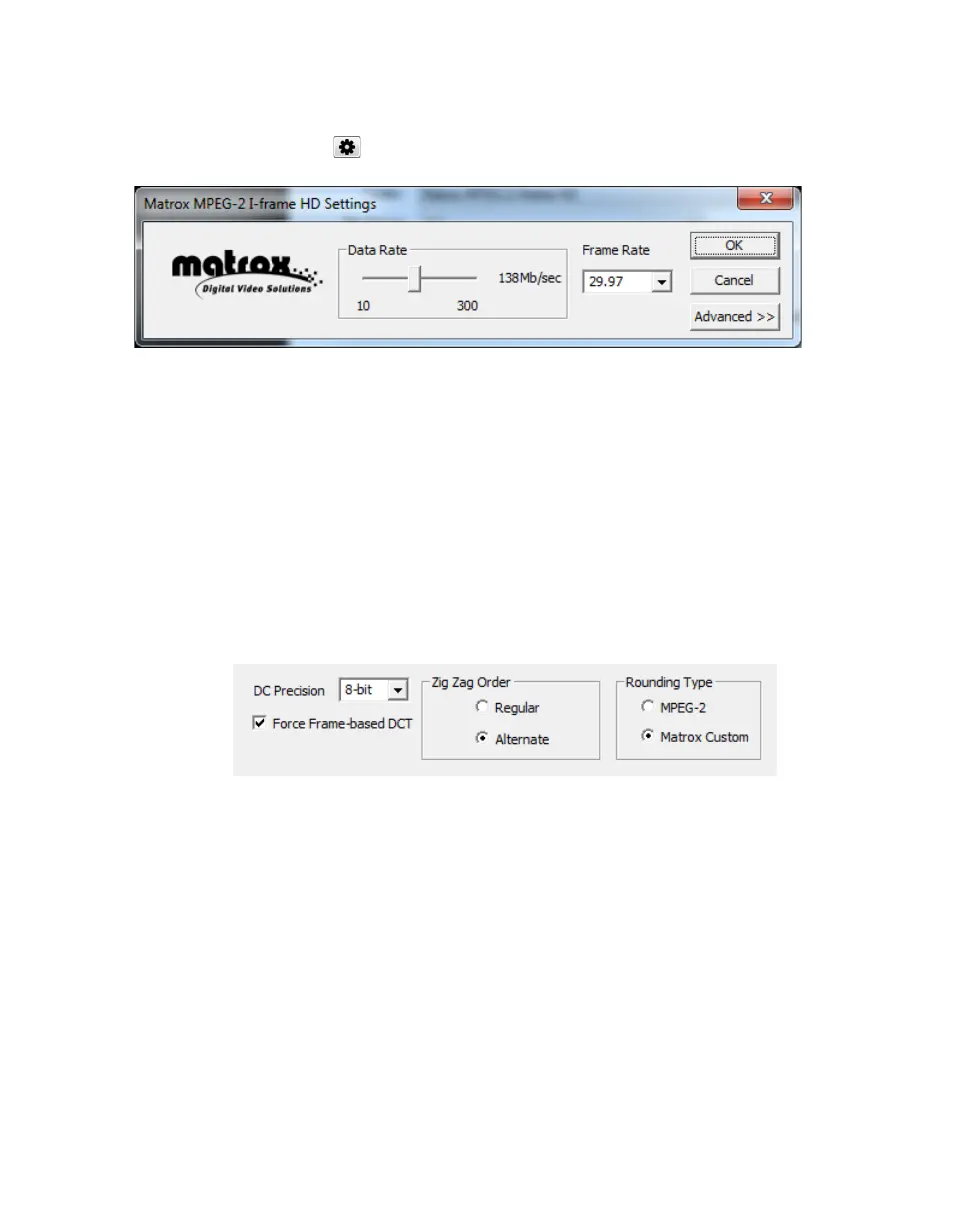
3 From the Codec list, select the Matrox codec for which you want to change
the settings (either
Matrox MPEG-2 I-frame or Matrox MPEG-2 I-frame
HD
) and click .
4 Drag the Data Rate slider until your desired data rate is displayed. The
higher the data rate you select, the better the video quality will be. The range
of available data rates depends on whether you’re using the Matrox MPEG-2
I-frame HD or SD format.
¡ Important Depending on the capabilities of your system, you may drop
frames if you select a data rate higher than 125 Mb/sec.
5 To apply advanced settings to your MPEG-2 I-frame file, click the
Advanced button.
¦NoteThe default advanced settings should provide good results for most
applications. We recommend that you change these settings only when needed
for special purposes.
6 From the DC Precision list, select the bit-depth precision of the DC intra
block.
¦NoteThe higher the DC precision value that’s used to record your video,
the more likely that the DC content will be increased at the expense of the AC
content in the encoded stream. This may result in lowering the overall quality
of the compressed stream at a specified data rate.
7 Select the Force Frame-based DCT setting to record macroblocks as
frames rather than as fields. In some cases, graphics will yield less artifacts if
this option is selected.