69
Recording your source video to disk
Specifying settings in the Matrox ISO Recording
tool
To specify the settings that you want for recording your clips, select a Matrox
input under
MATROX INPUT DEVICES in the Source Settings dialog box, and
then click the
ISO Record button.
¦NoteYou can hide or show the settings in the Matrox ISO Recording tool by
clicking or respectively.
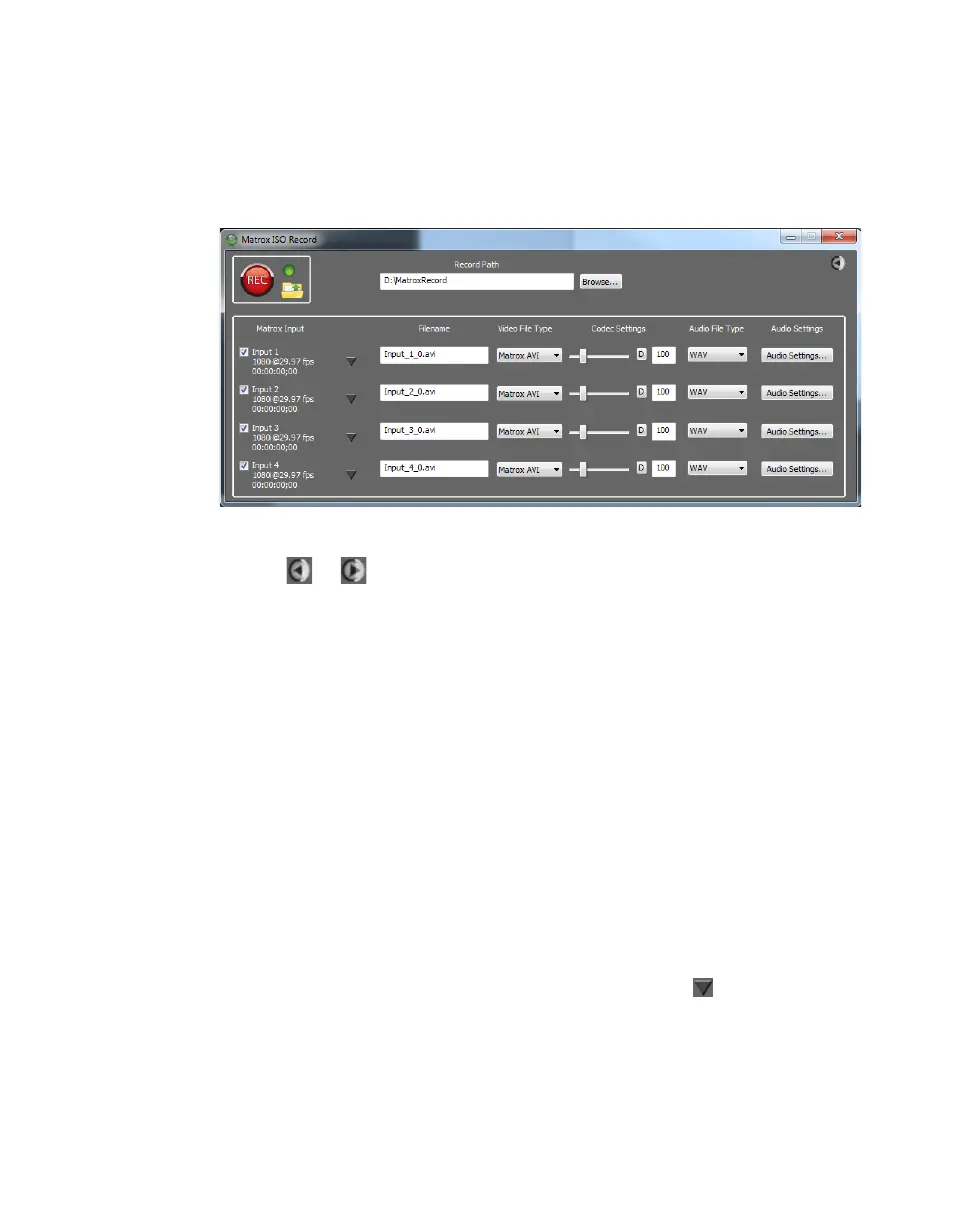
Record path
Under
Record Path, specify the destination where all your recorded clips will be
stored, or click
Browse to select the location that you want. Every recording
session generates a separate subfolder within the specified location, in the form
YYYY-MM-DD HHMMSS, which contains the recorded video and audio files,
and the log file (Record.Log) for that recording session.
Input selection
Under
Matrox Input, select the VS4 input(s) that you want to record. You can
also select or clear an input during a recording session (see “Input recording” on
page 74). If you select an input with no input signal (disconnected) or an invalid
input signal, the recorded video will be black with no audio. For more
information on the input states and how they affect recording, see “Input states
and video formats” on page 76.”
Selecting a preset and copying settings
You can load a previously saved record preset to apply record settings to an input,
or copy record settings from one input to another using the button. You can
customize any of the settings if needed as explained in the following sections. For
more information on these features see “Saving and loading record presets” on
page 72 and “Copying and pasting record settings” on page 72.