68
Chapter 5, Using Matrox VS4 with Telestream Wirecast
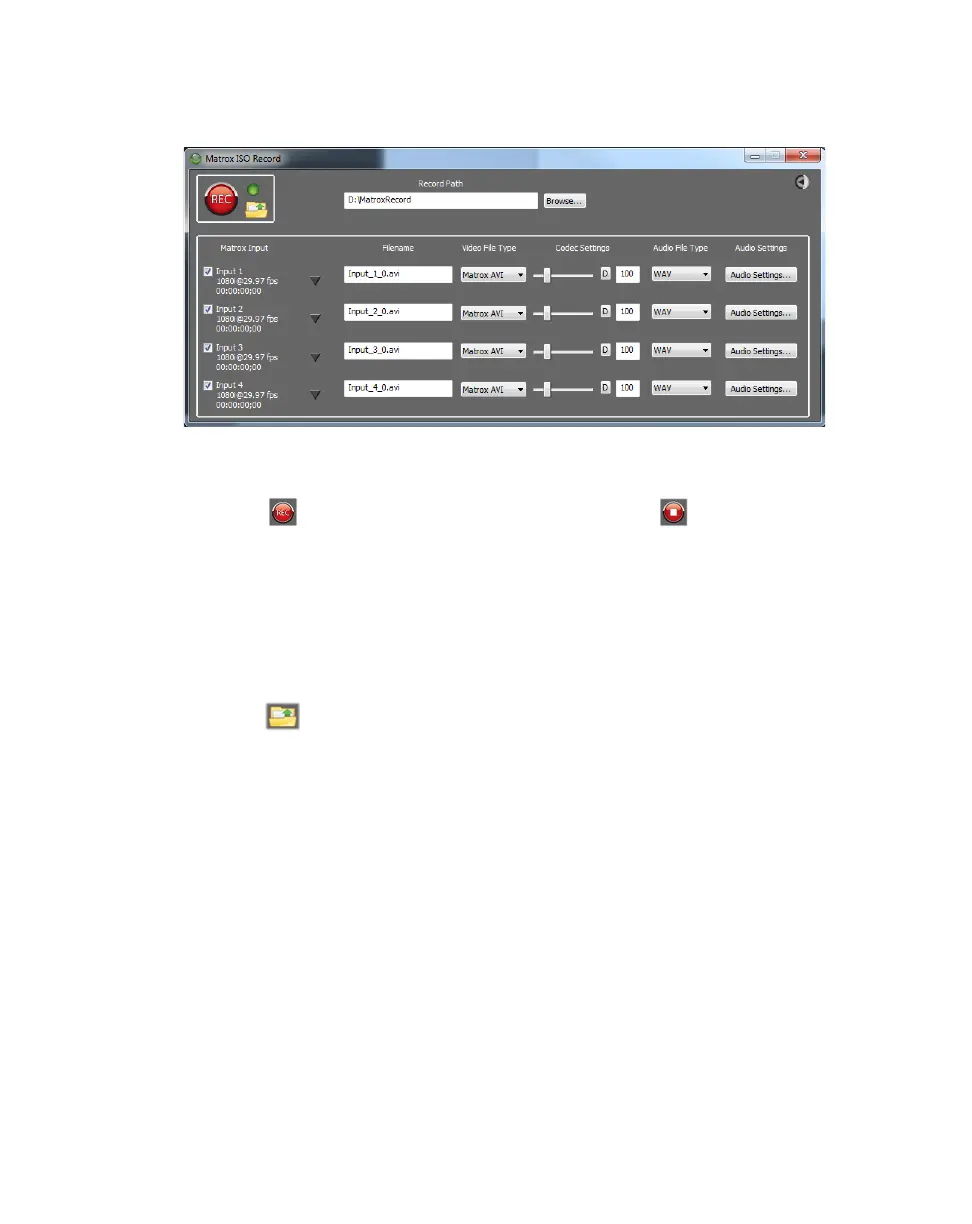
7 Select any Matrox VS4 input under MATROX INPUT DEVICES, and then
click
ISO Record to open the Matrox ISO Recording tool.
8 Select the settings that you want for recording as explained in “Specifying
settings in the Matrox ISO Recording tool” on page 69.
9 Click to start recording the selected inputs. Click to stop the
recording session. You can also start and stop the recording of individual
inputs during a recording session (see “Input recording” on page 74).
¡ Important If the status light turns red when recording, this indicates that
one or more of the selected inputs experienced dropped or skipped frames.
After the recording session ends, check the Record.Log file to see the
dropped/skipped events for each recorded input (see “Record log file” on
page 77).
10 Click to open Windows Explorer at the specified Record Path location
to view the recorded video/audio files, including the record log file
(Record.Log).
11 Once you’ve finished recording, you can use the recorded video and audio
files in an editing application, such as Adobe Premiere Pro, for post-event
editing. For more information, see “Working with editing applications” on
page 77.