81
Selecting VS4 inputs in vMix
Selecting VS4 inputs in vMix
This section provides instructions on how to select the VS4 inputs for video and
audio in StudioCoast vMix.
1 Set the recording audio as explained in “Setting the recording audio” on
page 80.
2 Connect your video source(s) to the VS4 SDI input(s) as explained in
“Connecting devices to Matrox VS4” on page 11.
¡ Important If connecting sources with different video formats, the sources
must have compatible frame rates. For a list of compatible frame rates, see
“Supported input formats” on page 10.
3 Start StudioCoast vMix and click the Add Input button on the Input Bar at
the bottom of the main window.
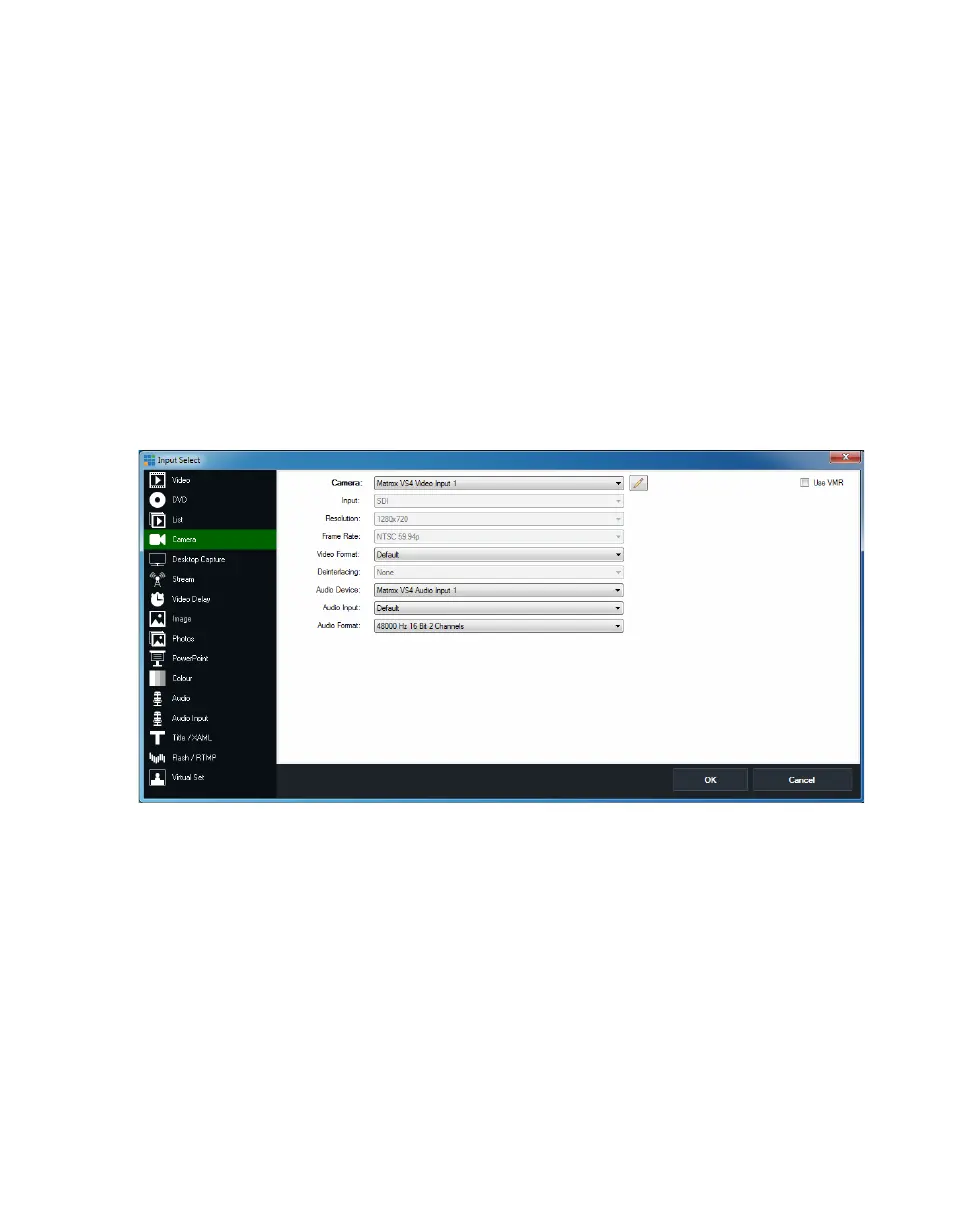
4 In the Input Select dialog box, select Camera:
5 From the Camera list, select the Matrox VS4 video input that you want to
stream or record, such as
Matrox VS4 Video Input 1.
¦NoteThe resolution, frame rate, and input type (SDI) are automatically
detected.
6 Under Audio Device, select the Matrox VS4 audio input that you want to
stream or record, such as
Matrox VS4 Audio Input 1.
Remarks
$ The audio input does not need to be from the same input as the video. For
example, if you selected
Matrox VS4 Video Input 1 from the Camera
list, you do not need to select
Matrox VS4 Audio Input 1.
$ Once you select an audio input, you cannot select it again for use with
another video input.