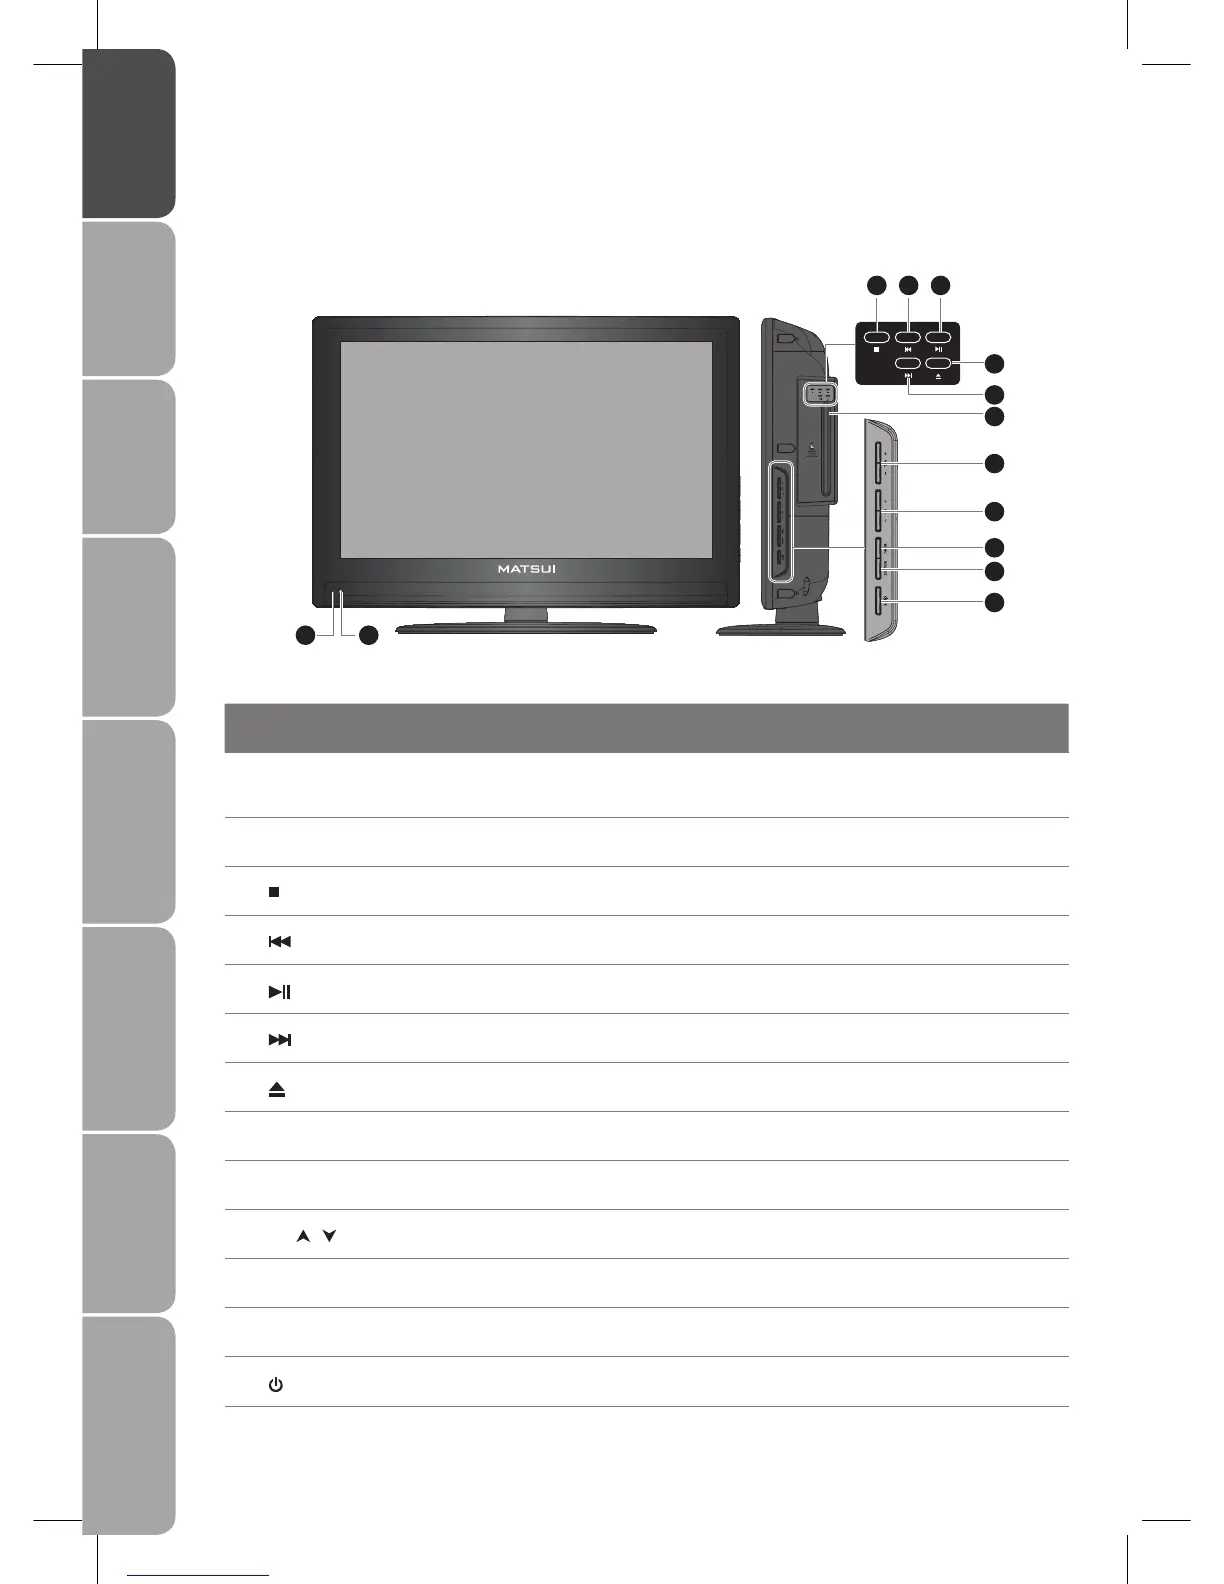
Front / Side View and Controls
Item Description
1 POWER LED
Illuminates blue when the TV is turned on. Illuminates red when the TV is in standby
mode. If the LED blinks red continuously, this indicates the timer programming has
started.
2 IR (Infrared Receiver / Light
Sensor)
Receives IR signals from the remote control.
Do not put anything near the sensor, as its function may be affected.
3
Press to stop playback. (DVD mode)
4
Press to skip to the beginning of the previous chapter or track. (DVD mode)
5
Press to start playback or pause. (DVD mode)
6
Press to skip to the beginning of the next chapter or track. (DVD mode)
7
Press to insert and eject disc. (DVD mode)
8 Disc Slot
Insert the disc with the mirror side facing towards you (12 cm discs only. Don’t insert 8
cm disc)
9 VOL. +/-
Adjust the volume.
Select and adjust setting in OSD menus.
10 CH.
/
Select a channel.
Select sub-menu of OSD menu.
11 MENU Displays the OSD (on screen display) menu.
12 SOURCE
Select among the different input signal sources:
TV / DTV / SCART1 / SCART2 / AV / S-VIDEO / YPBPR / VGA / HDMI1 / HDMI2 / DVD
13
/ I
Switch the TV on from standby or from off to standby.
1 2
3
6
7
9
8
10
11
12
13
4 5