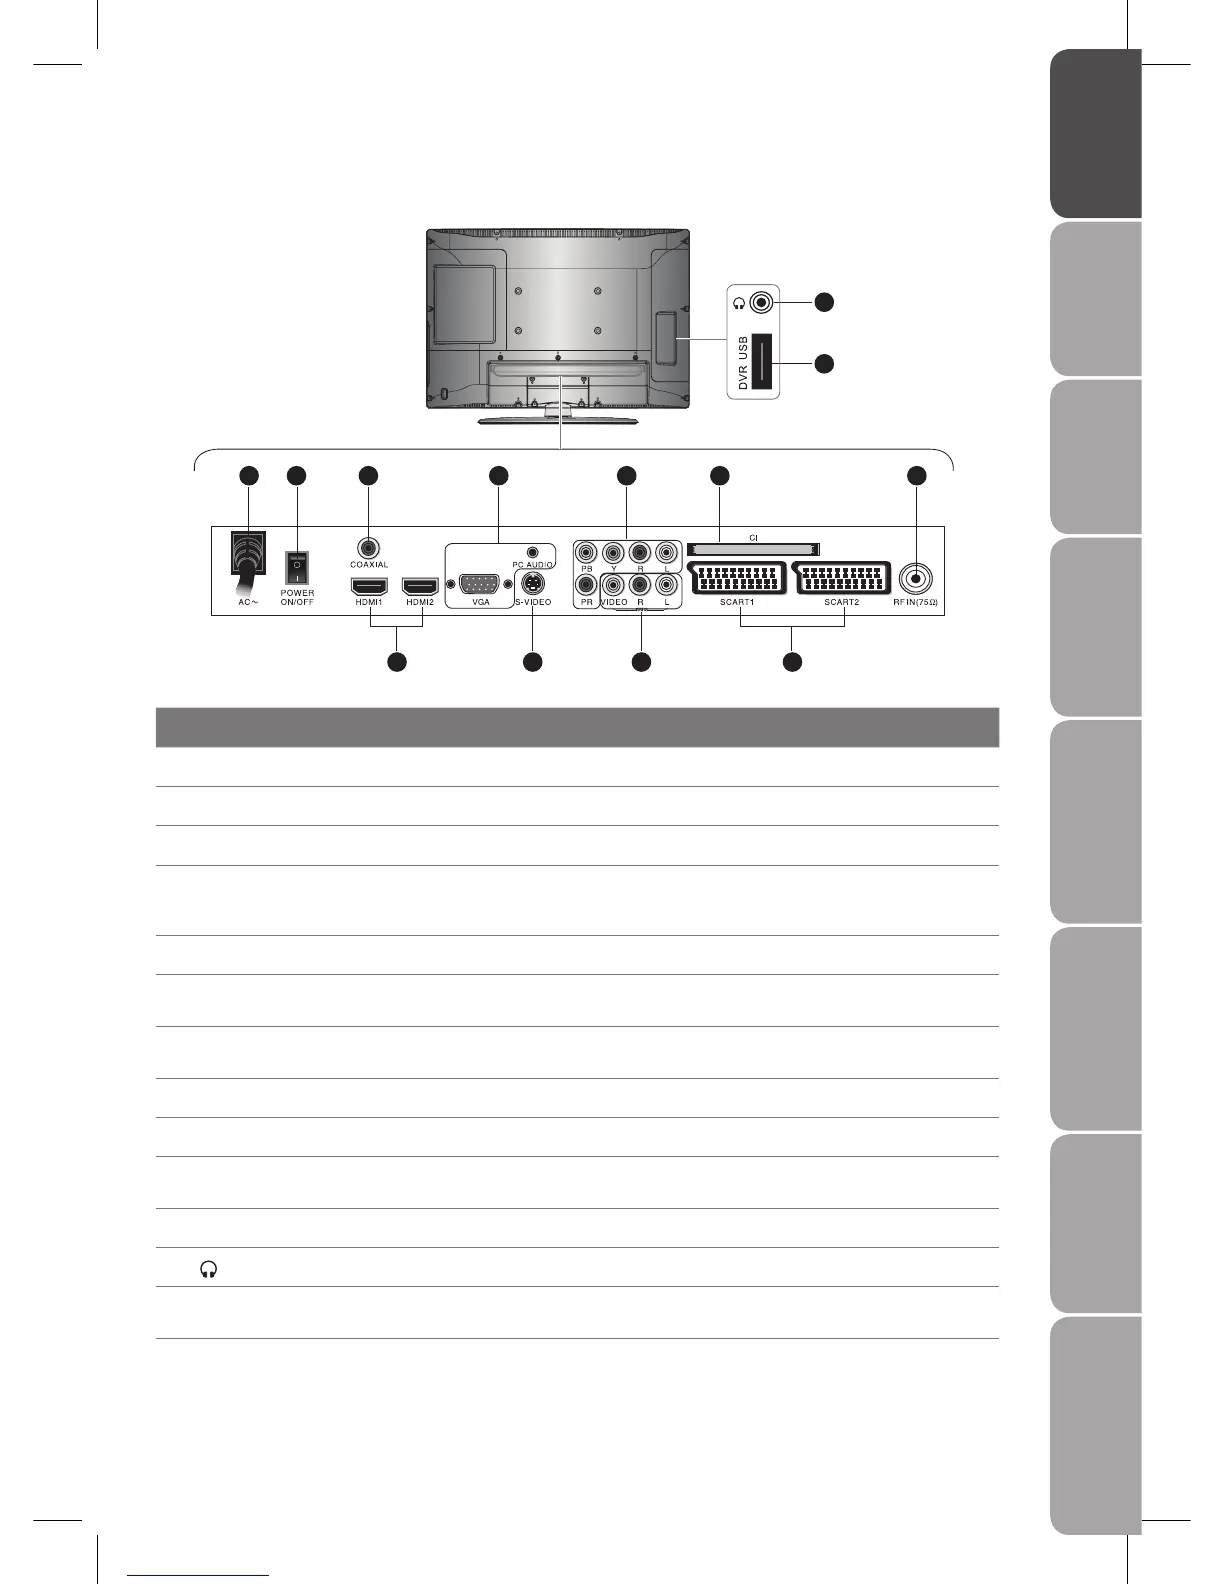
Item Description
1 AC IN Connect the mains cable to the mains socket.
2 POWER ON/OFF Switch on the POWER ON/OFF switch to turn the TV to standby mode.
3 COAXIAL OUT Connect to the audio jack on the digital/standard 5.1 audio system.
4 HDMI 1, 2 IN
HDMI (High-Definition Multimedia Interface) provides an uncompressed, all digital audio/
video interface between this TV and any HDMI-device, such as a set-top box, DVD player,
and A/V receiver.
5 VGA / PC AUDIO IN Connect to a PC or other devices with a VGA interface.
6 S-VIDEO IN
Connect to camcorders, VCR, DVD Player, or other AV equipment with S-Video output
jacks.
7 Y, PB, PR /AUDIO (L/R)
Connect to the DVD player, Digital Set-Top-Box, or other A/V device with component
(YPbPr) video and audio output jacks.
8 VIDEO / AUDIO (L/R) Connect to the Composite VIDEO and AUDIO (L/R) output jacks on external video devices.
9 CI Slot Allow insertion of CI Common Interface Card.
10 SCART 1, 2 Input
Connect to camcorders, VCR, DVD Player, or other AV equipment with SCART output
jacks.
11 RF IN (75 Ω) Connect to your aerial.
12
Connect earphones for private listening.
13 DVR USB port
Allows the insertion of a USB storage device. You can view media files or record DTV
programmes through this port.
Rear View and Jacks
1 2 3 5 9 117
4 106 8
12
13