78
11921 Slauson Ave. Santa Fe Springs, CA. 90670 (800) 227-4116 FAX (888) 771-7713
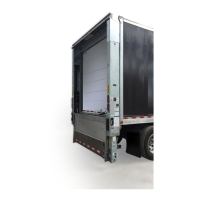
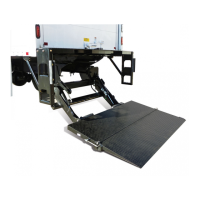
STEP 16 - FINISH WELDING LIFTGATE TO VEHICLE
METHOD 2 & METHOD 3 - WELD LIFTGATE TO BODY - Continued
4. Weld the Liftgate RH
and LH columns to
vehicle body as shown
in FIG. 78-1.
NOTE: If Liftgate columns cannot be mounted fl ush against rear of vehicle, a fi ller
such as tubing, channel, or plate stock may be used to bridge gap between
vehicle body and Liftgate columns. Make sure the added materials and welds
meet the BODY STRENGTH REQUIREMENTS indicated in this manual.
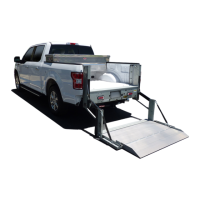
3. Cover platform as shown
in FIG. 78-1.
FIG. 78-1
Recommended practices for welding on steel parts are contained in the cur-
rent AWS (American Welding Society) D1.1 Structural Welding Code - Steel.
Damage to Liftgate and/or vehicle, and personal injury can result from welds
that are done incorrectly.
WARNING
!
To prevent damage to Liftgate:
• Connect welder ground to vehicle body.
• Protect hydraulic hoses and electrical
cables with fl ame-resistant cover.
CAUTION
ALTERNATE
WELDS IN-
BOARD AND
OUTBOARD
ON LH & RH
MOUNT-
ING PLATES
(METHOD 2)
OR COLUMNS
(METHOD 3)
WELD LH & RH MOUNTING PLATES
(METHOD 2) OR LH & RH COLUMNS
(METHOD 3) AT THE BOTTOM OF BODY
1/4”
1/4”
2-10
2-10
1/4”
1/4”
2-10
2-10
 Loading...