McHale Fusion 3 Baler & Wrapper
90
1. Remove all unfinished and finished bales from the baling chamber
2. Loosen the lock nut on the adjustment screw (A)
3. Inspect the existing pre-charge pressure by holding the “Top door close”
(Button 8), while in Manual mode, on the control box for 3 seconds, see
“Control box functions” on page 59.
4. If pressure must be increased (gauge in the yellow zone, or if there is a change
in the material being baled, i.e. dry to wet, etc. gauge in the green zone) turn
the adjustment screw (A) clockwise and if the pressure is to be decreased turn
the adjustment screw anti-clockwise.
5. Continue to inspect the gauge and once the indicator needle is at the desired
setting, tighten the lock nut on the adjustment screw ensuring not to let the
adjustment screw itself rotate and close all protective covers. To reduce the
pressure the door must be opened, then turn the adjustment screw and close
the door again to check the gauge.
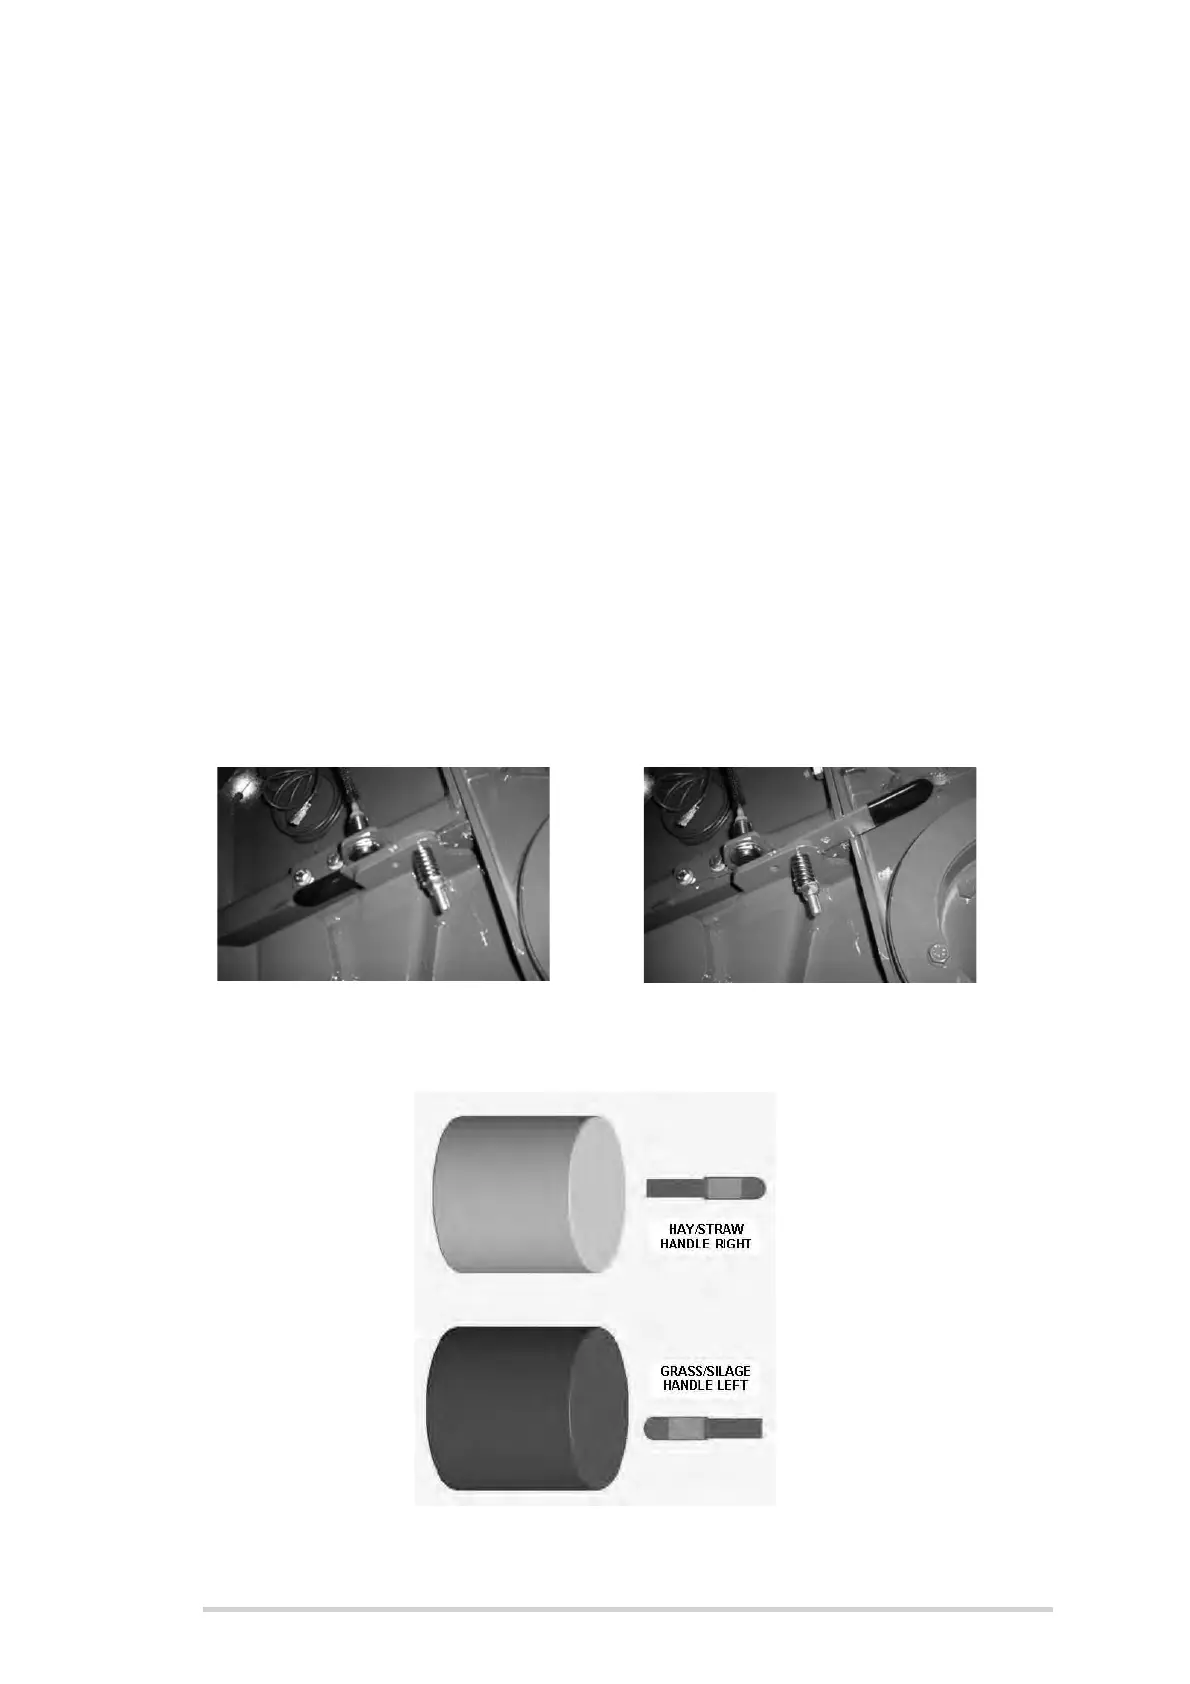
Grass-Silage or Hay-Straw adjustment (located behind the hydraulic section, on the
non-drive side of the chamber, inside the front right hand door of the machine). The
bale chamber features a quick adjustment sensor position plate. This allows for a quick
change to lower density bales as required for hay and straw without any need to adjust
the chamber pre-charge pressure. In effect, it limits the level to which the chamber
pressure will climb above the pre-charge pressure during baling of hay and straw.
Figure 10.h - Hay/Straw (Handle right) Grass/Silage (Handle left)
Figure 10.f - Grass & Silage position
(Handle left)
Figure 10.g - Hay & Straw position
(Handle right)