72 M32 - Digital Console User Manual 73
software. Choices include:
• Mackie Crtl: Use this protocol to control any DAW software that is compatible with a Mackie Control hardware
surface
• HUI: Use this protocol to control any DAW software that is compatible with an HUI hardware control surface,
such as Pro Tools
• Midi CC: Use this protocol to control software via MIDI.
3. Tap the second control to assign the currently selected control surface protocol.
4. Adjust the fth control to select whether the remote function uses the MIDI IN and MIDI OUT sockets, or the XUF
card’s MIDI.
5. Tap the fth control to conrm the selection.
6. Turn the sixth control to adjust various MIDI-based operations for the console. Choices include:
• MIDI In/Out: This toggles the MIDI input and output on or o
• Card MIDI: Allows MIDI transmission through the XUF card
• USB In/Out: This toggles the console’s USB ports on or o
• RTP (Real-Time Transport Protocol): This toggles on or o the console’s ability to interface with an Ether-
net-based MIDI system
• Enable MIDI scene recall: This toggles on or o the console’s response to incoming MIDI messages for switching
console scenes.
7. Tap the sixth control to toggle the currently selected MIDI option on or o. This can be useful if you want to ensure
that any connected MIDI transmitters cannot interfere with the console.
network
The SETUP screen’s network tab contains settings
used when connecting the M32 to a standard
Ethernet network. The user can set parameters
such as using a xed IP address, or having one as-
signed, as well as setting up Ethernet and subnet
mask settings.
To set the network address for the console,
perform the following steps:
1. Adjust the rst rotary control to select
which specic network eld to adjust.
Choices include:
• IP address
• Subnet Mask
• Gateway.
2. Adjust controls 2, 3, 4 and 5 to set the four numerical elds to be adjusted for the selected network eld.
3. Tap the sixth control to assign the adjusted settings.
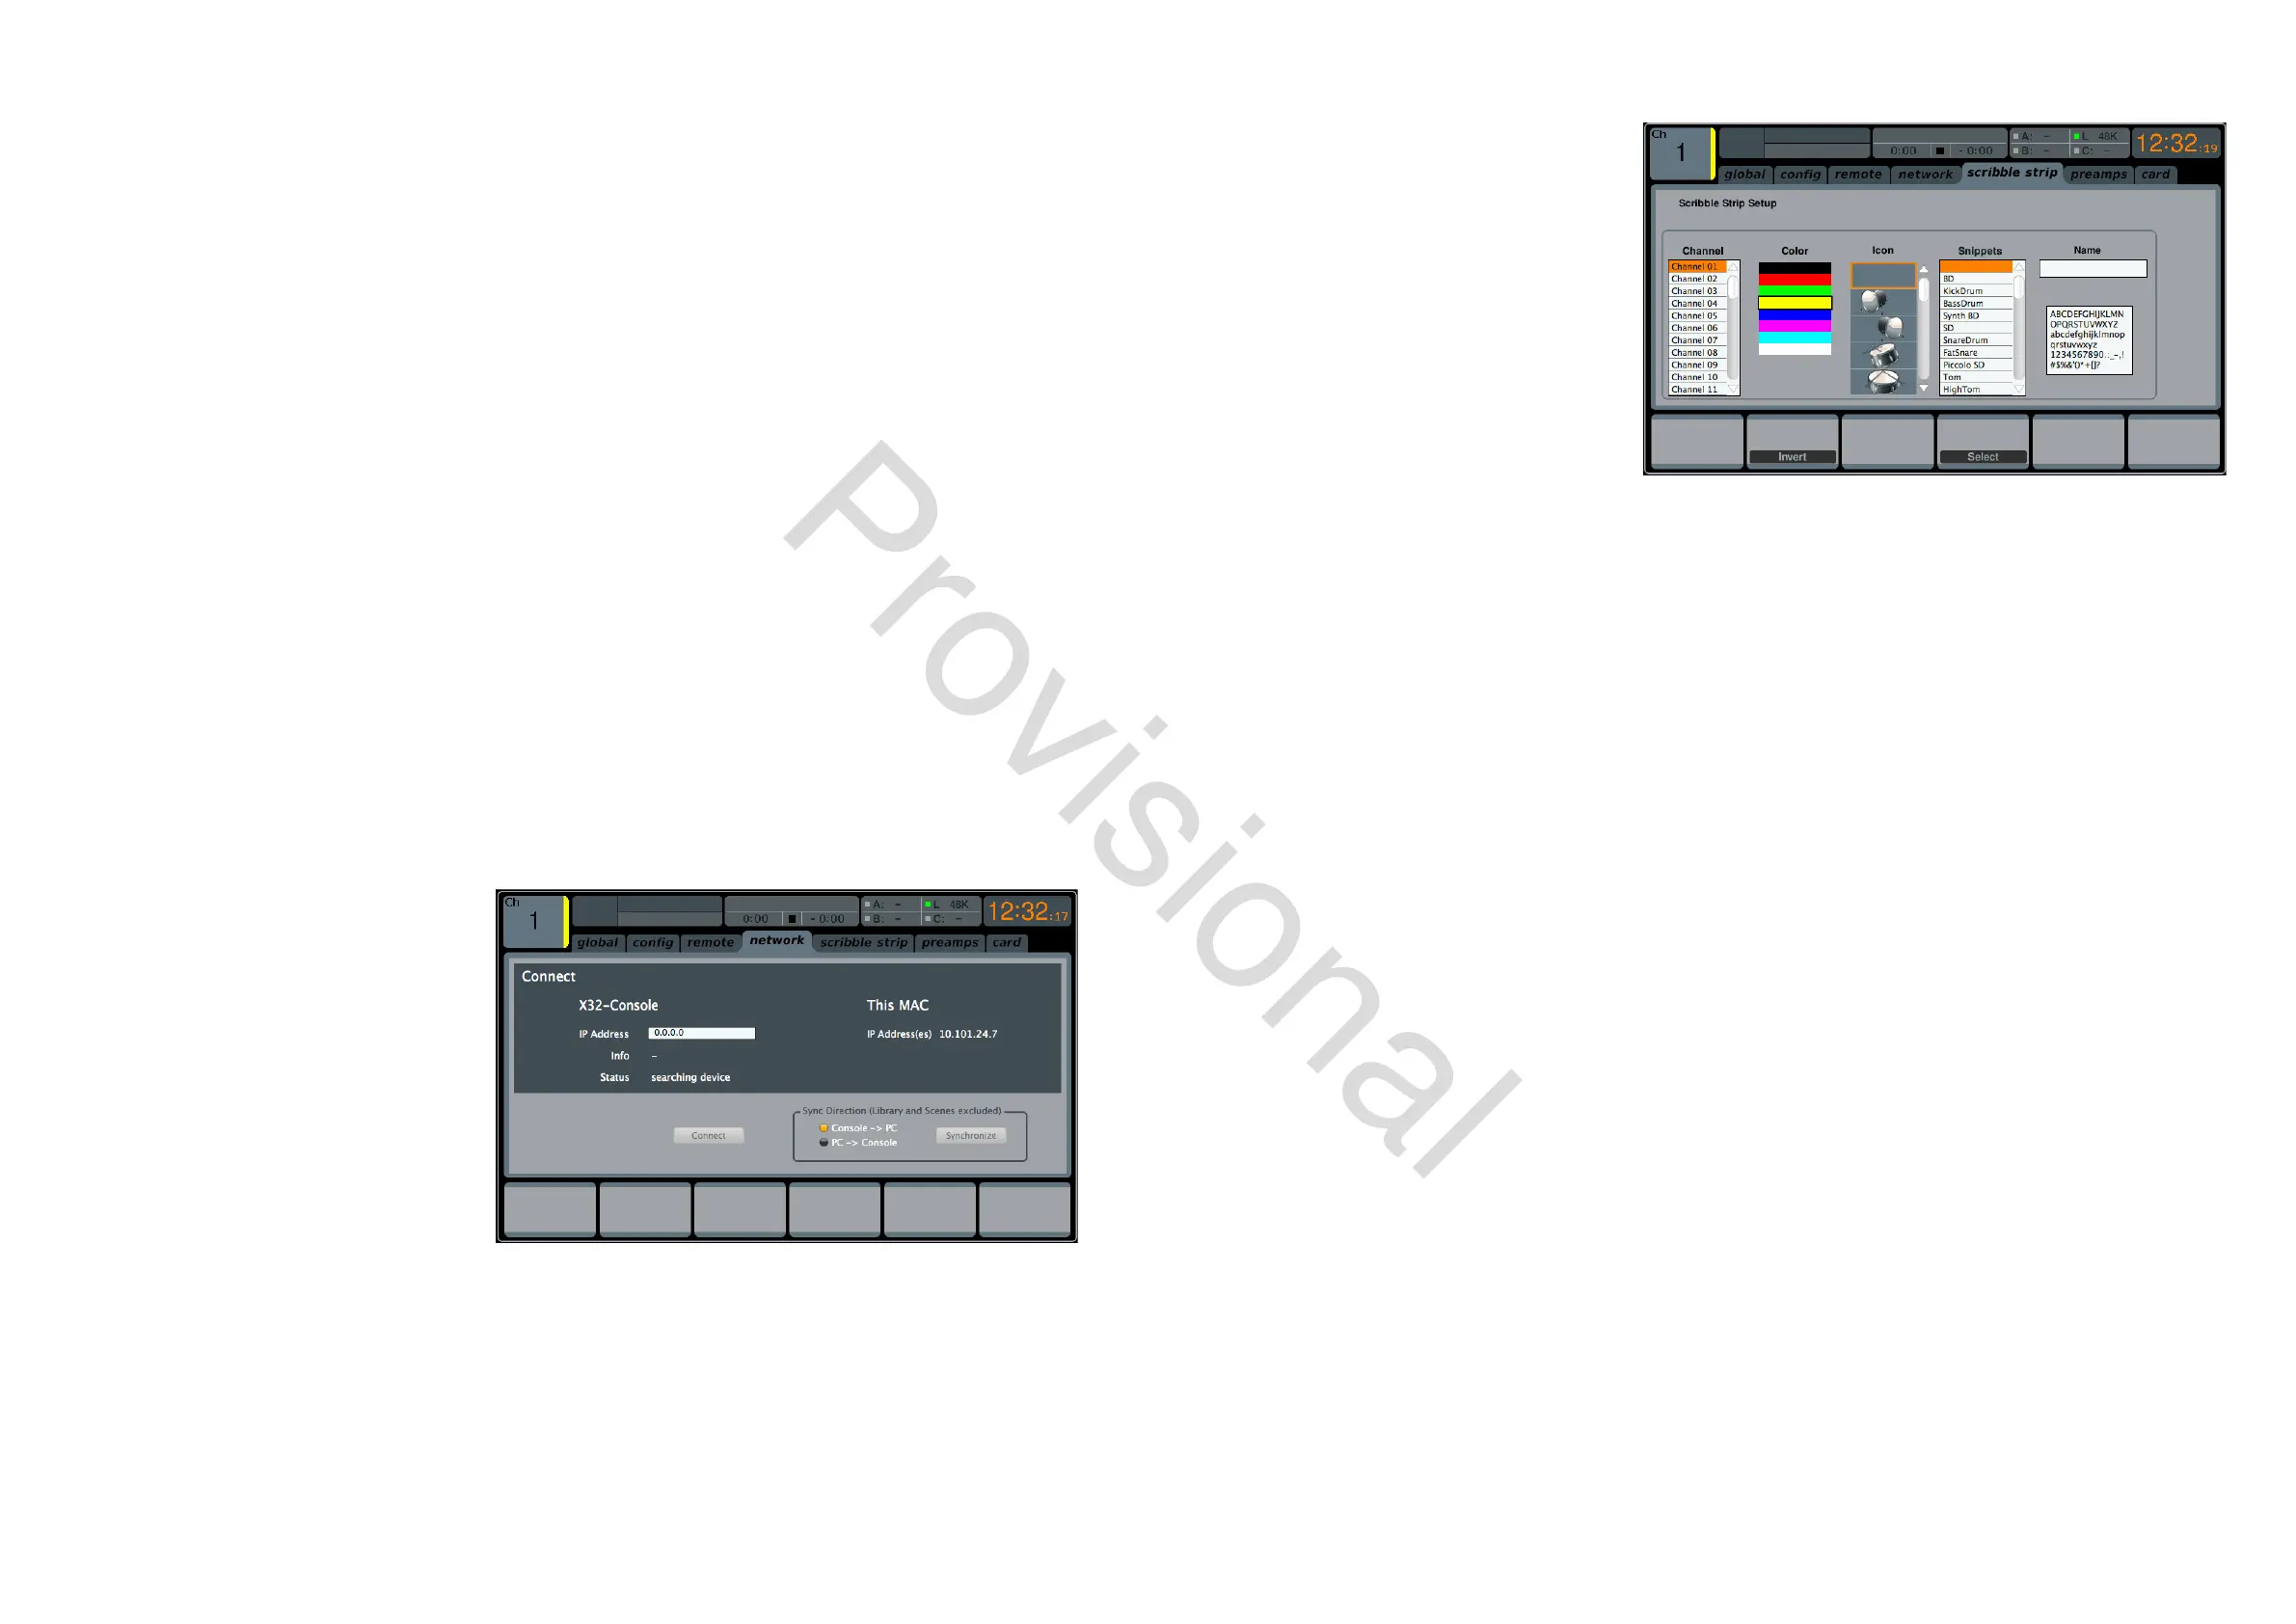
scribble strip
The SETUP screen’s scribble strips tab allows
setup of the M32’s channel LCD displays, including
those for the digitally-controlled amplier group-
ing feature, also known as DCAs.
A DCA group is a grouping function, made pos-
sible by the console’s digital operation, where
individual input channels can be grouped to-
gether and controlled with a single output fader
on the right-hand side of the console. Unlike
the traditional sub-grouping function found on
analogue consoles, a DCA group does not combine
the dierent input channels into a common sub-
mix. Instead, the individual input channels still retain their original routing characteristics, but their level adjustments are
commonly controlled.
On the scribble strips tab the user can make useful adjustments, such as assigning real names to the selected channel
(such as ‘drums’ or ‘backing vocals’), as well as assigning colours to them that are then reected on the console’s channel
LCD screens.
To adjust the various LCD display settings, perform the following steps:
1. Adjust the rst rotary control to select which of the channels you wish to edit.
2. Adjust the second control to set the colour for the currently selected channel’s scribble strip.
3. Adjust the third control to select the graphic icon for the selected channel. A large variety of clip-art is available to
represent various input sources and output destinations.
4. Adjust the fourth control to select a name from a list of common preset names (snippets) for the currently selected
channel.
5. Tap the fourth control to assign the currently highlighted text to the currently selected channel’s scribble strip.
6. Tap the fth control to edit the text assigned to the currently selected channel’s scribble strip.
7. Adjust the fth control to scroll through the available characters that can be used to name the currently selected
channel’s scribble strip.
8. Tap the fth control to select the currently highlighted character.
9. Adjust the sixth control to scroll between the available character sets.
10. Tap the sixth control to exit the text editor and save the current parameters to the currently selected channel’s
scribble strip.
www.theaudiospecialists.eu