VetPro DC Installation/Service Manual, 00-02-1606, Revision R01
111
Articulating Arm
Vertical
Movement
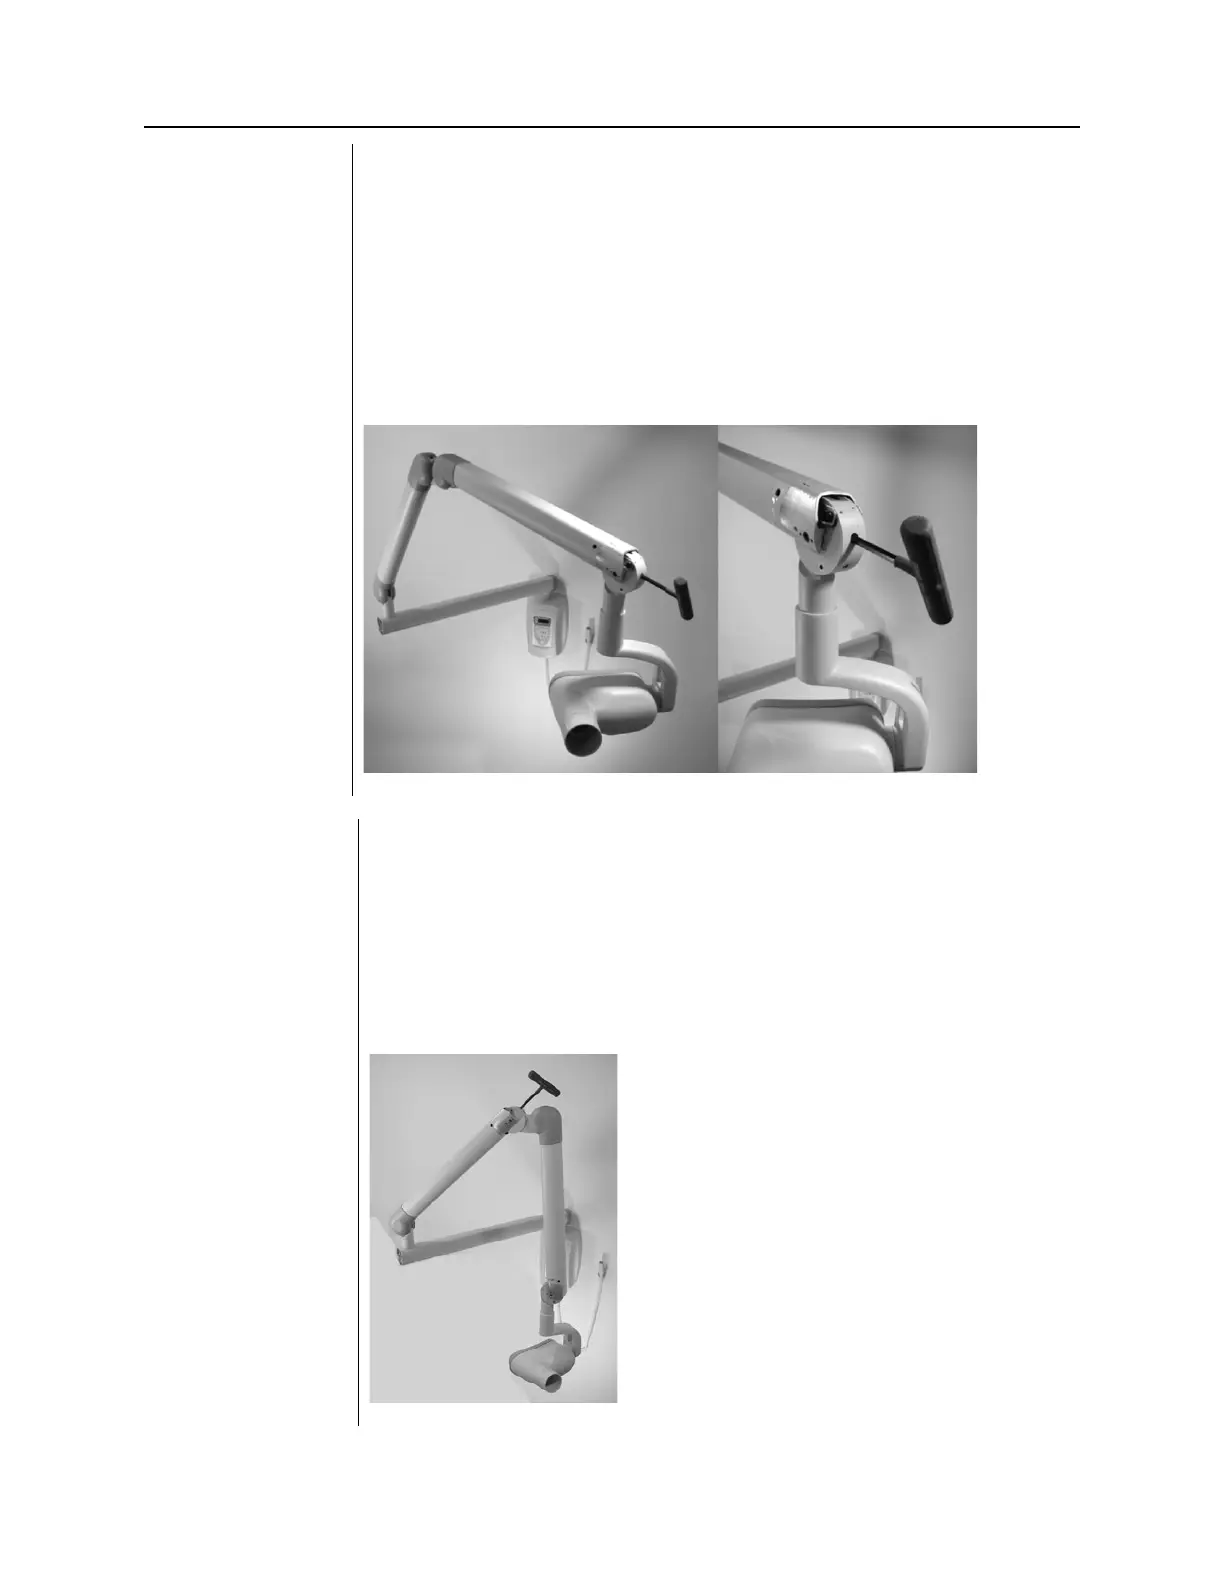
1. Remove the plastic trim covers from the end of the Articulating Arm nearest
to the Tubehead.
2. Position the Articulating Arm with the arm nearest the Tubehead fully
upward.
3. Insert a 9” [23 cm] long 8 mm hex key (T-handle) into the adjustment nut,
as shown in Figure 107. Turning the wrench clockwise will cause the
Control Unit side of the Articulating Arm to lift. Turning it counterclockwise
will cause it to drop.
4. Adjust as necessary until the Control Unit side of the Articulating Arm no
longer drifts.
5. Replace the plastic covers on the end of the Articulating Arm.
Figure 107
Adjusting Vertical
Movement of the
Articulating Arm
of Articulating
Arm Balance
Adjustment
1. Remove the plastic covers at the top of the Articulating Arm.
2. Position the Articulating Arm at a 45-degree angle.
3. Place a 9: [23 cm] long 8 mm hex key (T-handle) into the adjustment nut
inside the Articulating Arm, as shown in Figure 108. Turning the wrench
clockwise will cause the Control Unit side of the Articulating Arm to lift.
Turning it counterclockwise will cause it to drop.
4. Adjust as necessary until the Control Unit side of the Articulating Arm no
longer drifts.
5. Replace the plastic covers on top of the Articulating Arm.
Figure 108
Adjusting
Articulating Arm
Balance