25
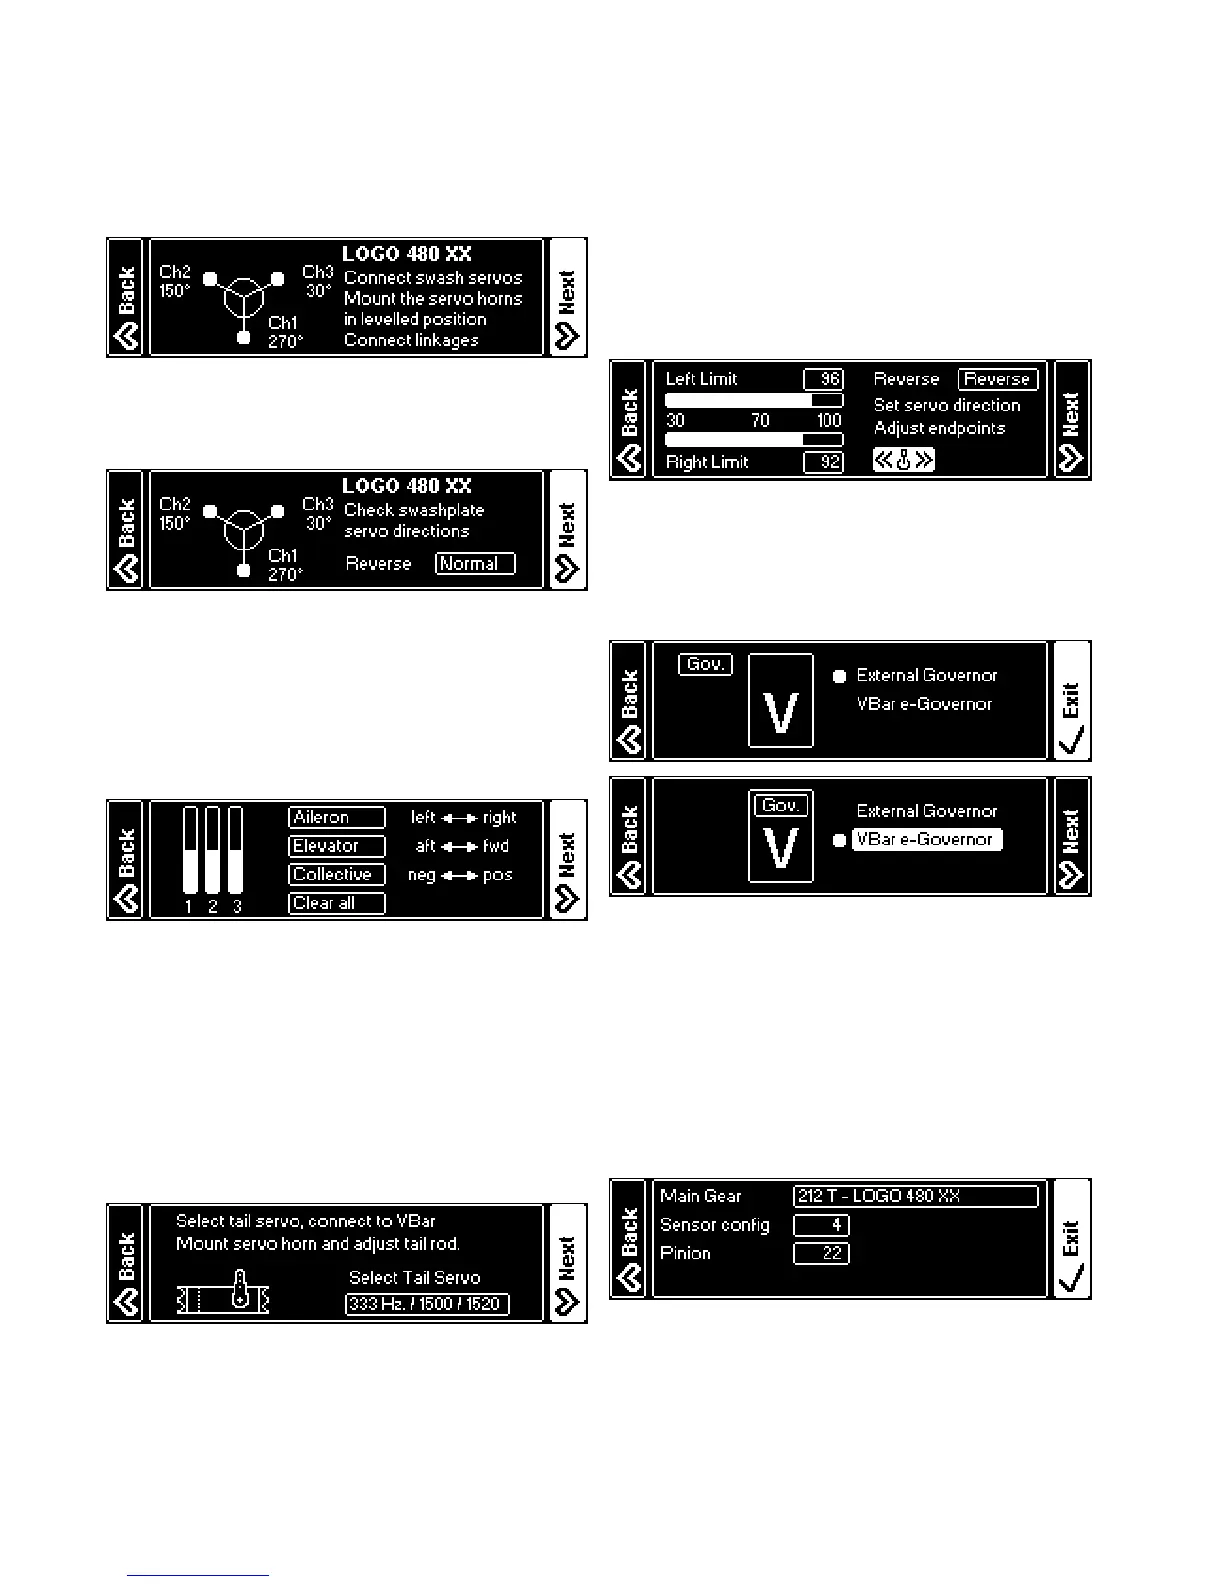
Connect the swash plate servos according to the graphics
shown in the Wizard (nose of the model pointing away
from you). In case you encounter issues with the control
directions later on, double check proper connection of the
servos again. Now mount the servo arms as close to 90°
as possible to the servos/links. Connect the links to the
swash plate.
Check if the swash plate is moving correctly according to
the stick inputs. If not, reverse. All three swash plate ser-
vos will be reversed simultaneously.
Use the trim controls to level the swash plate (90° to the
main shaft for aileron and elevator, good visual judgment is
precise enough) and to set it to the center of it’s available
collective throw. Make sure the servo arms are truly at 90°
to the servos/links now. If not, adjust the links to the swash
plate by the same amount, and/or move servo arms to
achieve the least necessary electronic trim.
☝ Attention For adjusting 0° collective, fold the blades and
visually check that they are on the same level. There is no
method more precise than the folding method.
Select the tail servo type (see list on page 34 or www.vstav-
bi.info/tailservos). In case your servo is not listed, check
the specs of your servo for center pulse (mandatory pa-
rameter) and frame rate. Select the adequate center pulse
and the frame rate that comes closest to, but does not ex-
ceed, the frame rate which your servo can handle.
connect the servo to the VBar Flybarless Con-
troller and mount the servo arm as close to 90° as possible
to the servo/tail push rod. The nal trim will be done by the
Autotrim feature (see page 32). For optimum performance,
90° angles should apply from the servo arm to the push
rod and from the push rod to the bell crank on the tail gear
box. This can be adjusted properly with the heli turned off,
so you can move the servo arm and push rod manually.
Check the servo direction; reverse if necessary. Select and
set the limits by moving the stick to both directions and
using the EDS dial to ne-tune. On initial setup, the value
is set very low (40), to avoid binding and damage to the
servo and the mechanics. A sensible range of values will
be 80-110. If necessary, move the ball link on the servo
arm to get into this range. In case the values for both direc-
tions differ immoderately, move the servo arm one notch
over it’s true center position and try again.
Select the type of Governor you intend to use:
(means the ESC will do the rpm control, VBar Control
will loop through the throttle signal) or VBar
(means VBar Control and the VBar Flybarless Controller
will govern rpm).
In case you select the External Governor, the Wizard will
nish here. Continue setting up your ESC on page 29.
If you you select
, check and select the type
of main gear and pinion on your heli (to calculate the gear
ratio automatically) and set the Sensor conguration prop-
erly (half the pole count of your electric motor, e.g. ‘5’ for a
10-pole motor).
The values for the most popular Mikado Combos will be
pre-set already. The Wizard will nish here.
☝ Attention Certain Mikado OEM-ESCs (like the YGE 160
HV from Mikado 700 and 800 XXtreme-Combos) come
pre-programmed and ready for use. These controllers you
do not need to set up using a prog card or other means. For
non-Mikado ESCs or YGE 90 LV ESCs from Mikado Com-
bos, please go to the
ESC Setup Wizard
(see page 29).

 Loading...