13
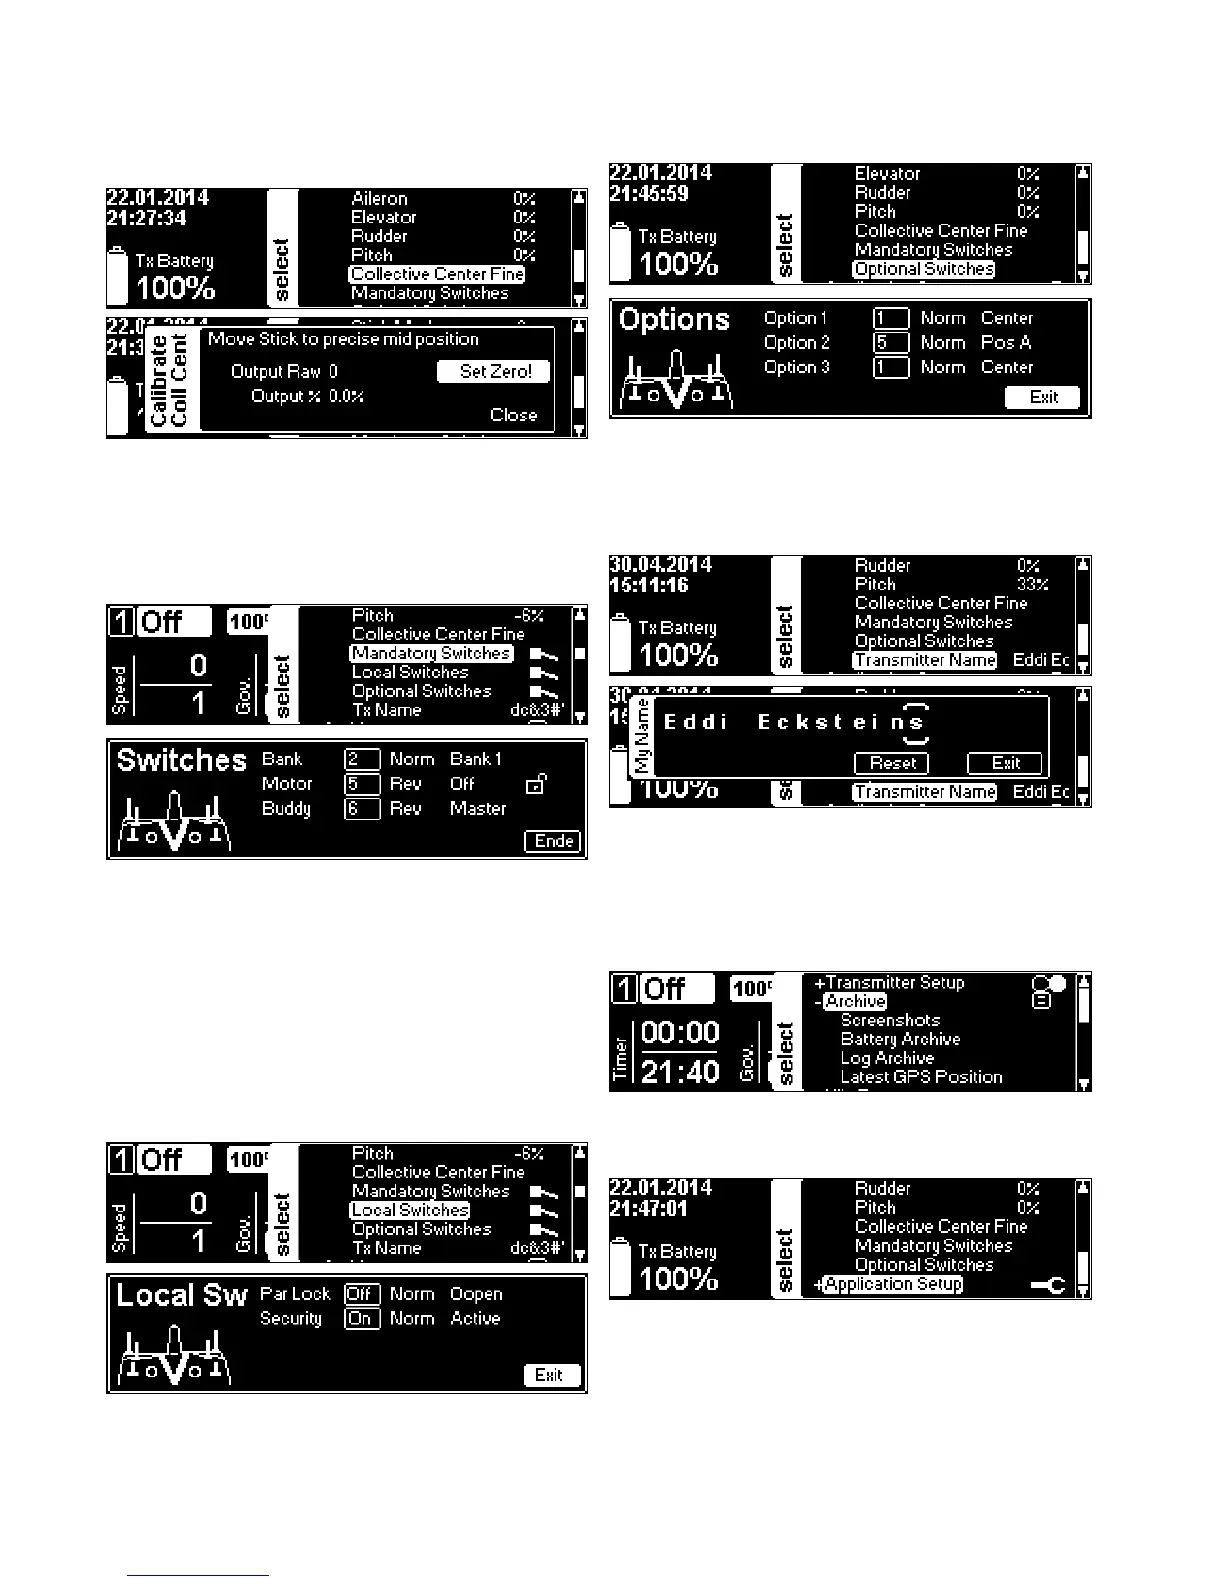
allows to set the zero collective
position, even though the gimbal has no spring to center
itself. Move the stick to the precise mechanical center po-
sition according to the zero pitch line on the gimbal’s scale,
press
!.
assigns three switches needed for
basic ight operations and the directions according to your
liking. Defaults are Motor—upper left, Bank switch (ight
modes)—upper right, Buddy Box—lower right. The graph-
ics show the actual assignments.
you can set
to lock the rotary
knob(s) eventually assigned for changing parameters in
ight, so you can not accidentally change parameters once
this switch is ipped. It also contains a
switch,
which acts as a safety feature to double-lock the heli
agains accidental spool-up. Select if you want to use this
feature and assign a switch.
The
panel as well as the main screen show a pad-
lock icon which indicates whether the safety is disabled
(open padlock as shown below) or enabled.
lets you assign
functions to
switches according to your liking. Later you will assign
functions within additional apps. For this, you may
require additional hardware and/or software.
allows you to name your radio. To enter
the name, select the position and then the character, using
the EDS dial. Select
when done, select
to clear
the name and start over.
These menu items contain le viewers for
,
,
and if a GPS sensor is used
on the model, the
of the model, with a
QR code which you can scan with your smart phone to e.g.
nd a lost model using the smart phone’s map App.
allows for basic settings of different apps.

 Loading...