24
Basic Setup using the
Wizard
☝ Attention This specic Wizard assumes that the heli is built
according to the manual (e.g. leading/trailing edge control
of the main and tail rotor, mounting position of servos, dis-
tance of ball links on servo arms, direction of rotation on
main and tail rotor etc.).
☝ Attention Disconnect all servos on an already set-up mod-
el and disconnect the ball links to the swash plate and the
tail rotor push rod. This is to avoid damage to the tail servo
and to the mechanics during the setup process.
☝ Attention A VBar that is connected to the VBar Control
System for the rst time will automatically cause the setup
wizard to start. A VBar that has already been connected to
a VBar Control System will just connect. In this case, select
Heli Setup Wizard
from
Model Setup
,
Setup Tools
in the menu
to start the setup process.
☝ Attention For LOGO series helicopters, the collective and
cyclic values will be set automatically to factory defaults.
This requires the heli to be set up by following the manual
exactly. To check or to make changes to the setup accord-
ing to your personal wishes or taste, re-enter the Heli Setup
Wizard again after the initial setup and select
Edit Current
Model
.
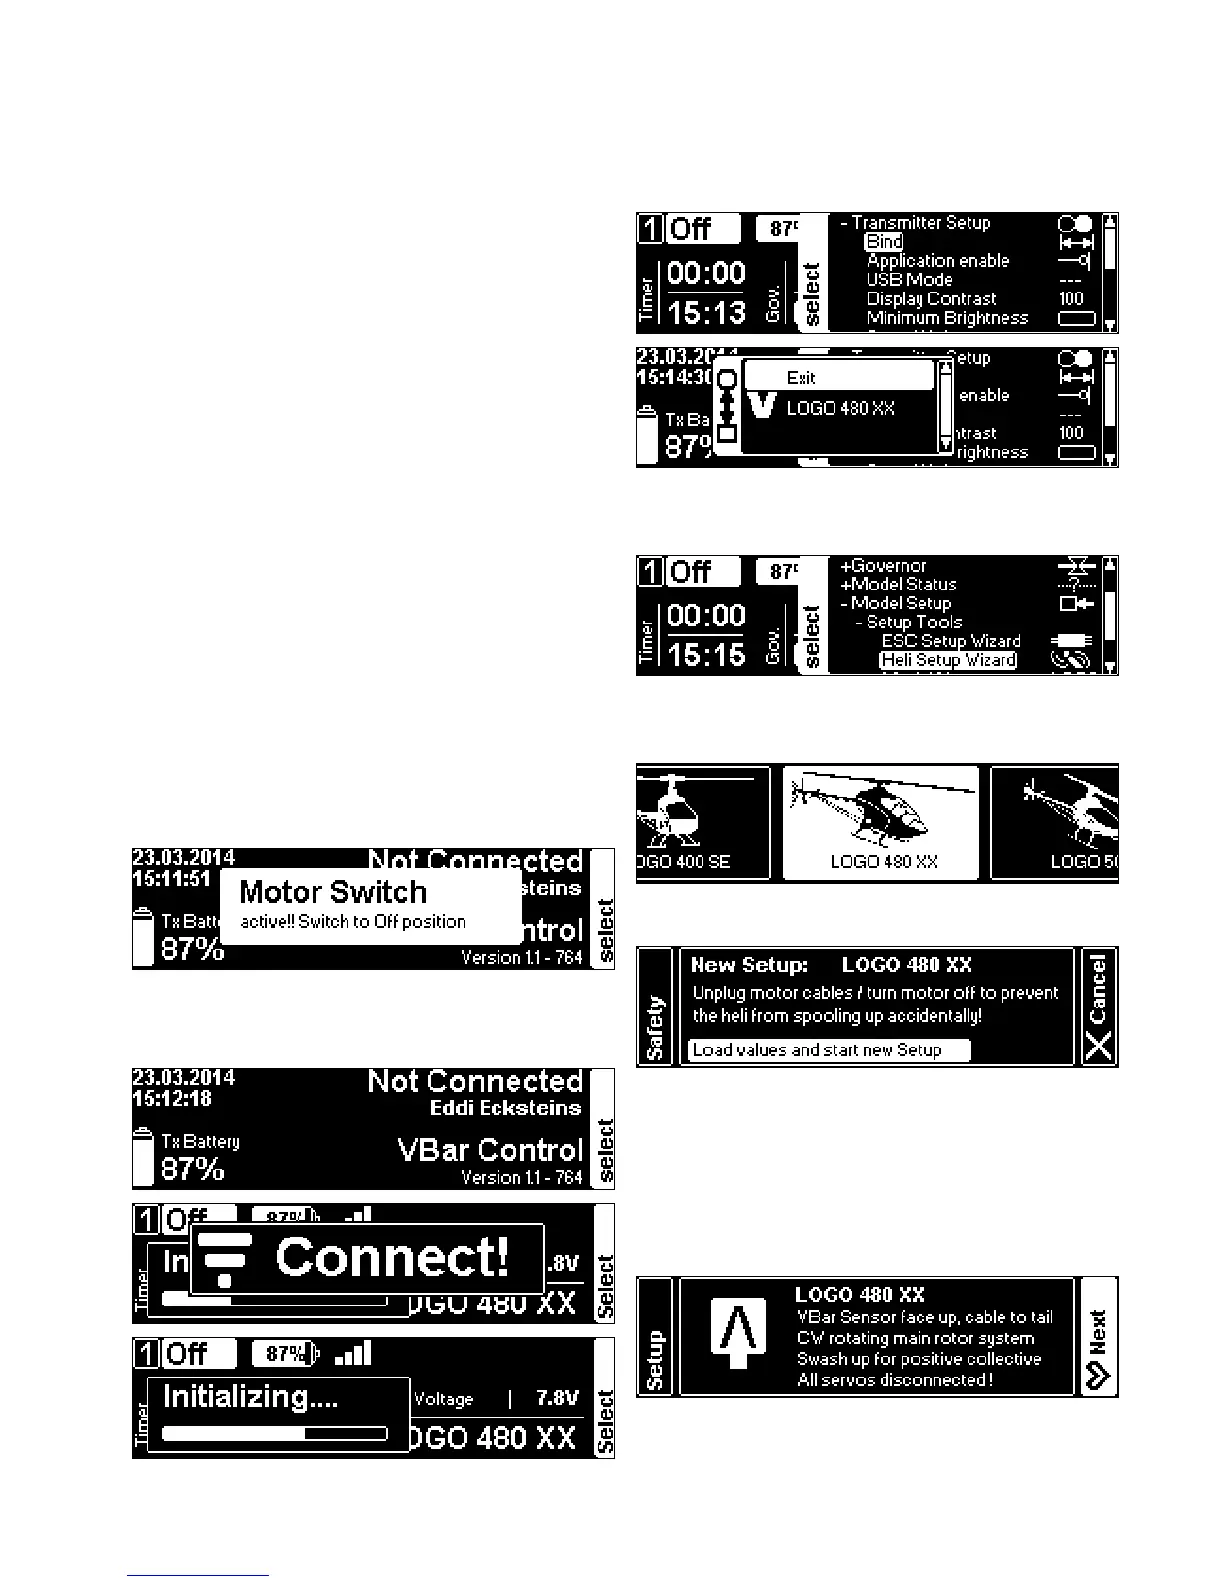
Turn on your VBar Control Transmitter. Turn the motor
switch to OFF-position if prompted.
Power up the VBar with the VBar Control Receiver Satel-
lite connected.
If the VBar Control Receiver Satellite is not yet bound to
your VBar Control Transmitter, rst turn on the receiver,
wait for 10 seconds, then turn on the transmitter. Select
,
from the menu, Select the VBar
(model name or serial number) of the VBar you are about
to set up.
Select
,
,
from the
menu.
In the
, select the Mikado LOGO you want
to set up (for other brands, see page 26 in this manual).
Carefully read the instructions given in the Wizard.
Select
from the menu. This will load factory
defaults for the LOGO series type and size into the VBar
Flybarless Controller. Wait a few seconds for the process
to nish.
Mount the VBar or sensor of the VBar, as shown in the
manual of your LOGO and as shown in the Wizard.

 Loading...