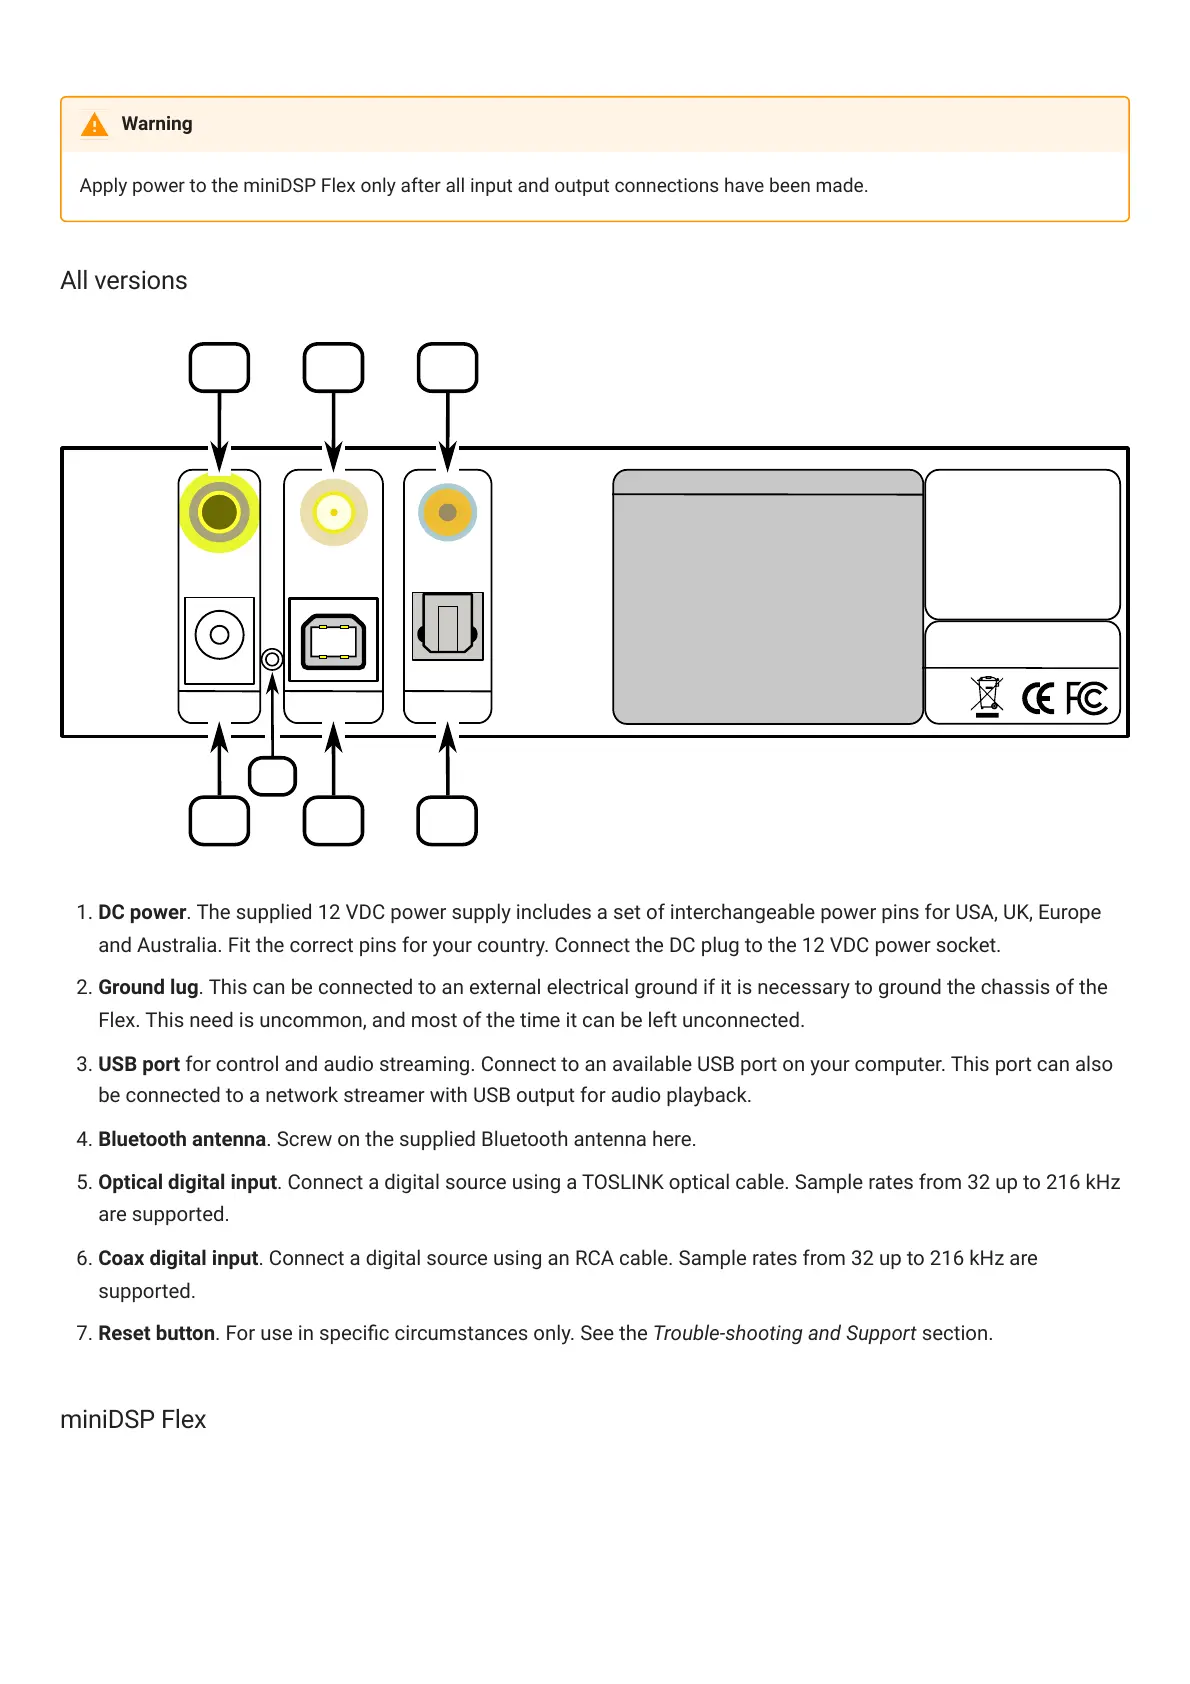
1. DC power. The supplied 12 VDC power supply includes a set of interchangeable power pins for USA, UK, Europe
and Australia. Fit the correct pins for your country. Connect the DC plug to the 12 VDC power socket.
2. Ground lug. This can be connected to an external electrical ground if it is necessary to ground the chassis of the
Flex. This need is uncommon, and most of the time it can be left unconnected.
3. USB port for control and audio streaming. Connect to an available USB port on your computer. This port can also
be connected to a network streamer with USB output for audio playback.
4. Bluetooth antenna. Screw on the supplied Bluetooth antenna here.
5. Optical digital input. Connect a digital source using a TOSLINK optical cable. Sample rates from 32 up to 216 kHz
are supported.
. Coax digital input. Connect a digital source using an RCA cable. Sample rates from 32 up to 216 kHz are
supported.
7. Reset button. For use in specic circumstances only. See the Trouble-shooting and Support section.
miniDSP Flex
Warning