www.mobotix.com • sales@mobotix.com
2.4.4
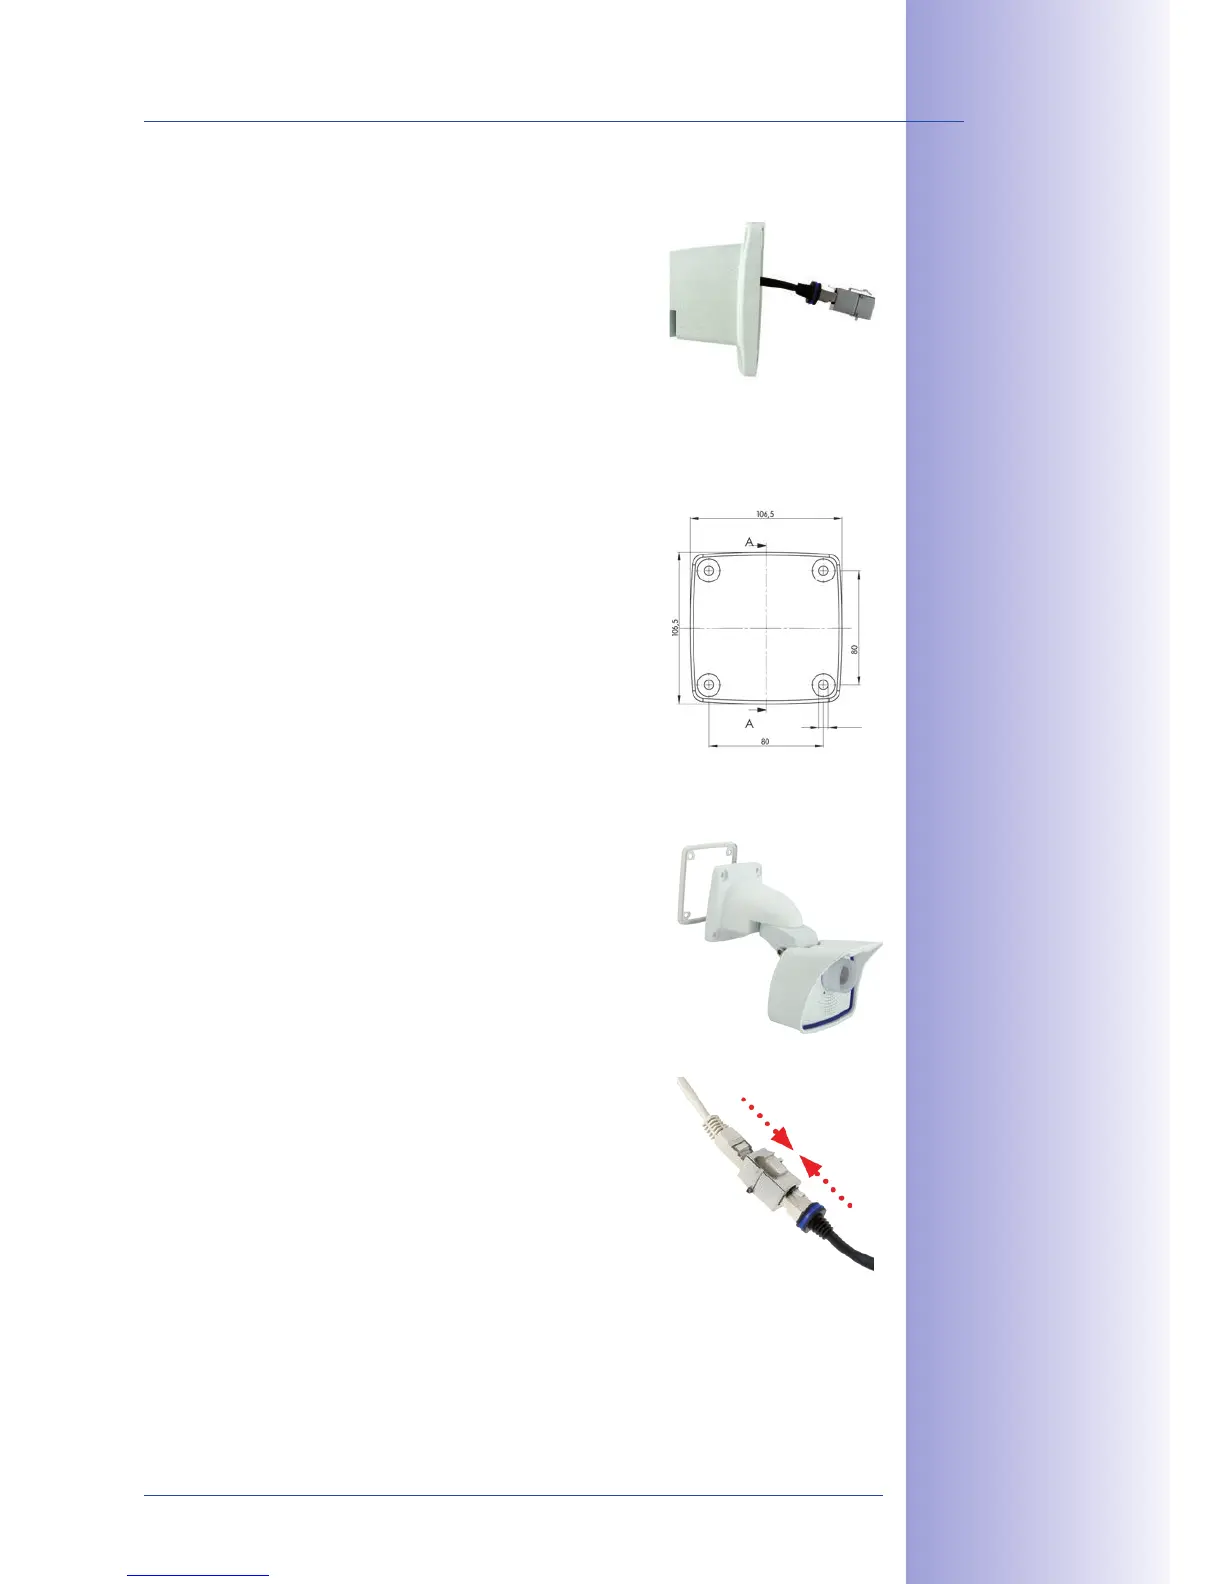
1. The pre-
installed camera patch cable must be connected with
the on-site network cable. The connection can either be
established using an installed flush-mounted socket with
RJ45 connector or - in the case of a protruding network
cable - using a suitable connector within the wall mount.
In both cases, the connection is well protected and is
neither accessible nor visible from the outside.
2. Use the supplied drilling template for
the camera (found at the end of the manual). Drill the
holes for the supplied screw anchors. Screw anchors
do not have to be fitted if the surface is made of wood.
To secure the mount, the supplied stainless steel hex
head screws will later be screwed directly into the sur-
face. In order to facilitate screwing in wood, the positions
should first be predrilled using a 2 mm drill bit, for
example (drilling depth just slightly less than screw
length).
3. Place the white rubber seal with the
groove on the edge of the wall mount.
4.
Connect the on-site network cable
to the camera patch cable using an adapter or insert
the patch cable into the RJ45 outlet. Make sure that
the cables are not bent or squashed.
No screw anchors
are required for
wooden surfaces
MOBOTIX patch
cables are available
as accessories in
different lengths