www.mobotix.com • sales@mobotix.com
Thanks to its hemispheric lens, the MOBOTIX M24M with L11 lens provides certain special
configuration options for the image settings. Depending on where the camera is mounted
(ceiling or wall) and on the live image display preferred by the user, certain important
basic settings and, if necessary, their adjustment must be configured when an M24M
is first installed.
in the browser (without installing the software),
carry out the steps described on the following pages:
1. as described in Section 3.2.
2.
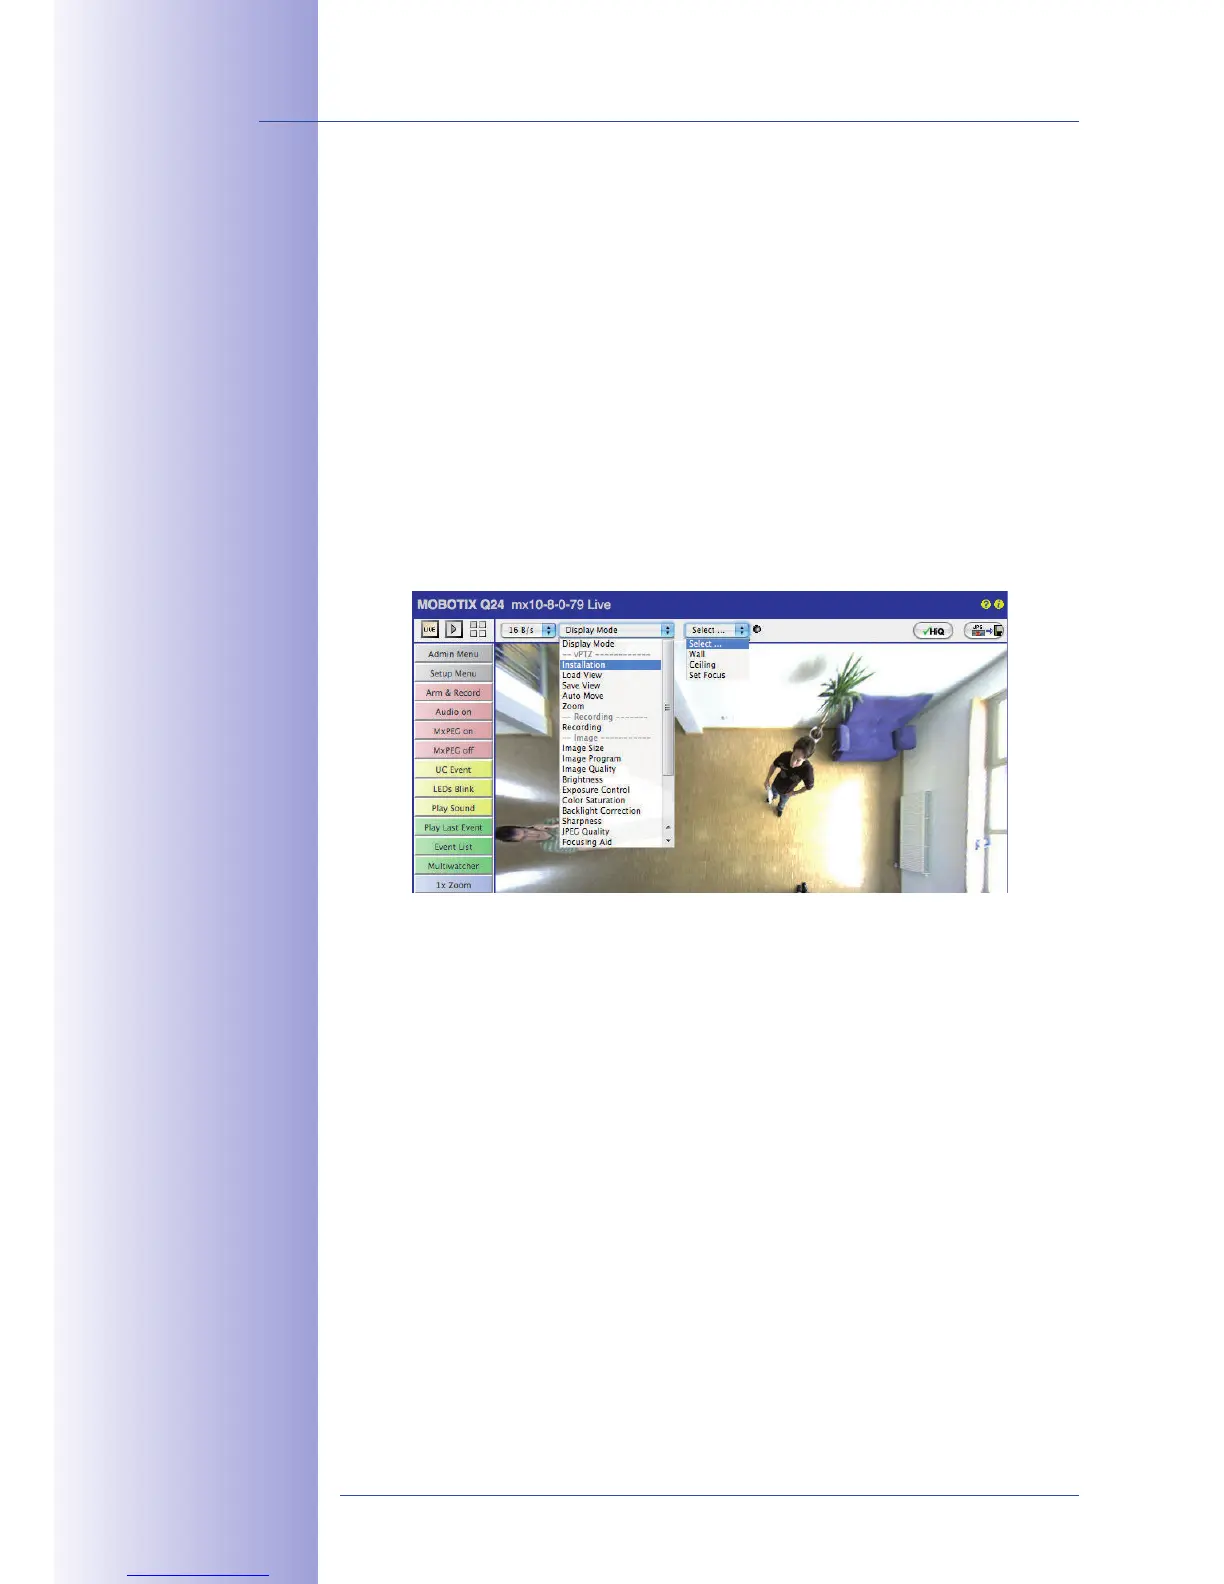
: Click"Installation" in the Quick Control panel
and then select "Wall" or "Ceiling" according to the position of the camera. "Ceiling"
always means that the camera points from top to bottom.
3. : After the camera has been installed, the "Installation" option can only
be selected if "Display Mode" was set to "Normal" beforehand.
4. The result is a . This serves as the basis for carrying out
all vPTZ commands.
5. Then switch to the Quick Control
6. Set the mode that you want to be the standard view. For demonstration purposes,
the descriptions below describe the typical display mode for the wall mount and
the ceiling mount, "Panorama" and "Surround" respectively. Every other display
mode can be operated in the same way.
Default settings:
Mounting position "Wall,"
"Panorama" screen