www.mobotix.com • sales@mobotix.com
If your network has a DHCP server, you can start the MOBOTIX camera with DHCP
support. In this case, the DHCP server automatically assigns and announces an IP address.
Note that this announcement function can be deactivated (
).
Carry out the following steps to start the camera with a DHCP address:
1. If the camera is running, disconnect the camera's power supply.
2. Reconnect the power supply of the camera.
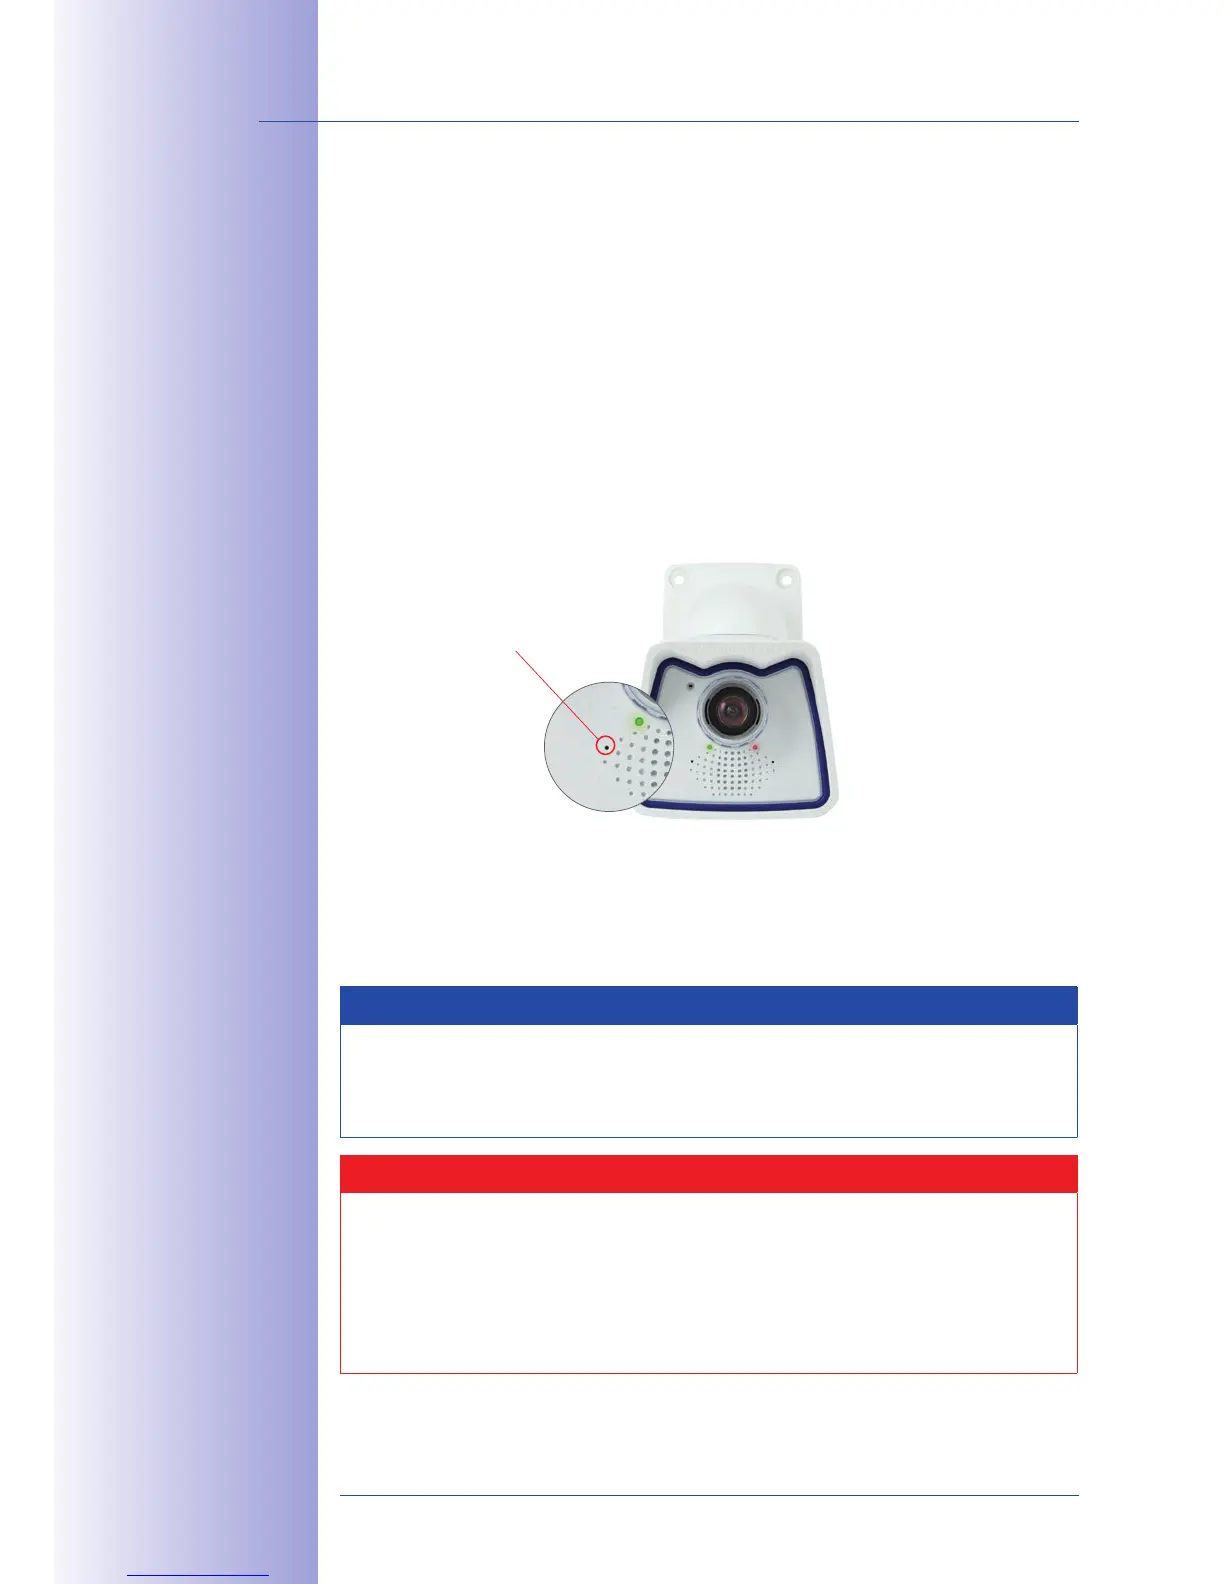
3. Wait until both LEDs light up simultaneously for the first time. Press the camera's
within four seconds. Use a
, for example, for this purpose but
4. After about two more seconds, the camera plays a sound ("Boing, Boing").
5.
After about another 15 seconds, the camera will automatically announce its network
data, that is, IP address, network mask and MAC address. You can now access
the camera using the IP address it just announced.
Notes
Starting the camera with an automatic IP address (DHCP) is only . The
network configuration of the camera can be set to DHCP permanently under
Admin
.
Caution
When starting the camera with DHCP support, make sure that the network has a
functioning DHCP server. If this is not the case, the camera cannot obtain a valid IP
address and will use its last IP address.
You should also make sure that the cameras always obtain the same IP addresses
by assigning the MAC addresses of the cameras to the desired IP addresses.
In case of an error,
the camera uses its
last IP address
Push the "R" key to
announce the net-
work data again