Appendix: Transfer Station II
Transfer Station II Configuration
Settings
Configure each Transfer Station II (Transfer Station 2) individually using a web page specific to the
Transfer Station II. You configure:
l Transfer Station II Settings
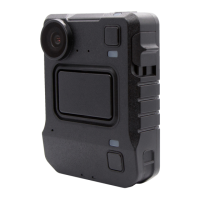
l V300 Camera Settings (page 74)
Important! To use the Transfer Station to upload events, Evidence Library must be
Evidence Librarycom (EL) or on-premise (EL).
Admin Evidence LibraryTransfer Station II Settings
1. Connect the Ethernet cable from the Transfer Station II to the computer.
2. Open your web browser and enter https://192.168.2.20, the Transfer Station II default IP address.
3. Log in to your Transfer Station II web page on the Secure Sign In screen.
4. Enter the Username and Password (Admin, V1$T@xfr).
5. Click login.
Transfer Station II Configuration
The Current Transfer Station II Configuration web page opens with the Transfer Station II default
settings.
Note: Transfer Station II supports only IPv4 networking.
74
V300 Body-Worn Camera User Guide
WGD00169, Revision B

 Loading...